Diane's blog


I've been adding new videos to my YouTube channel week by week, and trying to remember to share them here as well. So here's the latest, a little how-to for sewing two panels of PC together.

If you're of the YouTube persuasion and want to subscribe to my channel, you can do so over here. New vids every Friday! (Generally speaking.) :-)

Happy Hexie Pins Tutorial

Happy Hexie Pins Tutorial


I made a whole bunch of these pins to take to Craftcation, and they were a surprisingly big hit, so I thought I'd share a how-to. They're super fun to make, and an excellent use for little scraps.


You'll need:

  • Stiffened felt in white or a light color (available at many big box craft stores, or online)
  • • Cardstock
  • • Fabric scraps
  • • Craft glue
  • • Sewing machine and coordinating thread
  • • Hand-sewing needle
  • • Felt
  • • 1" pin back


Happy Hexie Pins Tutorial


So, Sizzix was kind enough to sponsor not only Craftcation, but the EPP class I taught there. They sent me one of their Fabi cutters ahead of time to play around with. This machine was the inspiration for these pins – I realized that I could quickly cut multiples of perfect hexagons, so making pins by the dozen would be easy.


Happy Hexie Pins Tutorial


I used the 1" and 3/4" hexagon dies for this project, but really you could use any size you like. For the two styles of pin I made, I did these diecuts:

  • • With the 1" die, I cut some stiffened felt, some regular felt (not pictured, sorry) and some card stock.
  • • With the 3/4" die, I just cut the stiffened felt.


(If you're unfamiliar with the Sizzix and want to see this in action, watch this video.)

With everything cut out, you can set the cardstock and regular felt hexies aside until later. The stiffened felt hexies, we need to cover with fabric.


Happy Hexie Pins Tutorial


I used my go-to method of EPP fabric cutting and basting for this project. (It's the first method I share in this video.) You just need to end up with fabric smoothly covering the stiffened felt, and no basting stitches visible on the front.

  • • For the two-hexie style pin, you'll need to baste one 1" hexie and one 3/4" hexie.
  • • For the three-hexie style pin, you'll need to baste three 3/4" hexies.


In case you're wondering, of course you can cut your fabric hexies for this project with the Sizzix! I chose to cut mine by hand here because I'm a total fussbudget about using directional fabrics and lining the designs up on my hexies. But you could use these Sizzix dies for fabrics:

  • • A 1 1/2" hexie die would cut fabrics for your 3/4" stiffened felt.
  • • A 1 3/4" hexie die would cut fabrics for your 1" stiffened felt.


(I recommend having about 3/8" or more of fabric sticking out from all sides of your stiff felt hexies before you baste - that makes it much easier to baste without stitching through the stiffened felt. If that last sentence made no sense, just watch the video.)


Happy Hexie Pins Tutorial


So, for each two-hexie pin, you should have one large and one small fabric-covered hexie. For the three-hexie pin, you should have three small fabric-covered hexies.

These pins get their sturdiness partly from glue and partly from machine-stitching. The first step is to glue the hexies together. For the two-hexie pin, just glue the smaller hexie on top of the larger one, centering them to each other. You can see above that I'm not using a ton of glue here. You want to anchor the pieces together, but not create a thick layer of hardened glue that your sewing machine will have to struggle through later.


Happy Hexie Pins Tutorial


For the three-hexie pin, arrange your hexies in a configuration you like and use a similarly small amount of glue to anchor them together. I like to keep some scraps of my stiffened felt on hand to help keep the hexies level as they dry. Just slide it under any section of the pin that's showing a tendency to sag while the glue's wet.

Let the glued hexies dry for several hours, or even overnight – you want them to be firmly in place before you sew on them.


Happy Hexie Pins Tutorial


It's also important to glue an extra bit of stiff felt to the back of the three-hexie pin, so it has a consistent thickness throughout.

Here's what I usually do: I take a scrap of the stiffened felt, and trim a corner so it will nest reasonably well into the space at the back of the pin. Then I glue it down, letting the glue dry for 20 minutes or so. And then, I trim the rest of the felt flush with the edges of the pin. (As you can see, it doesn't need to be any particular shape as long as it fills in the gap on the back.) Leave this to dry another several hours.


Happy Hexie Pins Tutorial


Now that the glue is dry, it's time to pop your pin on your sewing machine. Stitching through all the layers will really firm up your pins and make them very sturdy.

For a two-hexie pin, stitch about 1/8" from the edges of the topmost hexie. Choose a thread color that complements your fabrics, and put any old color on the bobbin - it won't show. I prefer to use a walking presser foot here for best results. Start stitching at the center of one side, and don't reverse stitch at the start or end of your seam. Instead, sew your way around until you reach your starting point, and then stitch a couple stitches over. Then cut the thread with some tails.


Happy Hexie Pins Tutorial


Thread the tails on a hand-sewing needle one at a time, and pull them to the back. Tie the thread ends in a double knot and cut them close to the pin. This method creates a nice finish to the topstitching.

For a three-hexie pin, stitch about 1/8" from all three hexies, starting with the center one. Since you're stitching on three separate hexies here, you'll of course end up with more thread tails to pull to the back.

(And incidentally, you could totally stitch around these edges by hand with a tiny running stitch, if that's your sort of thing.)


Happy Hexie Pins Tutorial


Finally, it's time to add a pin back and backing, and it's time for the hexies you diecut from cardstock and regular felt to see some action.

For a two-hexie pin, trim a little from the edges of the cardstock hexie - you want it to be a tiny bit smaller than the pin, so it won't show at the edges. Glue the cardstock to the back of the pin, centering it. Then, glue the regular felt hexie on top of that. Try to get the glue near the edges of the pin here, so the felt is well sealed.

Lastly, glue on a pin back, and if you like, a little scrap of felt to cover it.


Happy Hexie Pins Tutorial


If you're making a three-hexie pin, then you'll need to trace your finished pin onto cardstock and regular felt. Cut the cardstock a little inside your traced lines so it comes out a bit smaller than the pin. Cut the felt out to match the pin. Then glue it all together as above.


Happy Hexie Pins Tutorial


And that's it! Happy pin-making!

halfhexbutt-finished-wm1

It's probably no secret by now that I loves me some EPP. It's a technique I use every time I want to make a patchwork design that would be a bit of a pain in the patootie for me to execute by machine. (As in: anything with Y-seams.)

So for this project, I used good old hexies to make the patchwork strips, and then machine-sewed those to larger pieces of fabric. It's a very forgiving project, and gives you both EPP enjoyment and quick gratification.

You'll Need:

  • • 5 fabric scraps (for butterflies)
  • •About 1/3 yard of background fabric (linen, solid or small-print cotton - you decide)
  • •1/2 yard of backing fabric (again, linen or cotton)
  • •20" square piece of low-loft cotton batting
  • •Thread that coordinates with your fabrics
  • •Hand-sewing needle (a sharp or between in a length you like)
  • •Hexie EPP templates (see below)
  • •Paper scissors and fabric scissors
  • •Seam ripper
  • •Six-strand embroidery floss
  • •An 18" square pillow form


butterfly-hexies

This project uses hexies with 1 3/4" sides. You can download and print this pattern and cut out 27 hexie templates for this project. Or, if you'd rather not do all that cutting, you can order up a pack of lovely pre-cut templates from Paper Pieces.


This video shows you how to cut the fabric and baste your hexies. You'll need to baste:

  • •9 hexies in your background fabric
  • •18 hexies in butterfly fabrics (two hexies per butterfly, nine butterflies total)


I recommend basting only through the fabric, not the paper templates, for this project. (It's the first method shown in the video.)

I made two butterflies each of four of my fabrics, and one butterfly of the fifth one. But you can really do anything you like here - make them all in just two fabrics, or make each one a different fabric.

halfhexbutt-epp-diagram

Now, whipstitch those hexies into two strips, arranging them as you see here. Use your butterfly fabrics for the sections where the strip is two hexies wide. Make sure you're scattering your various fabrics along the two strips as you like. I always find it helpful to lay my hexies out before I sew, so I know what goes next to what.

(If you need help with the whipstitching part, try this video.)

halfhexbutterfly-readytocut

Press your completed strips with a hot iron. I recommend no steam for this pressing. Here's why: a lot of times, when you work with hexies, you end up lining the grain of the fabric every which way. This isn't a big deal for EPP generally, but when you're working with thin strips like these, steam can accidentally help stretch the fabric this way and that as you press, and that will mean your strips don't end up being straight. So: no steam, and always press your iron straight down; don't slide it around. Then you'll be just fine.

When you've pressed the strips, you can take out the paper templates. Just reach in at the edge of each patch until you can grab the edge of the paper. Then peel it out. Save those templates for a future project!

…Aaaaaand then press your strips again once those templates are all out.

halfhexbutterfly-cutbasting

We need to trim the long edges of these strips straight now. The first step to that is to press the sides of those single-hexie sections out flat. So take a seam ripper and gently cut the two tack basting stitches at the corners closest to the edge. Pull out that bit of the basting thread. (You can leave the rest of the basting there - it's not hurting anything.)

halfhexbutterfly-pressedout

Then, open out the side edges of each background hexie and lightly press them flat. (Leave a bit of the original crease in there – it'll come in handy in a moment.)

Don't do anything at all, by the way, to the two-hexie sections of the strips.

composite-halfhexbutt-ruleralign

OK. Place one of your strips on your cutting mat now, and line your ruler up on top. Your alignment point here is a little tricky, so let's be very careful…

Do you see how the points of the hexies along the edge of the strip form an invisible line? Take that line, and line your ruler's 1/4" line up along it. (I put a big red dotted line on the image above to show you exactly where that is.)

>composite-halfhexbutt-happymed

…Now here's the thing about EPP. It's hand-sewn. Hand-sewn things sometimes have little variations. There's nothing in the world wrong with this.

As you're lining your ruler up, you'll likely notice that there are some little variations in how well these notch points line up on that 1/4" line. Some will be right on, some will be slightly off. It's okay. Get the best happy-medium alignment you can, and it'll all work out.

halfhexbutterfly-trimmedstrips

Trim both EPP strips in this manner, and then you're ready for the sewing machine.

halfhexbutt-piexing-diagram

Here are the pieces to cut from your background fabric - seam allowances are already added to these measurements (and a little squaring room).

Sew your EPP strips to these background strips in the order outlined above. Use 1/4" seam allowances. Press the seam allowances away from the EPP strips.

halfhexbutterfly-seamline

I recommend always sewing your seams on the EPP side - that allows you to make sure those little notch points in the patchwork are getting caught in your 1/4" seam. It also helps keep the EPP seam allowances from moving around.

halfhexbutterfly-drawn

halfhexbutt-embroidery

If you want to add bodies and antennae to your butterflies, you can use my template to trace from, or you can hand-draw your own. I like a FriXion pen for this step - its marks remove with the heat of an iron. I drew the outlines right on the pillow top, stitched over them, and then pressed to erase any bits of line still showing.

I used split stitch to fill in the bodies and back stitch with a french knot for the antennae. You can put the pillow top in an embroidery hoop, but be careful about stretching your seams out too much.

(Many thanks to Sublime Stitching for the excellent stitch how-to's I linked there. I'm also using their awesome floss here!)

butterfly-quilted

When your pillow top is all sewn and stitched, square it to 18". Then cut a piece of batting to the same size and a piece of muslin the same size.

Stack these three squares together: muslin, then batting, then pillow top. Take a needle and thread and make big basting stitches through all layers. I like to do three rows of basting horizontally and three more vertically. That holds everything together while you quilt.

I recommend using a walking presser foot for quilting. Inspired by Kevin's awesome book, I just did some loose vertical lines. But if you like to get fancy with the free-motion quilting, that would look awesome, too.

When the top is quilted, pull out the basting.

halfhexbutt-finished-wm3

I made an envelope back for my pillow. Here's a simple style tutorial over at The Happy Housie, and a slightly more complicated style at Lia Griffith.

…And that's it! Piece and enjoy, my friends.


vday-sachet-finished3wm

Here's a sweet little V-Day gifty, incorporating a tiny bit of my current favorite craft, EPP. It's just six patches, so the piecing isn't time-consuming at all. In fact, once you're comfortable with the process, you should be able to make this entire project in about 90 minutes. My tutorial may look long because I'm a nerd for detail, but I promise, this is a quick project!

vday-sachet-finished1wm

Here's what you'll need:

  • Three fabric scraps for the hearts
  • Two 6" squares of fabric
  • Glue stick
  • Scissors
  • Pins (applique pins, if you have 'em)
  • Removable fabric marker (see below)
  • Hand-sewing needle and thread
  • A little six-strand embroidery floss
  • Jewel templates (see below)
  • Thread that coordinates with your fabrics
  • A handful of fiberfill
  • A few tablespoons of lavender buds, rose petals, or cedar shavings

epp-vday-sachet01

The EPP Part

The English Paper Piecing template we're using here is called a "jewel." It's kind of like a hexagon and a diamond got married. You can get these templates by the pack from Paper Pieces (5/8" size), or you can download this PDF, print it to cardstock, and carefully cut out the templates. I like EPP for this part of the project because it makes such a nice, crisp applique motif.

epp-vday-sachet02

Press your fabrics so there aren't any wrinkles. Then put a small amount of glue stick on the back of a jewel template, and press it to the wrong side of one of your fabrics. Cut the fabric around the jewel so there's a 3/8" margin on all sides. Do this with the other five jewels. You want to end up with two jewels in each of three fabrics.

epp-vday-sachet-tack-collage

Now, to baste the fabric to the template. Thread a needle with a single thickness of thread and tie a good knot in the end. Start basting the jewel at the blunt end, basting away from the long point. Fold the fabric over one short edge of the template and finger press it. Then fold the next edge over and finger press that.

Take a little stitch through the fabric at the point where the two edges meet. Don't pass your needle through the paper template at all - just skim it through the layers of fabric and back up. Then take a second, identical stitch.

epp-vday-sachet-basting-collage

Now, work your way around the rest of the patch, folding each new edge of fabric over, finger-pressing, and taking tack stitches at each corner. Do this even at the long point; just take a slightly bigger tack stitch there, since you're tacking over the raw edge. Your finished patch should be smoothly covered with fabric, with no basting stitches showing on its front.

Baste the other five patches in the same manner.

epp-vday-sachet09

epp-vday-heart-sachet-piecing

Now, we're going to sew these patches together into two strips, and then we'll sew the strips together to form a stack of three hearts, as shown above. Take a moment and decide what order you want your fabrics in. It's helpful to lay the patches out on your work surface in the configuration you want.

epp-vday-sachet-sewing-collage

Start with the topmost two patches on one side of your heart-stack. The easiest way to see how to sew them together is to first hold them side by side as they're supposed to be configured, and then flip the upper one over the lower one so their right sides face and the edges you need to sew together are lined up.

We're using a whipstitch to sew the patches together. It's a very short seam that will only travel partway along one of the two patches. (Incidentally, your patches will all have little "flags" of fabric at their tips; just fold these out of your way when you're sewing near them.)

When you have these two patches sewn together, repeat the process to add the third one. Then make another, identical strip.

epp-vday-sachet14

epp-vday-sachet15

Now, place the two strips together with right sides facing. Whipstitch along the center seam line, taking care to match up the points of the hearts. When you've sewn the center seam, press the whole thing nice and flat. There will be little "flags" of fabric sticking out from the bottom heart. Just fold them to the inside and press them flat.

epp-vday-sachet-paper-removal-collage

Now, you can take out those paper templates! Reach into a patch until you feel the edge of the paper. Pinch that in your fingers and peel it right out. Do the same with the rest of the paper templates. Then press your finished applique unit again. Good job!

epp-vday-sachet201

epp-vday-sachet-alignment

The Sachet Part

OK, so here you are with this this cute EPP unit. Pin it to one of the 6" squares of fabric. You can line it up any way you like, but above you can see how I did mine. (I'm using little applique pins here - they're so much easier to sew around.)

epp-vday-sachet202

Machine-stitch close to the edge of each heart to applique it to the fabric square. You might want to use a walking presser foot for this step.

epp-vday-sachet-embroidery-collage

I opted to do a little embroidery on my sachet, but you can skip this step if you like. I used a quilting ruler and a FriXion pen to draw two guide lines on the front of the sachet, 1/2" apart. (FriXion pens make lines that vanish when exposed to the heat of your iron. They are dandy. You could use a water-soluble marker instead, but do not iron over the lines! They'll become permanent.)

I drew my "XOXO" freehand between the guidelines with the FriXion, and then I stitched over the drawing with straight stitches for the X's and back stitch for the O's. Then I pressed the whole thing to remove the lines. Boom!

epp-vday-sachet207

To finish up, then, pin the front and back of the sachet together, right sides facing. Sew around all four edges with a 1/4" seam allowance, leaving about a 2 1/2" gap in the seam on one side for turning. Clip the excess fabric at all four corners.

epp-vday-sachet208

Here's one of my favorite tricky-tricks: when I need to turn something right side out, I like to press the seam allowances open before I do it. There's no need to finagle the square around so the seams actually are open - just fold over each seam allowance as you see here and press it flat. Do that on both sides of the sachet. This little process gives you nice, crisp edges when you turn the sachet, and it also makes a beautifully neat edge along the opening.

So press those seam allowances and turn your sachet right side out. Poke the corners out with a chopstick so they're as sharp as they can be. Then, press the turned sachet flat once again.

epp-vday-sachet-stuffing-collage

Stuff your sachet somewhat loosely. I know that's a terribly vague instruction. The thing is, you don't want this thing stuffed firmly because in a moment you'll machine-stitch around the edges, and this will moosh the stuffing toward the center. For this size sachet, I use a ball of fiberfill about the size of a large orange. I like to put about half of that into the sachet, then pour in my scented stuff, and then stuff the rest of the fiberfill in on top of that.

When it's stuffed, sew the opening closed with a ladder stitch.

epp-vday-sachet211

Now, make sure you have a standard presser foot on your sewing machine. Place the edge of your sachet under the presser foot, lining its edge up with the edge of the presser foot – just as you would for any 1/4" seam. Stitch 1/4" from all four edges of the sachet.

Take this step slowly, and be careful to keep the sachet flattened out with your fingers as you're sewing. It helps to gently stretch the edge toward you. Stitch around all four edges like this.

vday-sachet-finished4wm

…And that's that! Happy V-Day to all!


book-deadline5

So, as I mentioned in the last post, I've spent the last 30 days in the gnarly finishing stages of my book deadline. And as I ground my way to that finish line, it occurred to me: nobody really talks about this stage of book-writing. There are lots of how-to's out there for the glamorous part (getting a craft book contract), but nothing about what happens once you have it.

I thought, then, that I'd share a glimpse into perhaps the hardest part of the process – the final weeks before your publisher's deadline. I don't do this to grouse, but just to say, "Hey - here's the fuller picture."

book-deadline1

It should be said, before we dive in, that it's really up to each individual author how easy or hard these last 30 days or so are. Every author's experience will be different, so all I can do is share my own. In an ideal world, I would always have all my projects made, photography done, and text written 30 days before deadline, leaving me a leisurely margin to deal with all the details I'm about to share.

…But as we all know, the creative process isn't always that orderly. I'm a very plan-ahead kind of girl, but there's always a book project or two that I just can't seem to get exactly right until the last moment. There are sections of writing that completely elude me until that deadline is staring me in the face. And also, as I said before, writing a book is a long chain of decisions. Many of these decisions need other decisions to happen first, so invariably there's a whole cluster of decisions that can only be made at the last moment.

So my last 30 days are usually pretty nuts.

book-deadline8

Let's list some of the things you'll have to do in the last weeks of a book deadline, shall we?

• First, you'll have to get all your project samples finished and documented, so you can ship them off to your publisher. And unless you want to spend a bazillion dollars on overnight shipping, you'll need to have everything ready to ship about ten days before deadline. Make sure, too, that you have a good photograph of each item and a detailed record of all its measurements, supplies needed, processes, and anything else you might need to remember. (You won't be seeing your samples again for a year or more.) Make sure every item is labeled with your name, book's name, and project name – it helps prevent things getting lost.

• Your writing will need to be buttoned up too, of course. That means making sure everything is written as clearly and consistently as you can make it, but it also means making sure you're using the grammar and punctuation style your publisher prefers. It means checking your spelling and making sure you aren't using em dashes in every single sentence. (That last one might just be my problem.)

book-deadline7

• …And then there's formatting! Your publisher will send you a multi-page document outlining all the ways they want your manuscript formatted; it's up to you to study it well and follow it to the letter. Different publishers have different ways they want you to insert placeholders for your images. They may have special ways to format headers, bulleted lists, numbered lists, captions, and on and on. It's really a huge task, formatting a manuscript. (Recommendation: learn all you can about efficiency tools like Find/Replace, file renaming utilities, etc.)

• If you've taken (or hired) photographs or illustrations for your book, then you need to have produced a whole lot of high-res image files (again, following your publisher's requirements). Often, a publisher will want these files named in a specific way. Some publishers even want your image files named with sequential numbers, in the order in which they appear in your book. And then you usually have to produce one or more "art log" lists, documenting all these file names and what's in each image. This one element can be surprisingly time-consuming.

book-deadline6

• If you've used anyone else's images in your book, you'll need to get a signed Grant of Rights form from each and every photographer, so your publisher has express permission to use the images. In my experience, getting these forms signed (and making sure the photographers are sending you the kind of image files your publisher needs) takes a lot of follow-up.

• Speaking of photos, there's an all-important list of photo and illustration credits to pull together. There are also company names, phone numbers, and URLs to pull together for your Resources page.

• …And then when it's all done, you'll be following your publisher's instructions on how to submit the whole thing. Maybe you'll do it digitally, or maybe you'll need to ship a thumb drive or series of DVDs and CDs.

book-deadline2

"I am always so cruelly neglected during a book deadline. It's just ridiculous."

If all of this sounds a bit tedious, well… it sure can be. All of it makes your publisher's work much easier, so it's absolutely worth your time and attention. But admittedly, it's nowhere near as fun as making the projects was.

This deadline-time is also kind of a perfect storm of important details and extreme fatigue. You're simultaneously dealing with 30,000-foot decisions (How do I best transmit these 200 image files to the publisher?) and tiny details (Did I spell her name right? What's her URL?). In my experience, every book deadline seems to have a tired-and-punchy phase, a crying phase, and a grim, resolute, "I'm just gonna get this dang thing done" phase. Also, coffee.

…And this is one of those things nobody really talks about, but book advances are often paid out in installments. It's possible that by this ending point, you may have already spent through the advance money you've been paid – so your endgame stress could be accompanied by some money stress. Mind you, this isn't a disparagement of publishers. They have every right to pay you in installments. (You wouldn't pay someone in advance to fix your roof, would you? No – you might pay a deposit up front, but then you'd want to make sure the work got done well before paying the rest.)

book-deadline3

Now, in case you're thinking "Good God, I will never write a freaking craft book," let me also tell you this: The early days of book-writing are absolutely golden. The months where you have plenty of advance money on hand and you're spending days making and writing and dreaming – those months make this grindy ending totally worth it. Holding that finished book in your hands – or seeing it in a local store – makes these difficult weeks vanish altogether. This is just one phase in an ultimately-very-satisfying project.

For the record, I'm posting this five days after turning in my manuscript, and the stress has already faded away. Now all I need to do is back myself out of this three-pots-of-coffee-a-day habit.

Categories: 

pc-ornament-done-montagewm

So, I love making these little guys – it's just the most relaxing, serendipitous process of creation. That said, I really struggled with how to best represent this process in a tutorial. I think it's way more fun if you follow your own path of discovery rather than follow my specific pattern.

So I've tried to give you a good framework for serendipity here – in other words, there's no pattern for these and you don't need one!


pc-ornament-structure


This project works best with 3" PC rounds, which are commonly available (cheap!) at big box craft stores or online.

Take a look at the grid of this thing. In the center, it's divided into eight parts. And those eight divisions continue out to the edges. There are some definite "rings" within this structure, where the alignment of the holes changes a bit. And all of that is the basis for creating an unlimited number of stitch designs, as you'll see.

(Incidentally, 5" PC rounds have a whole different structure. I like them less for this project, but feel free to give them a try.)


pc-ornament-bw-finished


So, get yourself some dribs and drabs of worsted weight yarn – this is a great way to use up your scraps. I love using variegated yarns in this project because they create such pretty colorwash effects, but you don't have to. You'll also need these things:

  • A large-eyed blunt needle
  • Scissors
  • A scrap of felt (optional)
  • Some white craft glue (optional)
  • Some embroidery floss for a hanger
  • Some decorate-y things (more on those below)


OK, from here, my instructions are gonna get more minimal. I just want you to start stitching on your PC round and seeing what happens. But if you're not sure how to begin, take a look at the sample approaches below.


pc-ornament-step1-montage


Since this circle is divided into eight parts, just remember to work with even numbers. If you're making a pattern of stitches, base it on an even number of stitches. If you're stitching across several holes in the canvas, be sure to stitch across an even number of them.

...And keep your eye on those eight division lines in the canvas – if you keep your design tied to those, you can't go wrong.


pc-ornament-step1-4


If you're really stumped on how to begin, just pick a ring and stitch a band of your first color. (Again, doing this with variegated yarn makes its own pretty design.)

If you haven't used plastic canvas before, you might want to take a look at my three main tricks for this medium in this post. And it also answers your unspoken question of "How the heck do I knot this yarn?!"


pc-ornament-step2-montage


Then, switch colors and add another layer of stitches. Again, I've set up some samples above, but you don't need to follow them. What is your PC telling you it wants next?


pc-ornament-step2-5


Keep in mind that in addition to stitching, you can weave your yarn over and under previous stitches in your design. Here, I stitched along the original star design, but I wove the grey stitches under the white ones. It's easy - just slide your needle under there! And if you skip down a couple photos, you'll see even more weaving at work.


pc-ornament-step3-montage


Just keep going, adding more colors and stitches until you're happy with the look of the thing. And anytime you're not happy, no sweat! Those stitches come right out. This is about creative exploration, my friends - enjoy the process!


pc-ornament-laststep-montage


None of these designs had any pre-planning whatsoever. I just added and subtracted stitches. It all works out, I promise.


pc-ornament-sparkle


If you have some metallic embroidery floss on hand and feel like it, you can also add some little bits of sparkle to your design. I basically took several tiny stitches at key points. I ran the end of the floss under the other stitches on the back of the work to "knot" it at the start and end.

You could also add sparkle with little dabs of glitter glue. Or you could sew some sequins or seed beads right to your ornament.


pc-ornament-finish-montage


When your design is done, finish your ornament by covering the outer edge with an overcast stitch. You can do this one of two ways:

  • Stitch around a single ornament.
  • Put two ornaments back to back and stitch them together around the edges.

  • pc-ornament-back


    If you stitch around a single ornament, then cut a circle of felt to match it and glue that to the back to cover it up. If you want to add a hanging loop, just take a 5" length of embroidery floss and tie it into a loop. Insert one end of that between the ornament and felt.

    Place your glued ornaments under some heavy books to dry. Put a layer of waxed paper between your books and ornaments, because glue can ooze through plastic canvas sometimes.

    (If you want to make two-sided ornaments, just make that loop of floss and stitch it into your overcast stitches.)


    pc-ornament-done1wm


    I think this is a great project to do with your family or a group of friends as part of a holiday gathering. It's so much fun seeing what everyone comes up with. You could even do a gathering where everyone brought and shared their yarn scraps.

    Now, go make some cocoa and have a splendid time!

pc-stitchmarkercase-finished2-wm

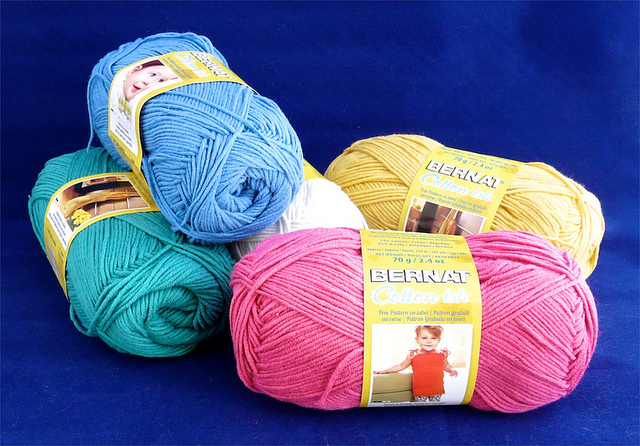
When I heard Vickie Howell was coming out with a cotton and acrylic blend yarn, I was eager to check it out – not for knitting or crochet purposes, but for plastic canvas. Of course.

Turns out, Cotton-ish is dandy for 10 count plastic canvas. It creates perfect coverage with a single strand, whether you're using short stitches or long ones. It's also significantly cheaper than stitching with embroidery floss or pearl cotton. And the color range is really pretty.

pc-stitchmarker-case25

I got so excited, Vickie sent me some samples and I immediately designed this little project. I figured I better come up with something knitter-and-crocheter friendly, as plastic canvas people make up about .000000001% of Vickie's actual market for this yarn.

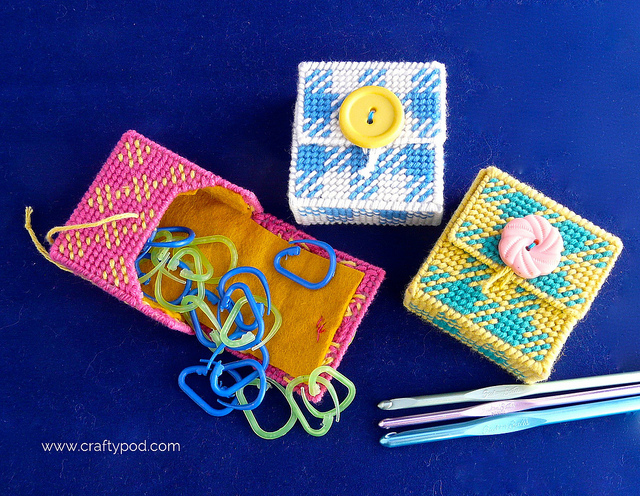
So this handy case is to keep your stitch markers in, so they aren't scattered all over the bottom of your knitting/crochet bag. These little cases make up quickly, and they're a perfect way to use up the Cotton-ish you have left over from other projects.

pc-stitckmarkercase-001

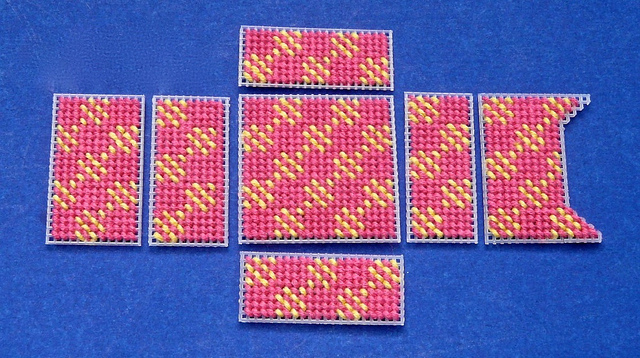
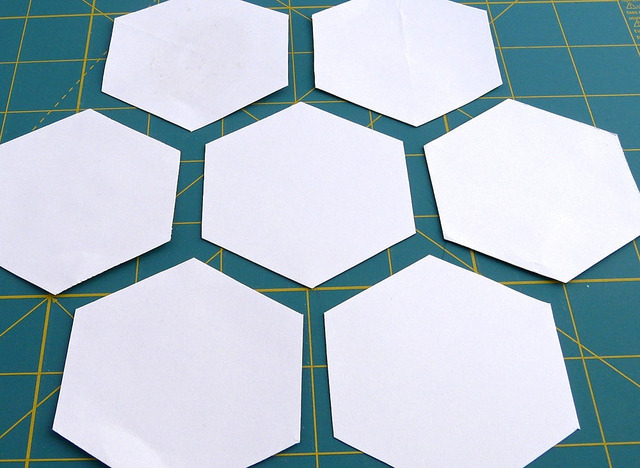
First, you'll cut some 10-count canvas (that's smaller than the stuff you usually see at your local craft store - be sure to check the label). You'll want precise sizing here so the stitching pattern fits, so measure your canvas by counting the holes. Here are the pieces you'll need:

  • Case Back: 21 holes x 21 holes, cut 1
  • Left, Right, and Bottom Sides: 21 holes x 9 holes, cut 3
  • Top Side: 21 holes x 10 holes, cut 1
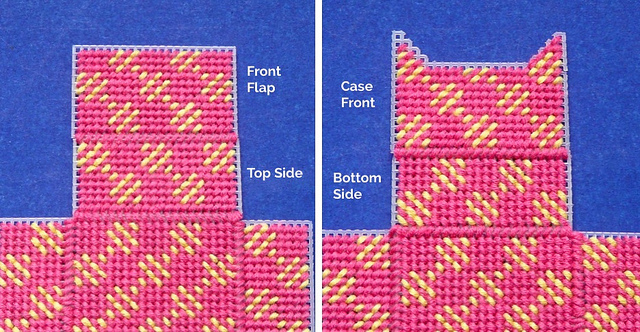
  • Case Front: 21 holes x 16 holes, with a little piece cut out of the top edge (Just eyeball that; it's an opening to help you reach in and grab your markers.)
  • Front Flap: 21 holes x 12 holes

pc-stitchmarker-case03

Next, stitch all the pieces. Now, I know patterns are useful for some kinds of projects, but this is one where I think you can be much more casual about it.

pc-stitchmarkers-stitchpattern-composite

Screen Shot 2013-07-29 at 5.30.12 AM

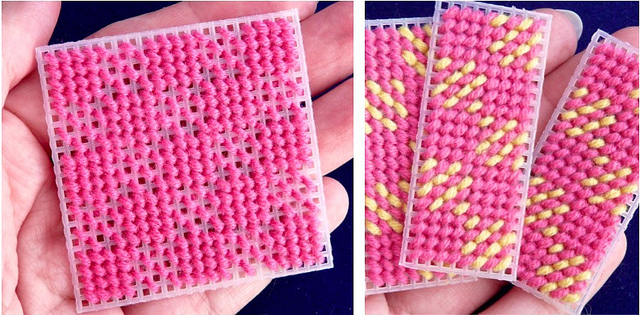
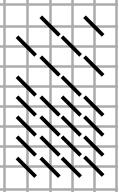
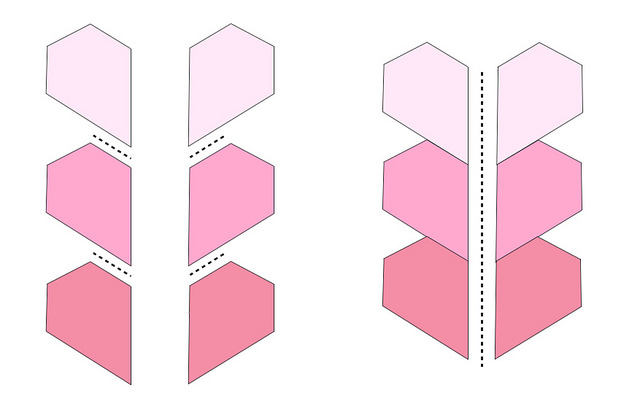
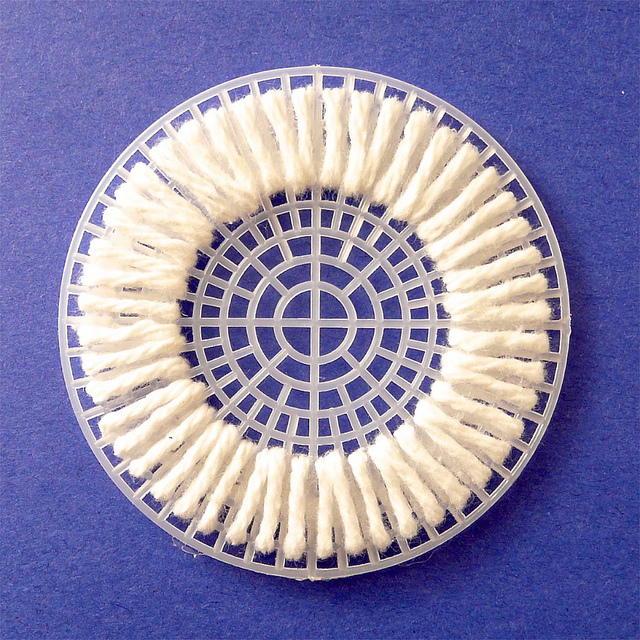
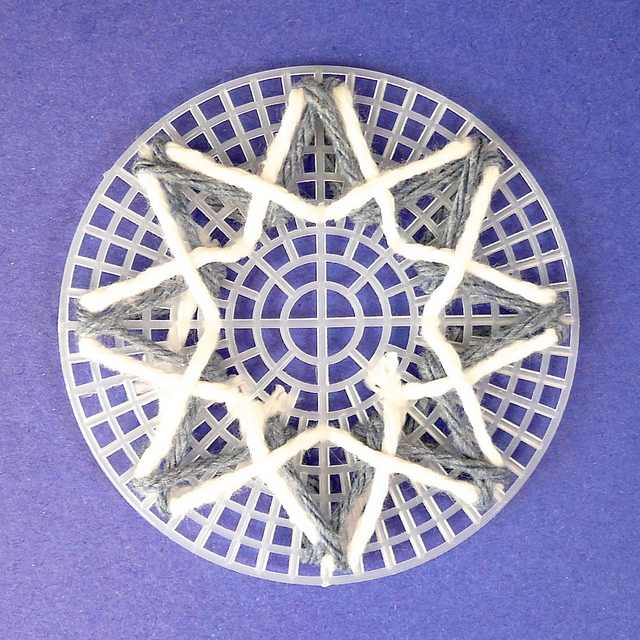
To make a checkered pattern, here's all I did. I started at the bottom right corner of each piece. I stitched a square made of four stitches across and four up. Then, above that, I made another square where each row has two stitches, and they alternate position.

This unit is the building block for the whole pattern. I filled each piece with that, working in vertical rows from bottom to top, and then I filled in the empty areas with a second color.

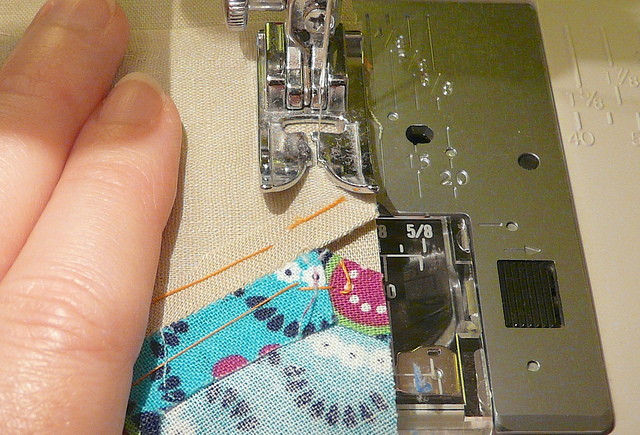
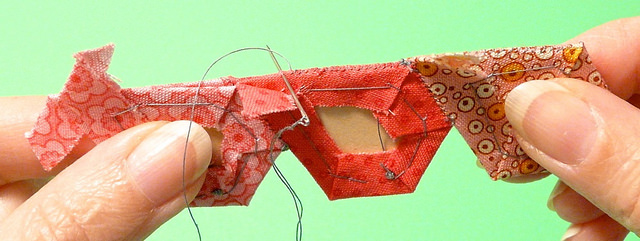
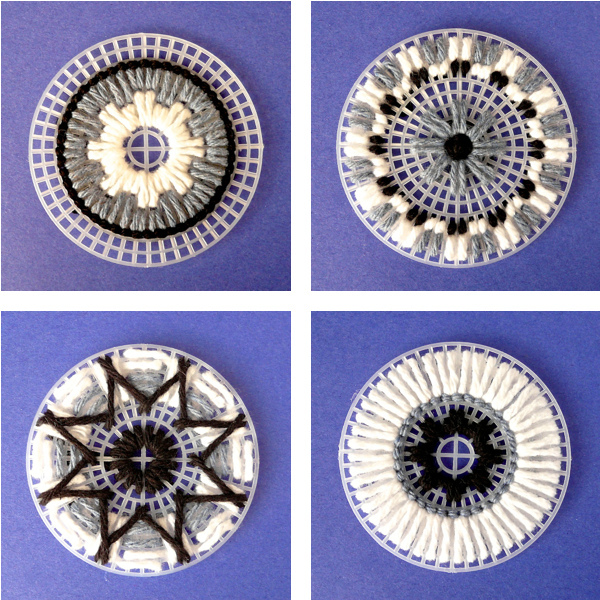
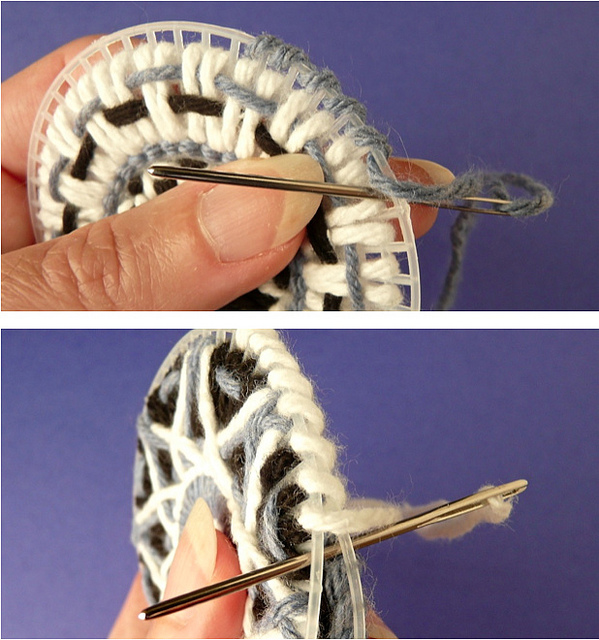
(Needlepoint purists might grumble at this, but I also think you can make your stitches angle in either direction. See how the two shots above have them oriented differently? Just pick one way and try to keep it consistent across all the pieces.)

pc-stitchmarker-case24

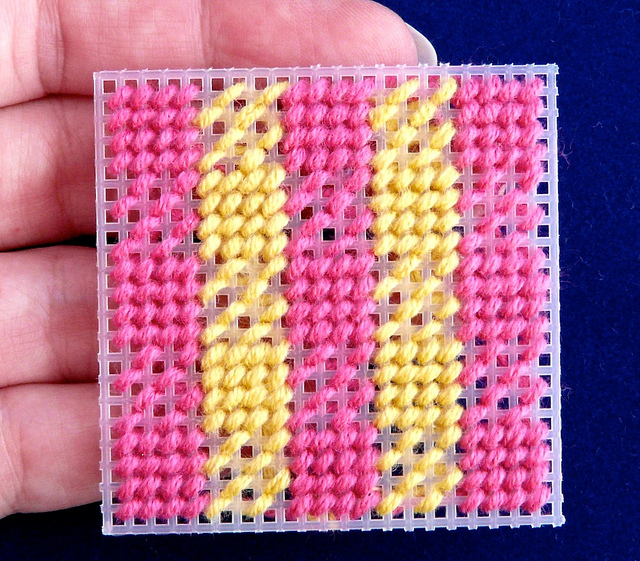
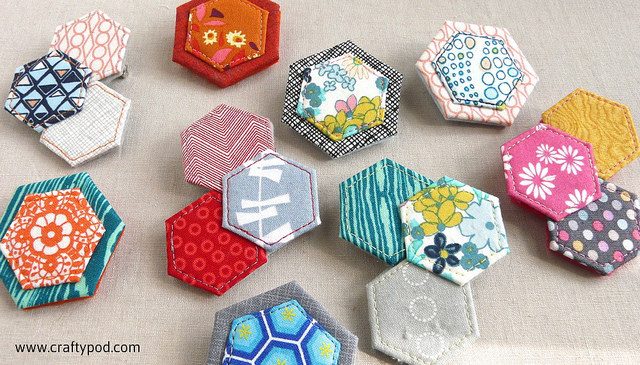
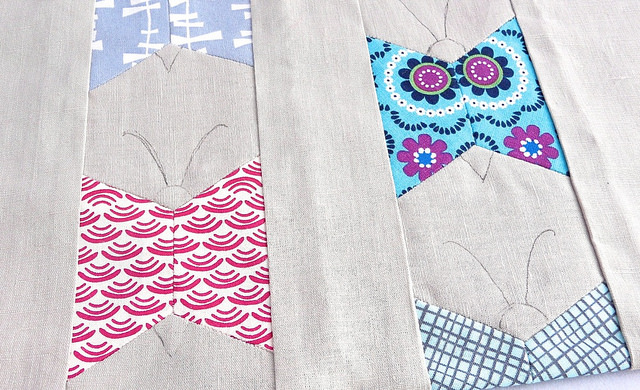
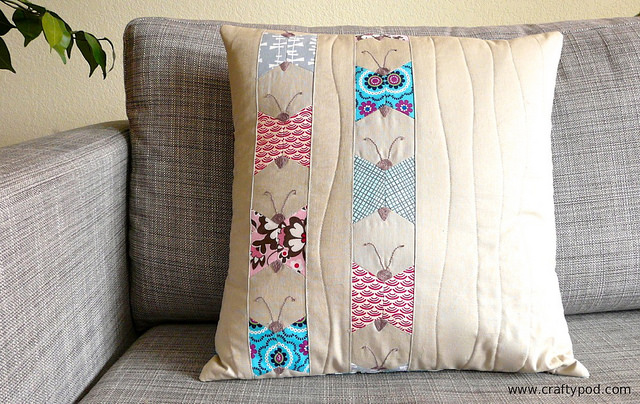
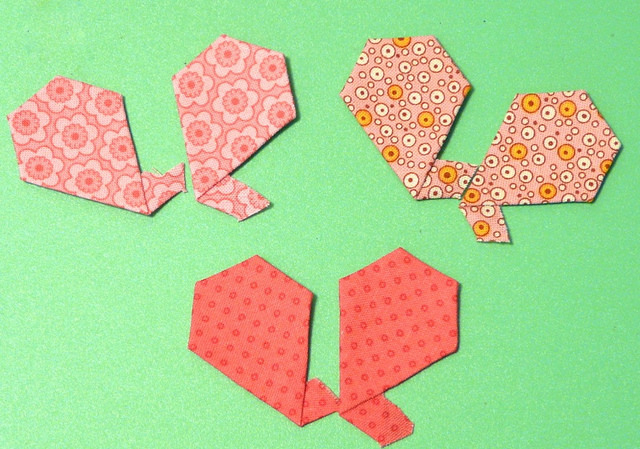
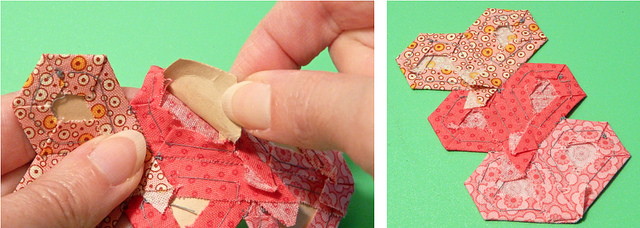
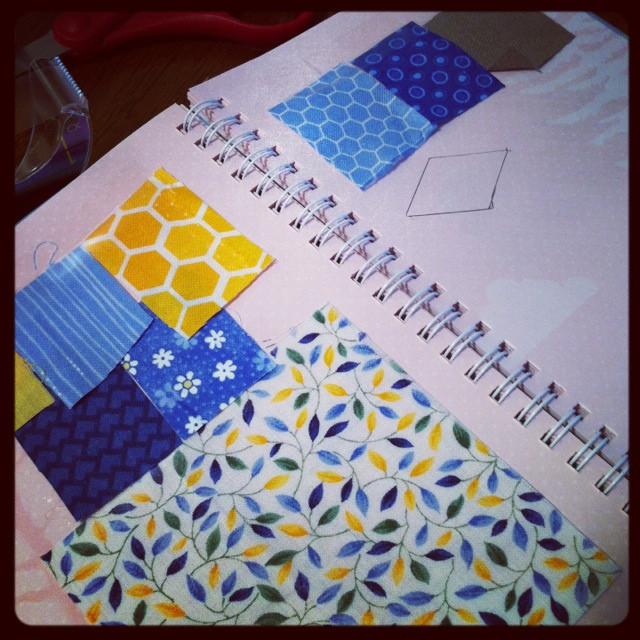
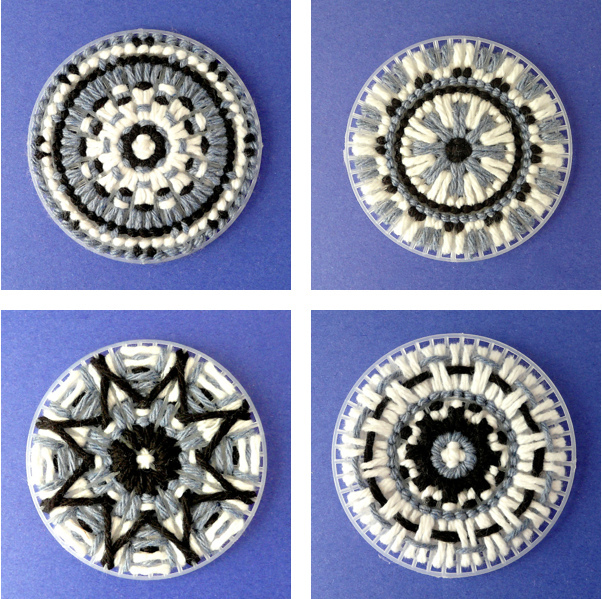
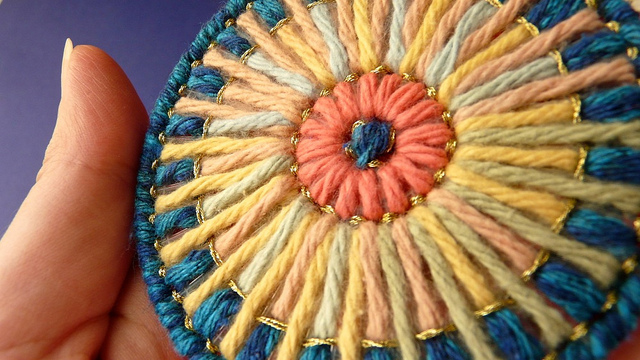
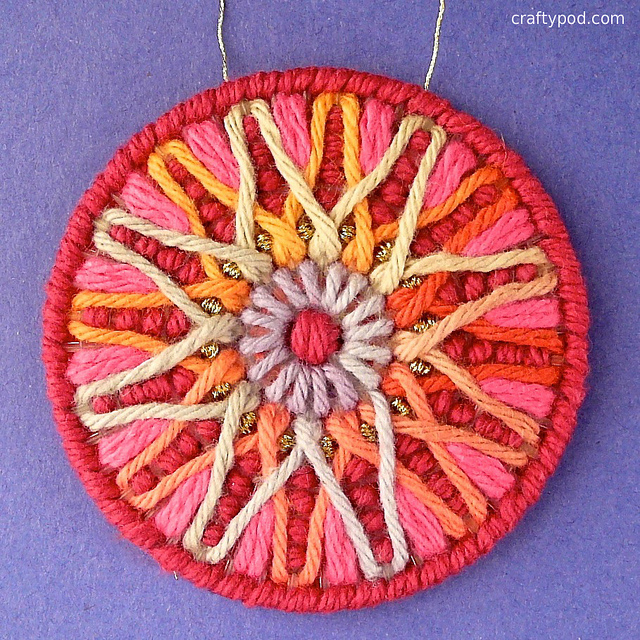
To make a fancier checker pattern, I did the same exact thing, but changed color each row. Then I filled in with the opposite color. (You can see this pattern in action on two of my finished samples at the top of the post.)

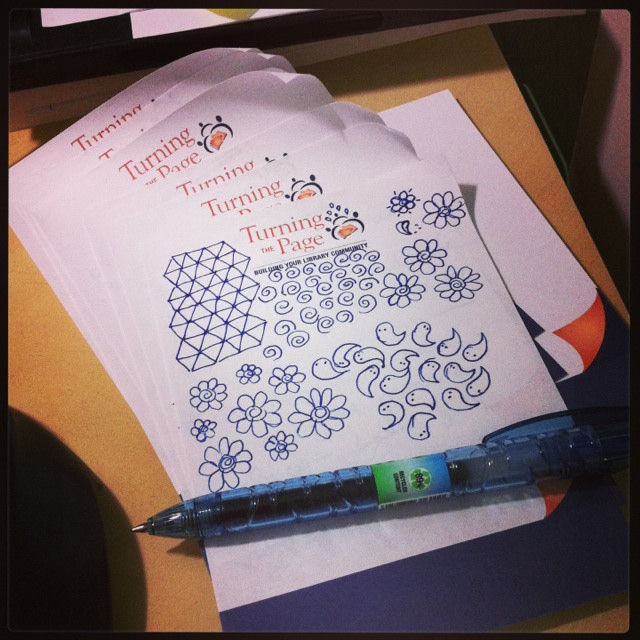
…But you can really use any stitch pattern you like here – my little checkered dealio is just one of endless options. Google for needlepoint stitches, or stitch a pattern of stripes, or a solid color. Don't make it too complicated, just have fun with it! (You can find lots of tips on stitching PC in this tutorial of mine and this one and this one.

pc-stitchmarkercase-topside-composite

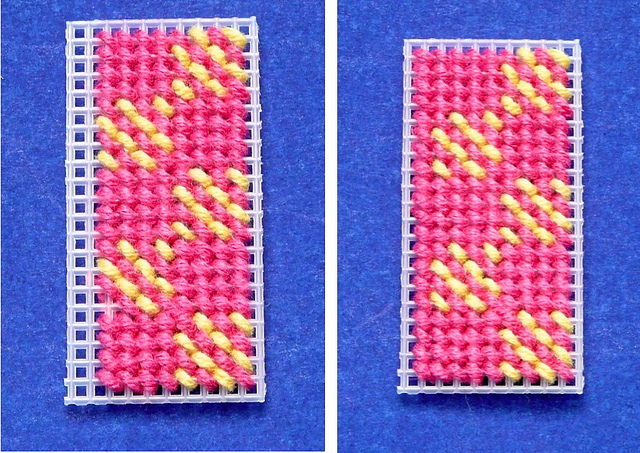
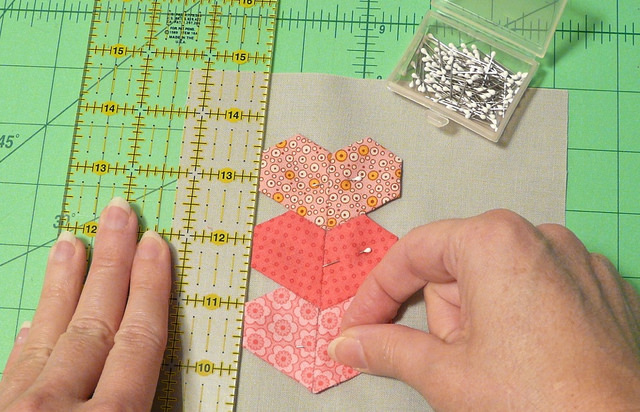
…Now, I do want to make two quick points about stitching. First, notice that the top side of the case is one row of squares wider than the other three sides. This extra width allows the lid flap to fit properly over the front of the case. So if you're using my checkered pattern, you'll need to add one extra row of stitches to this piece, as you see here.

pc-stitchmarker-case03

The second quick point (please excuse the repeat photo) is this: if you're using a checkered pattern, I recommend stitching the back piece first and then using that to dictate how you position the basic pattern unit on all the other pieces. But if you mess up a little, as I did with the top side of my case here, don't be too hard on yourself. The overall impression will be a checkered pattern, I promise!

pc-stitchmarker-case04

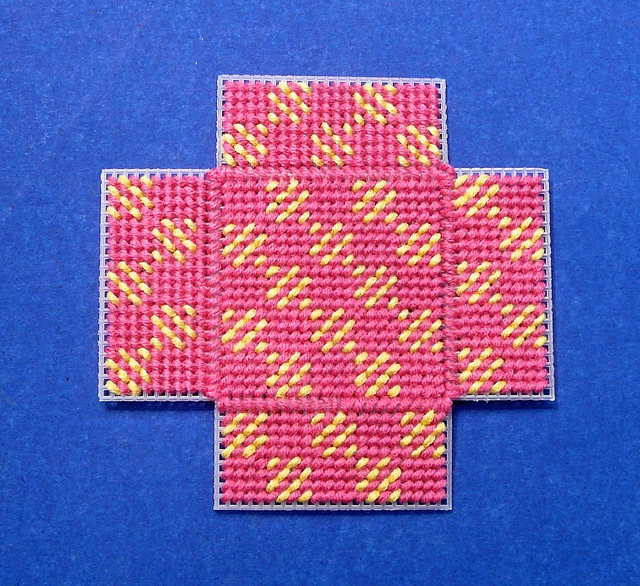
OK, then. We'll assemble this bad-boy now! Sew the top, left, right, and bottom sides to the back of the case. It's best if you start with a pretty long strand of yarn, so you can do this in a single seam. I'm using a whip stitch here.

(Rmember, you can reference the tutorial links above for techniques.)

pc-stitchmarkercase-positioning-composite

Next, you'll sew the remaining two pieces to the case. The Front Flap piece is attached to the Top Side. The Case Front piece is attached to the Bottom Side. (Remember, the way you tell them apart is that the Top Side has that extra row of stitches.)

pc-stitchmarker-case07

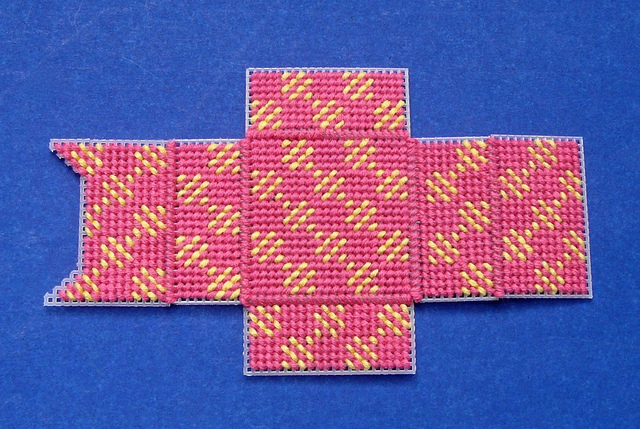
…So, the whole thing looks like this when you're done.

pc-stitchmarkercase-liner-composite

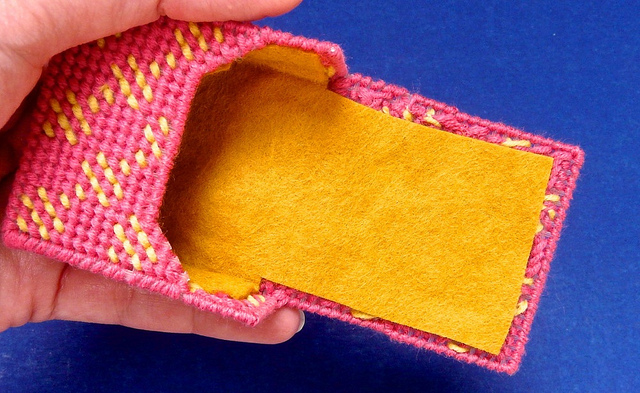
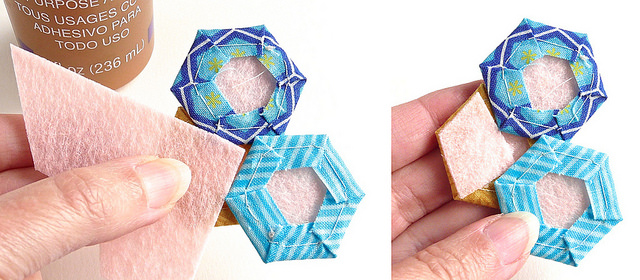
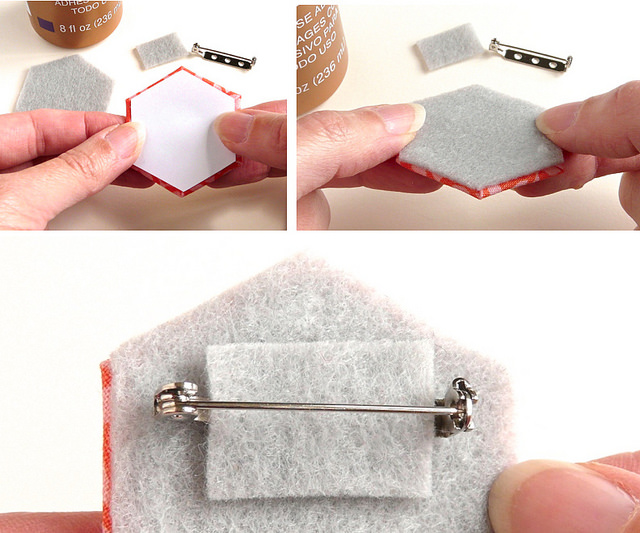
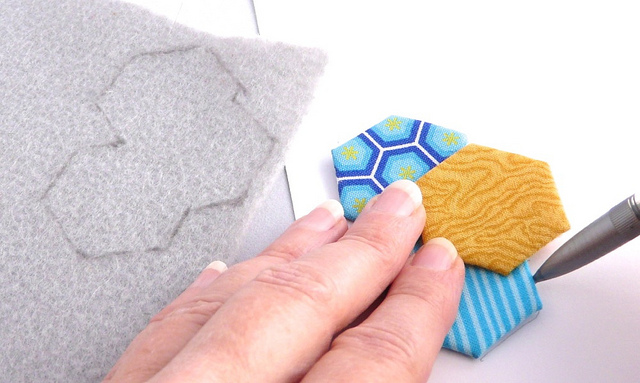
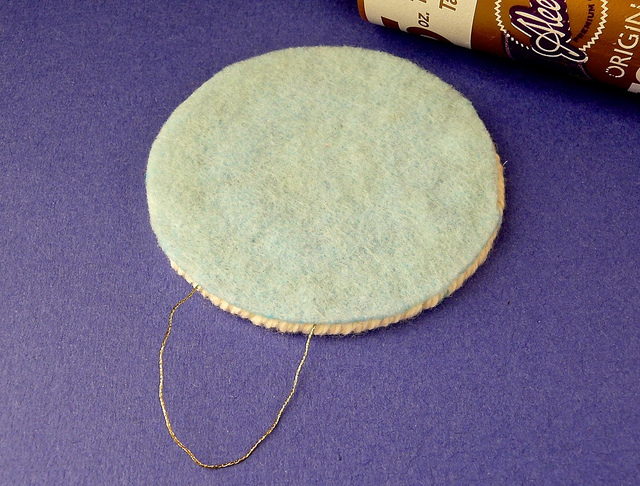
If you want to, you can give your case a casual liner, like this. First, trace the flat case onto a piece of felt. Then, cut inside your tracing lines by a good 1/8". You need the felt to be smaller than the case on all sides as you see above, so keep trimming the felt until it fits.

Then lightly glue it to the back side of the case piece. Don't place any glue on the joints where you stitched two pieces together! (If you do, you end up making your case too stiff to use.)

pc-stitchmarkercase-corner-composite

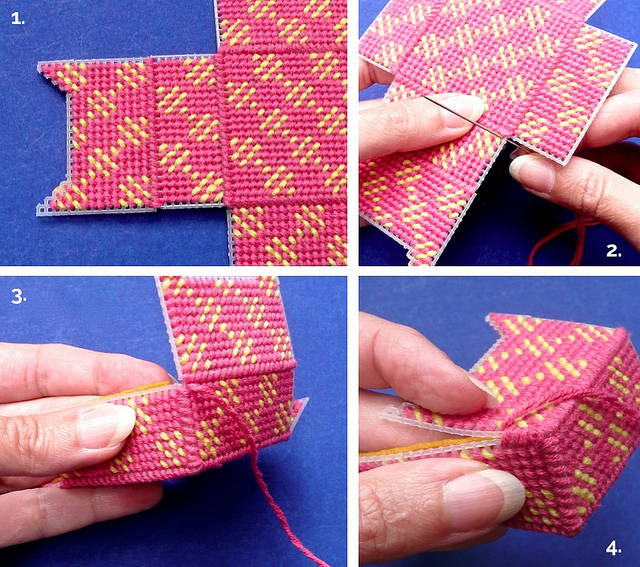
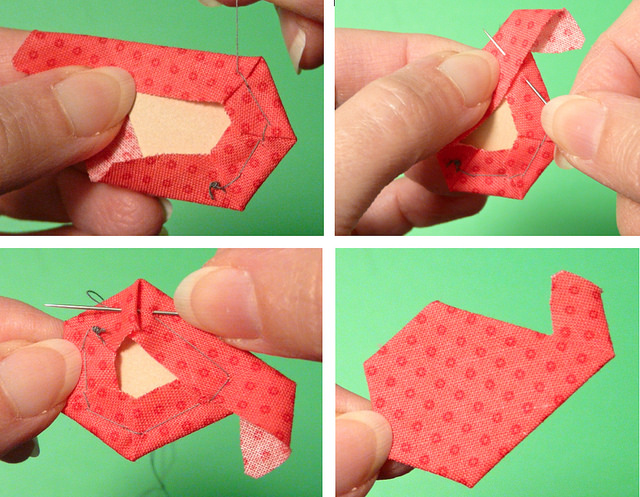
Now, we'll begin sewing up the sides of the case, starting here at the front piece. Bring your needle up at the point you see above. Then fold the bottom side in to meet the case front, and whip stitch those edges together.

When you reach the corner, take an extra stitch in that last hole and then round the corner so you can start stitching the next edge. Take two stitches in the first hole and then continue stitching until you reach the end of the case front.

pc-stitchmarker-case16

The best way to finish off these seams is to pass your needle through some stitches at the back of the case, under that felt liner, and then bring the needle out somewhere on the side of the case, as you see above. Then pull the yarn through and clip it flush with the side of the case.

Repeat this process to sew up the other side of the case.

pc-stitchmarker-case17

Lastly, use overcast stitch to finish the entire remaining edge, which runs along the front of the case and around the top side and front flap. End this stitching the same way as I described above.

pc-stitchmarkercase-closure-composite

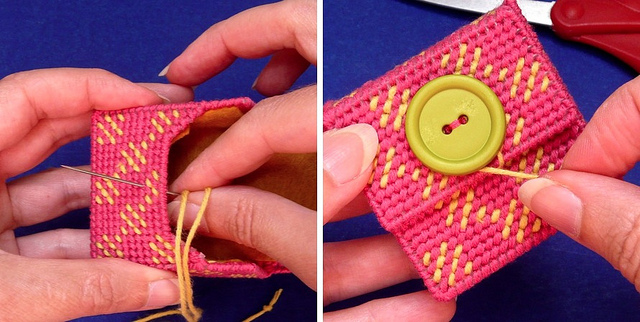
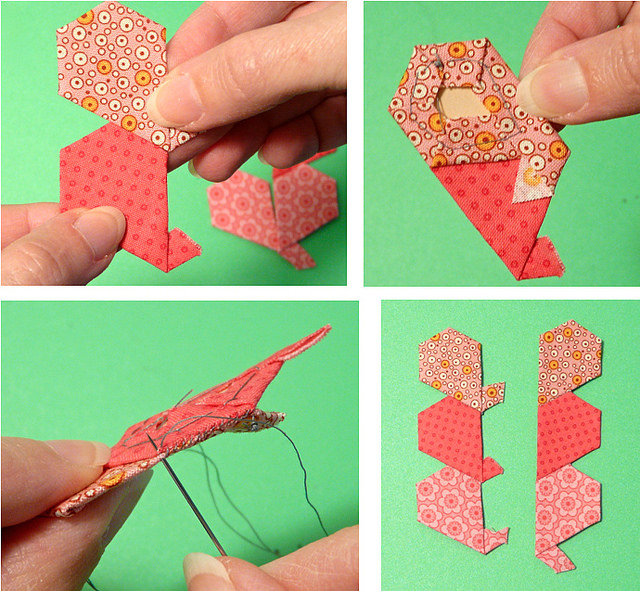
Now all you gotta do is make a little closure. Here's how I do that: first, I thread about a 6" strand of yarn onto a needle, and tie a big knot at the end. Then I pass the needle out through the front of the case, so the yarn comes through right below where the front flap overlaps it. Pull the thread through.

Then, sew a large and awesome button to that front flap. You can wrap the strand of yarn around the button several times to make a nice, secure closure. I usually trim away any excess yarn and tie a little knot in the other end so it can't slip back through the case wall.

pc-stitchmarkercase-finished1-wm

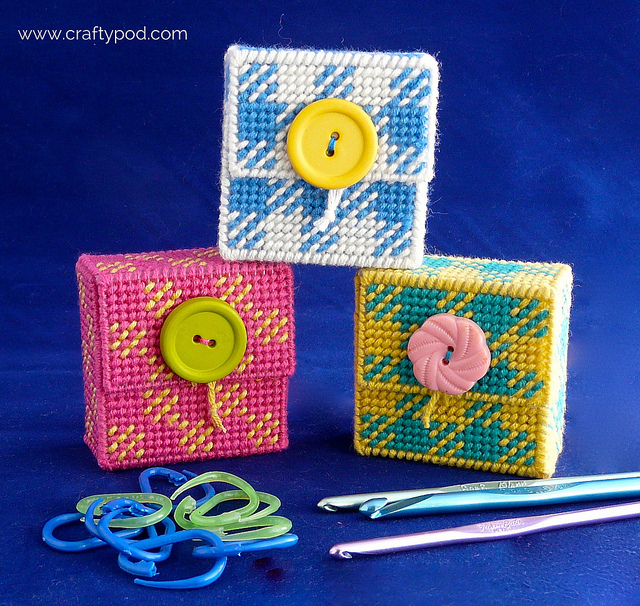
…And you're done! Fill it with your stitch markers of choice and enjoy.

Categories: 

Pages