You are here
How to Make a Stitch Marker Case from Plastic Canvas, Using Cottonish Yarn
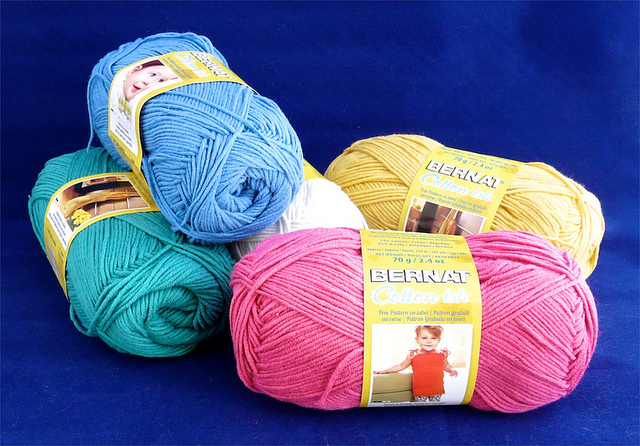
When I heard Vickie Howell was coming out with a cotton and acrylic blend yarn, I was eager to check it out – not for knitting or crochet purposes, but for plastic canvas. Of course.
Turns out, Cotton-ish is dandy for 10 count plastic canvas. It creates perfect coverage with a single strand, whether you're using short stitches or long ones. It's also significantly cheaper than stitching with embroidery floss or pearl cotton. And the color range is really pretty.
I got so excited, Vickie sent me some samples and I immediately designed this little project. I figured I better come up with something knitter-and-crocheter friendly, as plastic canvas people make up about .000000001% of Vickie's actual market for this yarn.
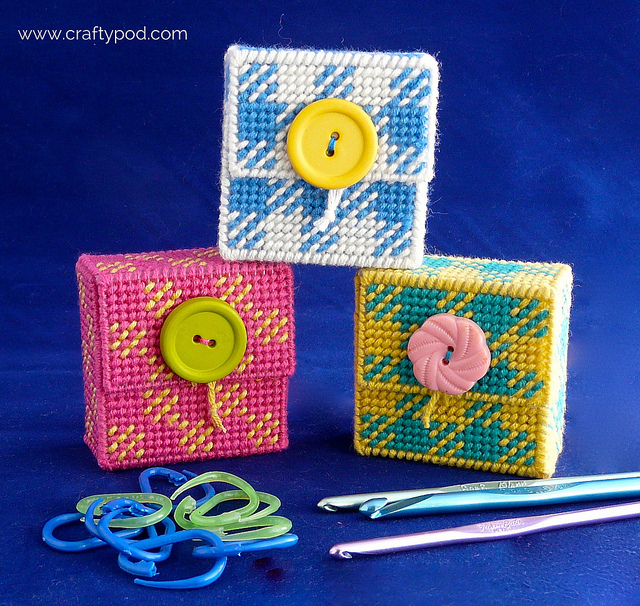
So this handy case is to keep your stitch markers in, so they aren't scattered all over the bottom of your knitting/crochet bag. These little cases make up quickly, and they're a perfect way to use up the Cotton-ish you have left over from other projects.
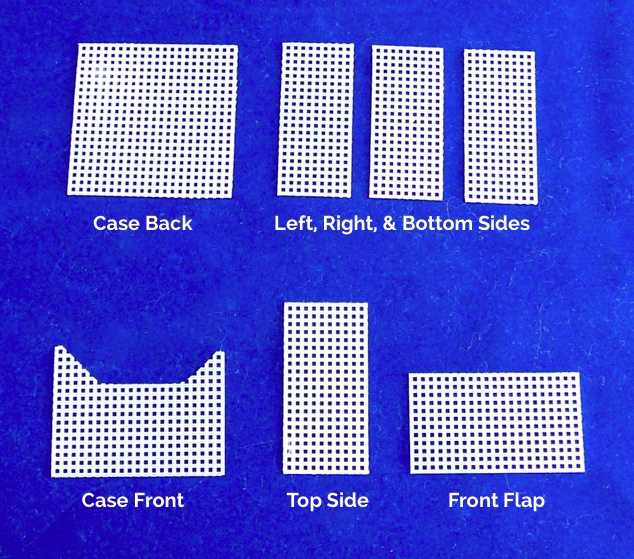
First, you'll cut some 10-count canvas (that's smaller than the stuff you usually see at your local craft store - be sure to check the label). You'll want precise sizing here so the stitching pattern fits, so measure your canvas by counting the holes. Here are the pieces you'll need:
- Case Back: 21 holes x 21 holes, cut 1
- Left, Right, and Bottom Sides: 21 holes x 9 holes, cut 3
- Top Side: 21 holes x 10 holes, cut 1
- Case Front: 21 holes x 16 holes, with a little piece cut out of the top edge (Just eyeball that; it's an opening to help you reach in and grab your markers.)
- Front Flap: 21 holes x 12 holes
Next, stitch all the pieces. Now, I know patterns are useful for some kinds of projects, but this is one where I think you can be much more casual about it.
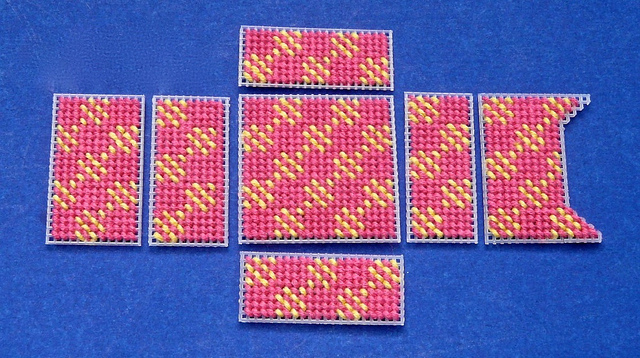
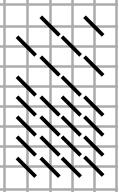
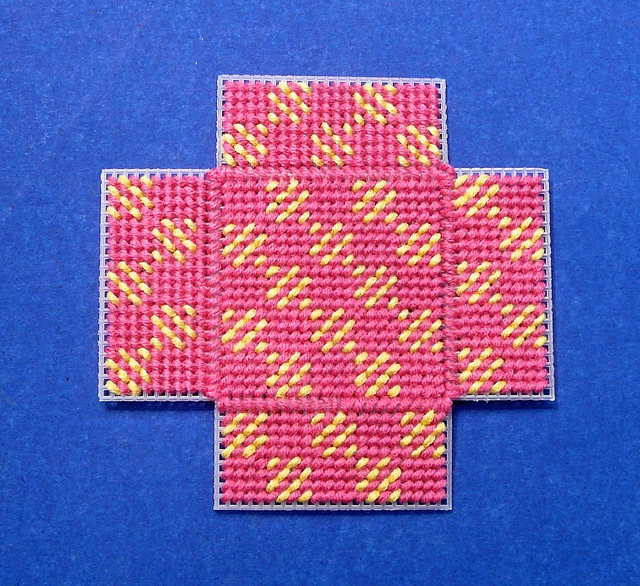
To make a checkered pattern, here's all I did. I started at the bottom right corner of each piece. I stitched a square made of four stitches across and four up. Then, above that, I made another square where each row has two stitches, and they alternate position.
This unit is the building block for the whole pattern. I filled each piece with that, working in vertical rows from bottom to top, and then I filled in the empty areas with a second color.
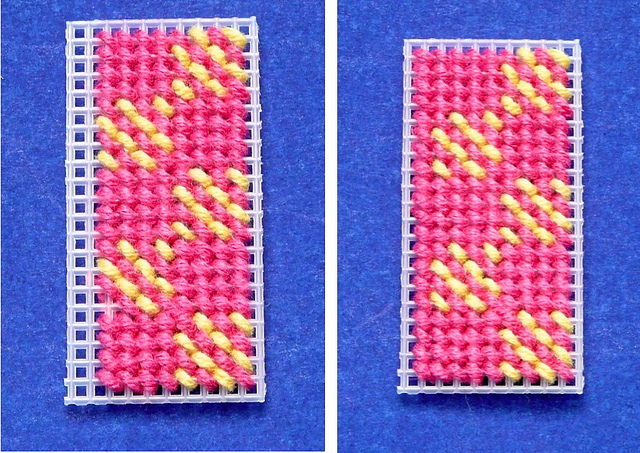
(Needlepoint purists might grumble at this, but I also think you can make your stitches angle in either direction. See how the two shots above have them oriented differently? Just pick one way and try to keep it consistent across all the pieces.)
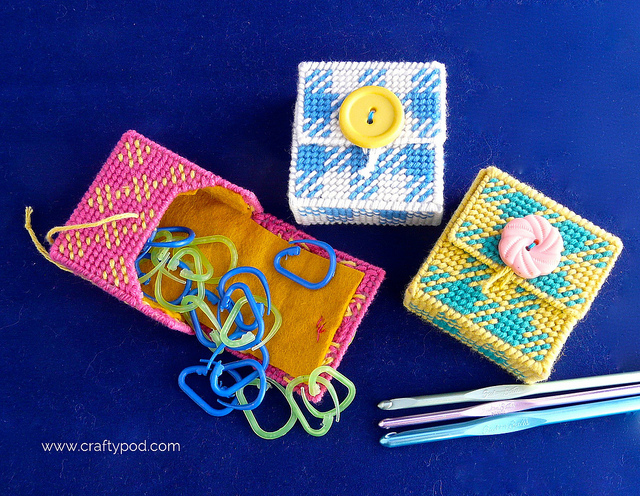
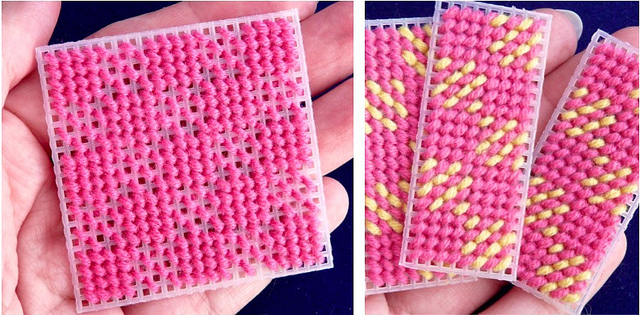
To make a fancier checker pattern, I did the same exact thing, but changed color each row. Then I filled in with the opposite color. (You can see this pattern in action on two of my finished samples at the top of the post.)
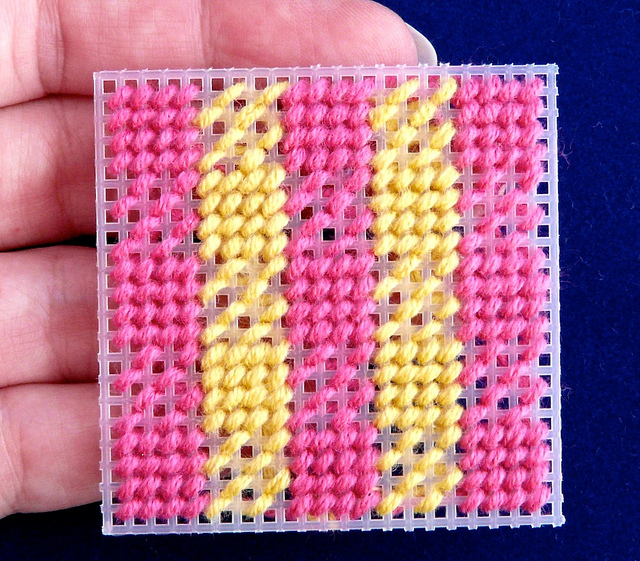
…But you can really use any stitch pattern you like here – my little checkered dealio is just one of endless options. Google for needlepoint stitches, or stitch a pattern of stripes, or a solid color. Don't make it too complicated, just have fun with it! (You can find lots of tips on stitching PC in this tutorial of mine and this one and this one.
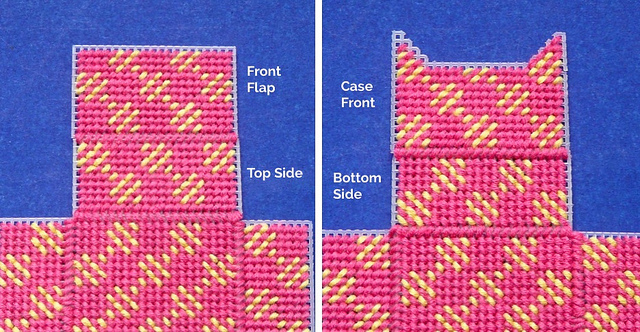
…Now, I do want to make two quick points about stitching. First, notice that the top side of the case is one row of squares wider than the other three sides. This extra width allows the lid flap to fit properly over the front of the case. So if you're using my checkered pattern, you'll need to add one extra row of stitches to this piece, as you see here.
The second quick point (please excuse the repeat photo) is this: if you're using a checkered pattern, I recommend stitching the back piece first and then using that to dictate how you position the basic pattern unit on all the other pieces. But if you mess up a little, as I did with the top side of my case here, don't be too hard on yourself. The overall impression will be a checkered pattern, I promise!
OK, then. We'll assemble this bad-boy now! Sew the top, left, right, and bottom sides to the back of the case. It's best if you start with a pretty long strand of yarn, so you can do this in a single seam. I'm using a whip stitch here.
(Rmember, you can reference the tutorial links above for techniques.)
Next, you'll sew the remaining two pieces to the case. The Front Flap piece is attached to the Top Side. The Case Front piece is attached to the Bottom Side. (Remember, the way you tell them apart is that the Top Side has that extra row of stitches.)
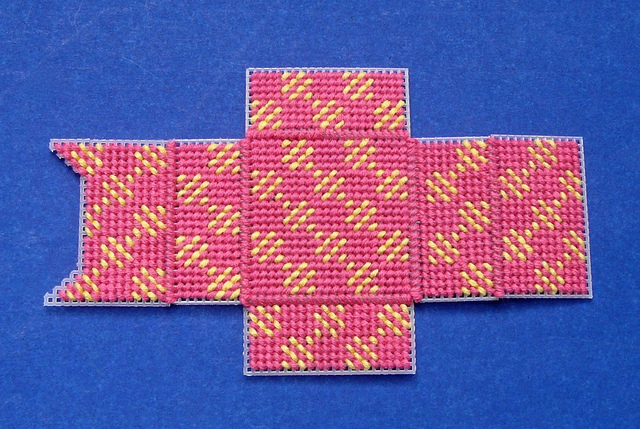
…So, the whole thing looks like this when you're done.
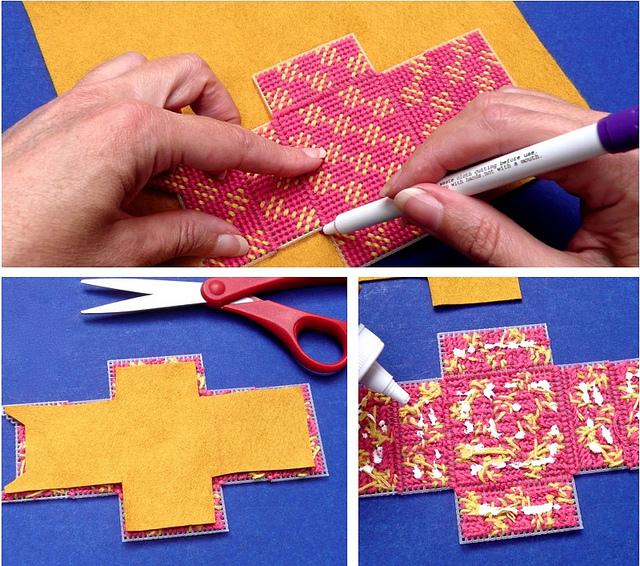
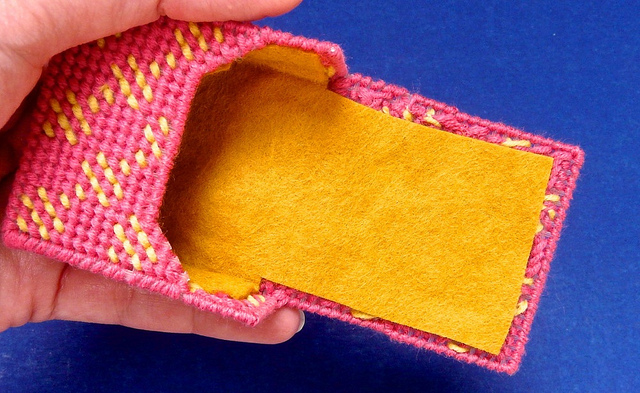
If you want to, you can give your case a casual liner, like this. First, trace the flat case onto a piece of felt. Then, cut inside your tracing lines by a good 1/8". You need the felt to be smaller than the case on all sides as you see above, so keep trimming the felt until it fits.
Then lightly glue it to the back side of the case piece. Don't place any glue on the joints where you stitched two pieces together! (If you do, you end up making your case too stiff to use.)
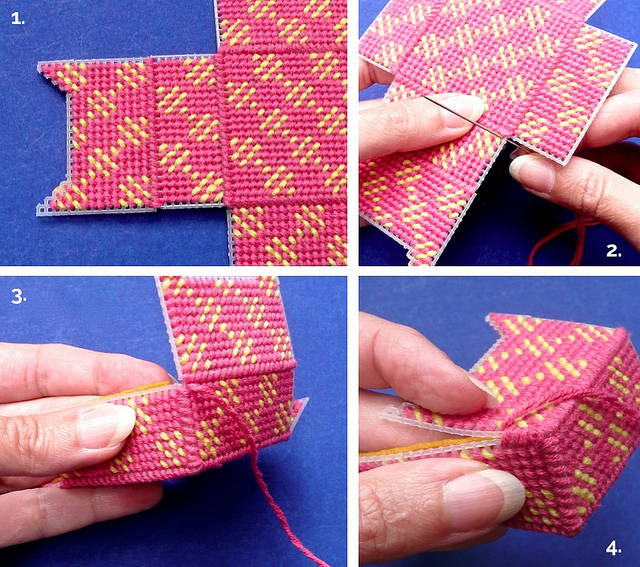
Now, we'll begin sewing up the sides of the case, starting here at the front piece. Bring your needle up at the point you see above. Then fold the bottom side in to meet the case front, and whip stitch those edges together.
When you reach the corner, take an extra stitch in that last hole and then round the corner so you can start stitching the next edge. Take two stitches in the first hole and then continue stitching until you reach the end of the case front.
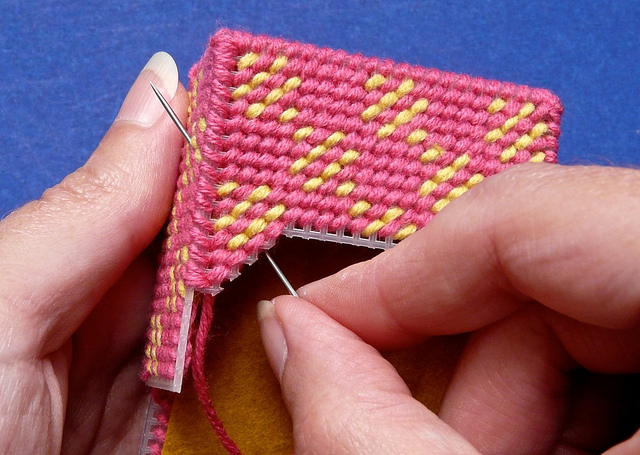
The best way to finish off these seams is to pass your needle through some stitches at the back of the case, under that felt liner, and then bring the needle out somewhere on the side of the case, as you see above. Then pull the yarn through and clip it flush with the side of the case.
Repeat this process to sew up the other side of the case.
Lastly, use overcast stitch to finish the entire remaining edge, which runs along the front of the case and around the top side and front flap. End this stitching the same way as I described above.
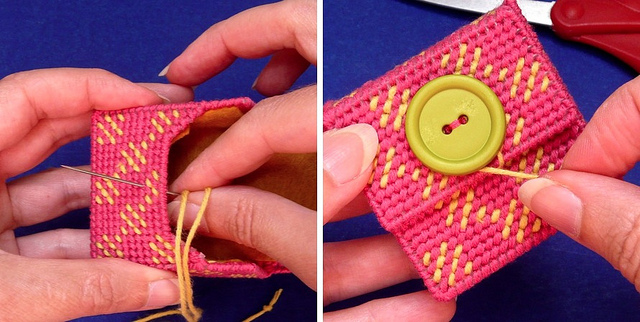
Now all you gotta do is make a little closure. Here's how I do that: first, I thread about a 6" strand of yarn onto a needle, and tie a big knot at the end. Then I pass the needle out through the front of the case, so the yarn comes through right below where the front flap overlaps it. Pull the thread through.
Then, sew a large and awesome button to that front flap. You can wrap the strand of yarn around the button several times to make a nice, secure closure. I usually trim away any excess yarn and tie a little knot in the other end so it can't slip back through the case wall.
…And you're done! Fill it with your stitch markers of choice and enjoy.


![Validate my RSS feed [Valid RSS]](../../../sites/files_cp7/valid-rss.png)