Blogs


CraftyPod started as a podcast back in 2005, and after adding a blog in '06, was my online home for ten years. Here, I explored creativity, the ins and outs of running my small design and writing business, and my life as a maker.

I closed CraftyPod in 2015. You're now looking at a simplified version, containing a sampling of my design and instructional writing. I've done my best to make sure all links are working, but the internet moves quickly. (And please keep in mind that at one time, a 2 megapixel camera was state-of-the-art.)

I hope you enjoy this bit of time travel!

Tumbler Fish: a Free EPP Pattern


The EPP Borders Blog HopI couldn't resist adding my two cents to the EPP Borders Blog Hop, even though I wasn't an official participant.

Several weeks ago, I had one of those flashes of inspiration and came up with the idea of turning tumbler patches into little fishies. They work perfectly! And so I contacted the lovely folks at Paper Pieces, where I get my tumbler templates, and offered them a free Tumbler Fish pattern to share on their website.

Tumbler Fish, a Free English Paper Piecing PatternThey said yes, and so I came up with five cool designs for these fishies, some fabric suggestions, and a sheet of tumbler graph paper for designing on, and set up a free PDF - which you can grab right over here.

I think these little guys work a lot like hexie flowers - they're easy to assemble, and then you can make all kinds of designs with them depending on how you arrange your fabrics. And there are good opportunities to use fussy cuts on the body and tail sections!


Tumbler Fish, a Free EPP Pattern

Tumbler Fish: a Free EPP Pattern

For this baby blanket, I used a few rows from "School of Fish," one of the five designs in the free pattern, and then added an extra row of background fabrics along the top and bottom edges. I made my fish out of random scraps, and used five blue background fabrics (some subtle prints and some solids), mixing them up randomly.

(This is a good moment to mention that these fish work great with any size tumbler template - 1/2" long, 1", 1 1/2", or 2". It all depends on how big your project is and how big you want your fish. I'm using 1 1/2" tumblers here.)


Tumbler Fish Baby Blanket

I made a 33" long strip, which was a little longer than the width of my readymade baby blanket. My original plan was to have the patchwork go all the way to the bottom and both side edges of the blanket. But then the blanket I'd ordered arrived, and lo and behold, it had a blanket-stitched edge and rounded corners. Oops!

Tumbler Fish Baby Blanket

So I decided to simply have the patchwork strip fit within the end of the blanket. I whipped out my seam ripper and shortened it a bit. In craft and in life, curveballs show up and we improvise. :-)

Tumbler Fish Baby Blanket

I pressed my finished EPP border carefully, making sure I pressed all the sticky-out bits along the edges to the back (as you can see on the right side, above). Then I peeled out the templates, and pressed the whole thing once again.


Tumbler Fish Baby Blanket

I decided to embroider my fish eyes, so I used a circle template and a heat-soluble Frixion pen to draw a circle on each fish. Then I outlined each circle with a tiny back stitch and filled in with satin stitch.


Tumbler Fish Baby Blanket

I didn't want to use an embroidery hoop for fear of stretching my patchwork out of shape. So instead I simply stitched on the unstretched fabric. This is a technique I figured out from pure laziness, and I use it whenever I have just a tiny bit of stitching to do and a hoop is impractical. You can see in the photo how I'm holding the fabric; and I'm very gently pulling it taut with my fingers. Then when I stitch, I'm careful not to pull those stitches too tight.


Tumbler Fish Baby Blanket

From there, it was super straightforward - EPP borders are like that. First I placed the border on my blanket, measuring the distance from the bottom to make sure it was straight. Then I pinned the layers together all over. And then I machine stitched 1/8" from the outside edges.

Since this is such a large applique, I also wanted to anchor it at a bunch of internal points, so it would be more bonded to the blanket. I just "stitched in the ditch" along each line where fish heads met fish tails, as shown above.


Tumbler Fish: a Free EPP Pattern

...And that's that! If you make yourself some Tumbler Fish, I'd love to see what form they take. You can tag me on Instagram or shoot me an email.

Plastic Canvas Gm Ornament


This tutorial is basically an act of sheer determination. As some of you know, I started a part-time job recently, and while that's a very good thing, it's also been quite an adjustment – particularly when it comes to creating blog content. I'm working from my home studio only three days a week, and this being Portland, the sun keeps ignoring my requests to shine on these days so I can take blog photos. (Such a jerk sometimes, that sun.)


Plastic Canvas Gm Ornament


Anyway. A couple months ago, I was noodling with some plastic canvas triangles I found on clearance at my local Jo-Ann, and discovered this ornament form. Then I spent a full month trying to get a tutorial photographed, but kept missing my light opportunities. Finally this morning, I was all "This thing is getting shot TODAY, and I don't much care what the light looks like." So, making use of some wan and paltry window light and a ridiculous amount of photo editing, I got 'er done. And thank goodness!

I'd call this an intermediate sort of PC project. The stitching's very easy, but the assembly may need a little patience. And maybe a beer. But definitely not two!


Plastic Canvas Gm Ornament


You'll Need:

  • • 8 Plastic canvas triangles (available online if your big-box store doesn't have 'em)
  • • Scrap of 7 count regular plastic canvas
  • Synthetic raffia or worsted weight yarn, 3 colors
  • • Needlepoint needle
  • • Scissors


Plastic Canvas Gem Ornament


OK, so let's have a little discussion about supplies first. These PC triangles have, as it turns out, triangular holes. That may make stitching on them seem daunting, but don't worry. As you can see, those triangular holes line up nicely in both diagonal and vertical rows, and that's what we'll be using to line up our stitching.


PC Placemat Raffia Spreading


I opted to stitch my ornaments with synthetic raffia, which adds a nice matte finish and straw-like look. But I should say, this stuff is a little more high-maintenance than yarn. You'll want to carefully spread out each strand of raffia before stitching with it, so that you can get maximum coverage over those larger triangular holes. You might want to skip all that and use yarn instead. Play around with your yarn and see if one strand or two gives you the coverage you want.

Plastic Canvas Gem Ornament


OK, with that said, let's make an ornament. The first step is to trim the bottom corners from your eight PC triangles, as shown here. Use the bottom row of holes as your guide. Count in five holes from each corner and make your cuts.

Then, just use the first piece you cut as a guide for all the rest.


Plastic Canvas Gem Ornament


You'll also need four little squares cut from some 7-count PC. Measure against the cut edge of the triangle as shown here. Or cut your squares to 6 holes by 6 holes.


Plastic Canvas Gem Ornament


There's no real need for a formal stitch pattern here - we're just following the canvas. So thread up your first color and start at the bottom right corner. Bring your needle up, and then pass it back down at the next corner up, forming a long diagonal stitch that follows the diagonal row of the canvas.

Then make four more stitches like that, following the edge of the canvas along the top and keeping them all the same length.

When you have five stitches, come across to the left side of the canvas and make five diagonal stitches in the opposite directon. The first one should share the same bottom hole as the top stitch of the previous row, as you can see above. Then follow with four more stitches below that and fasten off your raffia.

(Do you need some basics on stitching plastic canvas? Try this video of mine: How to Start and End a Strand of Yarn. Raffia works exactly the same way.)


Plastic Canvas Gem Ornament


Next, take your second color and make vertical stitches to fill in the rest of the canvas. I find it easiest to start with the longest center stitch, and then make stitches on either side of that.

(If you look closely, you'll see that I missed a hole in my canvas here. So, you know, don't be like me.)


Plastic Canvas Gem Ornament


Then, with your third color, stitch a great big "X" across the piece, following the edges of the design. Run your needle under some stitches at the back of your work to secure the end of the raffia, and then use the same holes on both sides to make your "X".

You'll then make a little straight stitch to secure the point where these big stitches overlap. In the fourth photo above, you can see where I'm bringing up my needle, right at the tip of my blue triangle. That's also where I'll put my needle back down to finish the stitch.


Plastic Canvas Gem Ornament


That's what the stitch looks like - see how it tacks down the big "X"?

Go ahead and stitch up all eight pieces in this manner.


Plastic Canvas Gem Ornament


You'll also need to stitch your four squares, using either Color #2 or Color #3. These are super easy - just vertical stitches from corner to corner. Again, do the center one first and then fill in on either side.


Plastic Canvas Gem Ornament


Right – so, just so we're on the same page, here's what you need to have stitched up. Then we'll move on to assembly.

(If you haven't done any PC assambly before, I recommend watching this video, Joining Two Pieces Together.)


Plastic Canvas Gem Ornament


Stitch all the pieces together using Color #3. Place two of the "gem" pieces together with wrong sides facing, and sew a seam between their longest edges. Start at the corner where Color #1 is stitched, and sew your way to the tip.


Plastic Canvas Gem Ornament


…Then, open up the two pieces you've just sewn together. Add a third one, again placing it wrong sides together. Continue your seam on down toward Color #1 again. When you get to that end, fasten off the raffia.


Plastic Canvas Gem Ornament


…And then sew the fourth piece on in the same manner. You'll end up with a pyramid shape. Make two sections like this.

A Little Cautionary Note: This is a good moment to mention that these PC triangles are a fair amount more delicate than their square-holed cousins. If you pull your raffia too hard here along the edges of your canvas, it's easy to break it. So, remind yourself to tug the raffia through these edge-holes gently, and pull the stitches snug, but not too tight. This is especially important when you're stitching at the tips of the gem pieces.


Plastic Canvas Gem Ornament

Plastic Canvas Gem Ornament


Now, take one of those pyramids and stitch the four little squares to it, nesting them into the openings at the corners.

It's easiest to start by placing a square as you see in the top photo above – inside the pyramid, wrong sides facing. Then sew the seam, and then open out the little square. From there, you can line up the next two edges an sew them.

As you do these little seams, the triangle holes and the square holes should pretty much match up. Don't worry too much about that - stitch wherever you can get your needle through both edges, and all shall be well.


Plastic Canvas Gem Ornament


Sew on all four of the little squares. You'll be surprised how much sturdiness this adds to your ornament-in-progress.


Plastic Canvas Gem Ornament


…And now, see how the two pieces of your ornament will nest together? We're going to sew a meandering seam all around the middle to join the two pieces.


Plastic Canvas Gem Ornament


If you haven't done any PC construction before, you might want to watch this video on How to Construct a Lidded Box. Many of the techniques in that video will help you out here.


Some Tips For This Step:

• I recommend starting with about a 30" strand of raffia, so you don't have to stop in the middle and reload your needle. That said, this is a seam that will tend to wear out your raffia as you go, so be prepared for some minor shredding along the way. It won't hurt anything as long as you're still getting coverage.

• Take your time and don't worry too much about the canvas-holes lining up. In some spots, they will, and in others, not so much. Again, just place your stitches wherever you can get your needle through both edges of the canvas.

• The whole thing will feel a bit fiddly until you get the first few segments of that seam done, and then the shape will start to solidify and become much easier to handle.

• And lastly, you'll need to repeatedly pause and un-twist your raffia, so you can get good coverage throughout the seam. Once it twists up, you'll see too much canvas between your stitches.


Plastic Canvas Gem Ornament


To add a hanger, just thread a piece of raffia through the very tip of the finished ornament. Cut it to the length you want, and tie the ends in a tight double-knot.


Plastic Canvas Gm Ornament


And that's that! I really love how different color combinations change the look of this ornament, and I love how substantial-yet-lightweight they are.

I hope you have a blast making one. And, on the better-than-average chance that this is my last blog post before Christmas, let me also wish you and yours a peaceful holiday!

Magnifying Glasses

Image by Philip Chapman-Bel, via Flickr


I hope you won't mind one more book-writing post. While it's fresh in my mind, I want to expand on something I said in the previous post:

"Because a publisher has access to markets beyond what you can reach on your own, a book can be a way to reach new potential customers for another business you already have. (Assuming you get good marketing support from your publisher, which is something you should look into before you sign a contract.)"

I thought that idea deserved a little focus because unfortunately, not all publishers are created equal when it comes to marketing support. As always, that's not a case of publishers being nefarious; it's a case of them facing steep business challenges and cutting costs.


Glass Marbles

Image by med-i, via Flickr


My publishing experience has been a mixed bag so far: I've had pretty good marketing support for one book, almost no support for another, and very good support for my soon-to-be published third book.

Here's what I find interesting about working with a publisher: when I put a book proposal together, I always have to include a section that details all the things I'm going to do in order to market that book. I have to list all the traditional and online media contacts I have, all the online promotion I plan to do, the events I'll put on, etc.

Does the publisher have to provide me with similar assurances that they'll market my book as hard as I will? No, not currently. That's always been treated as a given, but increasingly in publishing, it isn't. I've had so many friends, especially in the last two years, who've gone through the work of making a book only to discover that their publisher isn't doing much to market it. I've even had friends whose publishers ended up eliminating their marketing teams!


Long Hot Road

Image by arbyreed, via Flickr


Why is marketing support important? Because marketing is a rather hidden and perfectly enormous part of writing a book. And it's an ongoing job. Many new authors think only in terms of the big launch, but if you want your book to sell and bring you the other benefits we discussed in the last post, then you actually need to be promoting it over and over again, until it's out of print.

…But let's face it, marketing is a very different skill than the skills you used to make your book. Maybe you're great at marketing and don't need anyone's help. But if marketing's not your strong suit, then you need the support of a professional marketing team.

If you're an aspiring author and you're considering working with a particular publisher, here are some very good ways to assess that publisher's marketing skill….


Red Bud

Image by Théo, via Flickr


Things to do way before you have a book idea to sell:

• Subscribe to publishers' consumer email lists. You can go to a publisher's website and look for invitations to sign up for "updates on our new titles." See what kinds of email newsletters the publisher offers, and how targeted they are to a specific audience. Then, subscribe and pay attention to the emails. Is the content interesting to you? Are new books presented in an engaging way? How often do you hear from the publisher? This is all good information to have.


• Follow publishers on social media. Same idea here – what is the publisher saying on its social media channels, how interesting are they being, and how often are they posting? Check for Twitter, Facebook, Instagram, and Pinterest feeds. Subscribe, and see what you think of the content as a consumer.

Blogging deserves special mention here. Some publishers are maintaining active special-interest communities through blogs, and some seem to be pasting press releases into boring corporate blogs. You'd have awesome and ongoing opportunities to market through the former kind; not so much through the latter. Subscribe to lots of publisher blogs and see who's doing what. (And incidentally, in many RSS readers like Feedly or Bloglovin, you can even see how many subscribers a feed has, which is good information.)

Blogger, after Guy Orlando Rose

Image by Guy Orlando Rose & Mike Licht, via Flickr


Things to do if you're a blogger yourself:

• Become a book reviewer. Reviewing books on your blog is an excellent way to create relationships with marketing people at various publishers. And from those interactions, you learn a lot about how a book of yours might be presented to other bloggers.

Many publishers have some kind of blogger mailing list. Check websites to see if there's a sign-up form, or if not, look for a contact email for marketing and write a nice note to introduce yourself and your blog. You should mention what kinds of books you're interested in reviewing and your blog's current readership. (Another good tactic: post a review of a book you already own, and then email the publisher's marketing contact with a link.)


5/365 - Reach Out {Explored}

Image by Susana Fernandez, via Flickr


• Observe how you're treated as a blogger. Once you're on a publisher's blogger list, you can see how good a job they do at reaching out for marketing. Let me give you two examples from my experience:

  • - Publisher A has a super nice publicist who sends me an email whenever he has a title coming out that he thinks is a good fit for my blog. He always offers a cover shot and any other images I might need. He even sends me a thank-you email when my review posts.

  • - Publisher B has been sending me knitting books for the past two years. I've tried asking several publicists there to stop, since I don't know how to knit and never blog about knitting. But there seems to be a revolving door of new publicists there, and each one has assured me they'll get the problem fixed. And then they don't.


…So, which publisher do you think might do a better job marketing your book?


El Productor: La verdad sobre un rol distorsionado

Image by andresfranco.net, via Flickr


• See how good their marketing ideas are. When publishers contact you about blogging their new releases, are they using the same tired blog-tour/giveaway formula for every book, or are they coming up with more interesting promotions?

• Watch the comings and goings. When you have a blogger relationship with a publisher, you have an inside view of how committed that publisher is to its marketing team. Are people getting laid off frequently? Are interns handling the marketing, or dedicated publicists? That's all good information to have.

On Target

Image by viZZZual.com, via Flickr


Things do to once you have a book proposal:

Backchannel, backchannel, backchannel. The best place to get a good picture of how a publisher handles marketing is to talk to other authors. Go to a publisher's website and look at the books they've published within the last year. Find a few titles that are related to your book idea. Then go to the author's website. find an email address, and contact the author. Explain that you're considering doing a book with her publisher and ask about the marketing support she received. Most authors will be more than happy to discuss their experiences.

• Be freaking direct about it. When you find yourself in conversation with a publisher, ask point blank: How much marketing, and what kinds, can I expect your team do to for my book? See how specific they get in their answer. See if they can give you examples of good marketing they've done for other books similar to yours. See if they offer to put you in touch with someone on their marketing team. See if they HAVE a marketing team.

I hope this is useful, aspiring craft-book authors. I'm not saying you shouldn't work with a publisher who doesn't offer much marketing support. I'm just saying that this is information you need to have before you sign a contract.

And of course, in the 18 or so months it takes to make a book, a whole lot can change. So you're not exactly handing yourself a guarantee. You're just minimizing your future surprises. Right?

Categories: 

Miss A Writes a Song

Image by Denise Krebs, via Flickr


For the past five years, I've heard from lots of people who are interested in writing a craft book. But interestingly, the questions these folks ask me are starting to shift. I used to get asked how to break into writing craft books. Now, the question is more likely to be, "Is it worth it to write a craft book?"

Obviously, any question of whether something's "worth it" needs you to define what worth-itness means for you. But since I don't know your definition, I'll speak generally (and honestly): craft-book-writing is worth it in many ways, but probably not in the monetary one.

I'll get to the ways craft-book writing IS worth it later in this post. But first I'd like to wade into those financial waters and give you a real-life picture.


... and so on

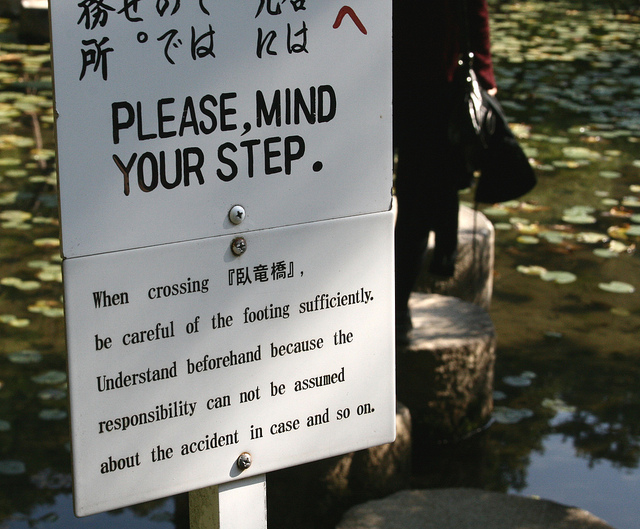
Image by Niklas Barsk, via Flickr


…But before I do, let me also say this: I don't mean any disparagement to any publisher here (and especially not my current publisher, Storey, whom I dearly love). I'm not trying to tell you that publishers are out to screw you, nor am I warning you against writing craft books. What I am saying is that the craft book market is up against real challenges, and as a result there just isn't much money in writing books anymore.

Anyway. Let me illustrate:


Payday advances sign

Image by HelenCobain, via Flickr


Let's Talk Advances

I feel like the folks who approach me with questions are getting savvier about what a book advance means, but let me run over some basics, just in case.

First, a book advance may seem like a big chunk of cash, but you can't actually have all that cash yourself. A bunch of things have to come out of that check:

  • • Taxes (which take up to a third of that check)
  • • Agent fees, if you have an agent (That's another 15%. So, that plus taxes eats 45% of your advance right away.)
  • • Supplies for writing your book (These vary wildly, but might include expensive equipment, software, and contract services as well as craft supplies.)


Puff Daddy George, 1/2

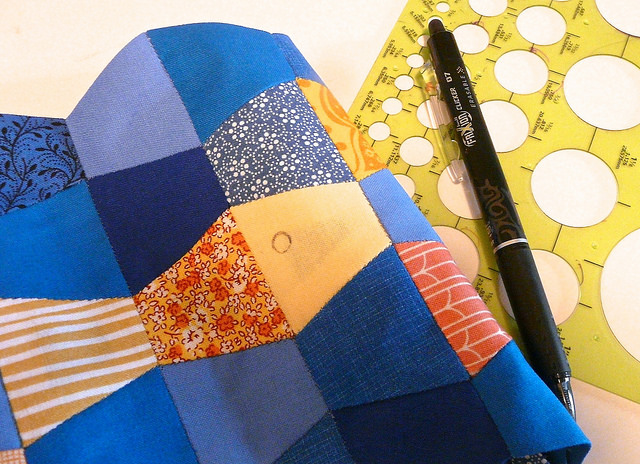
Image by Eric Gjerde, via Flickr


…So, by way of example, I received a $10,000.00 advance for Kanzashi In Bloom. Some of you will think $10K is a huge amount, and some of you will think it's tiny. I think it's worth mentioning that, unless you have a huge online audience, book advances in general are shrinking. For the last book proposal my agent shopped to various publishers, I had some offers in the $5000.00 to $8000.00 range, even though I was already an experienced author. I've even heard that some publishers are forgoing the advance altogether, but personally, I would never take that deal.

Anyway, back to that $10K Kanzashi advance. By the time I paid the taxes, my agent, and supply bills, I had about $4700.00 left. (I could have saved on supplies by asking companies to donate them in exchange for a credit in the book, but I didn't know this yet.)


tiny books

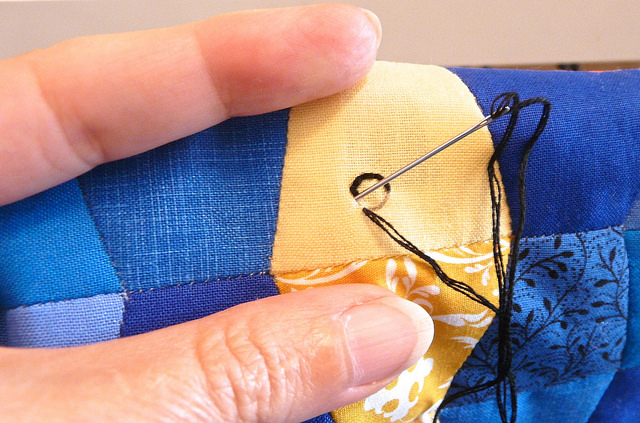
Image by Kelly Taylor, via Flickr


Now, when you take what's left of your advance and divide it into the number of hours you'll spend actually producing that book, there's where things get pretty grim. Because it takes hundreds of hours to write a book, what with all the designing, making, and manuscript prep. Depending on the book, there might also be weeks of photo shoots, or weeks of illustrating.

Once the manuscript is done, there are more hours to come: several rounds of edits/proofing, and then many hours of marketing activity, including building and maintaining a book website, planning events, travel, etc. When it's all said and done, you'll be lucky if you end up having earned minimum wage. (I earned about five bucks an hour writing Kanzashi In Bloom.)


Self-penalty system / 20090815.10D.51563 / SML

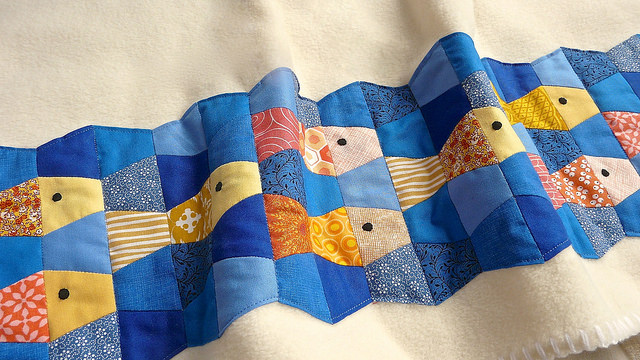
Image by See-ming Lee, via Flickr


Here's another thing about advances that not enough people talk about: they are unlikely to be paid out in one lump sum, or for that matter in "advance." When I did Quilting Happiness, for example, my advance was paid out in five installments – and two of them happened after the book was published. So not only is your advance smaller after expenses, it's also sliced into even smaller chunks and you might not have access to all of it while you're writing the book.

(You can negotiate to some extent for a payment schedule that meets your needs, but generally speaking, the bigger the advance, the more pieces your publisher will want to slice it into.)

Technically speaking, the advance is supposed to help cover your costs and living expenses while you produce your book, but given all these slices and dices, it really can't do that. Which brings me to another potential financial problem with book-writing….


#ds308 - Out of Luck

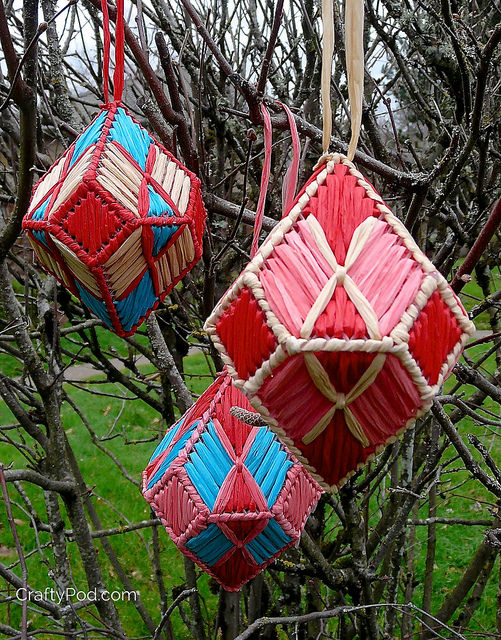
Image by Sharon Drummond, via Flickr


Your earning ability while you're writing the book

This is another subject I don't think enough people talk about. If you make your living as a freelancer or an online shop-owner, then writing a book can actually be step backward financially.

Here's what I mean: I've had an average of ten months to produce each of my three books. Typically I've worked part-time hours on a book for the first seven months while maintaining my other business on the side. It's those last three months that become financially problematic. If you have some kind of steady paycheck coming in, you can weather them pretty easily. But if you depend on irregular income, then those final months of all-consuming book work will squeeze out your ability to produce other money.


Super Nervous

Image by Andrés Þór, via Flickr


As a freelancer, I can tell you that there's been a point near the end of every one of my book projects where the advance money I've been paid has run out and, because I've been so busy with the book, I haven't been able to bring other income in. So not only am I on book deadline, I'm scrambling to pay my rent. And once I turn the book in and begin producing my regular income again, there's a month (or more) of lag time before I get paid for that work. So it's usually a pretty thin and stressful time.

Honestly, I'm getting to the point where I recommend book-writing primarily for people with day jobs! Or, that freelancers sock away a good chunk of savings to cover them through the interim.


Feline Royalty

Image by Shaeree, via Flickr


…But you get royalties, right?

I think people are getting savvier about royalties too, but just in case: Sorry, the answer is "not that often". I was lucky enough to see Kanzashi In Bloom "earn out" its advance and start earning royalties. The book was published in 2009, I received my first royalty in 2011, and I've received two royalty checks per year since. (The first was over $1000.00, and they've declined a bit in size each time since then.)

On the one hand, this is awesome. But it's important to understand that I still have to take taxes and agent fees from each of these checks – so essentially, again, they're cut nearly in half. But whatever - I'll happily take all the royalties Kanzashi has left in it. K and I like to joke that, thanks to the royalties, I made $6.00 per hour writing that book instead of $5.00 per hour.

Quilting Happiness, on the other hand, doesn't look likely to earn out. I love and believe in that book, but let's face it – the quilting market is very crowded and celebrity-driven right now. Every new quilting book has so much competition, and publishers are pumping out new ones all the time. So it's harder to get the sales you need in order to earn out.

(There weren't any U.S. books on Kanzashi when I wrote Kanzashi In Bloom, however, and that really helped sales.)

Of course, there is one easy route to earning royalties, and that's taking only a tiny advance or none at all. But I don't like that gamble. I don't believe anyone should do hundreds of hours of work up front for no money, based on the promise of possible future money. Regardless of how well or poorly a book sells, the writing and design work deserve compensation, period.


Fotoserie: Gezichtcollage

Image by Marco Bijdevaate, via Flickr


So why don't publishers pay more?!

There are legends from 2005, when the new, irreverent brand of crafter got $50,000.00 book advances. Those were good days... for authors. Unfortunately, the books didn't sell well and those big advances started shrinking. And that's not because publishers are greedy.

You have to consider what a publisher is up against in this craft-book landscape. As I've pointed out in other posts, your publisher is making a huge investment in your book. Aside from the advance payments to you, they're funding several kinds of professional editors and designers. They're often paying for professional photography, and sometimes for professional illustration. Oh, and they're funding the print run. And they're paying the costs to sell and ship those books to retailers.

Why aren't advances bigger? Because a publisher can only make so much investment in a new book. If that book never sells enough copies to cover costs, then the publisher loses money. If every craft book sold millions of copies, there'd be a lot more money to spread around, but every book doesn't sell millions.

…Which brings us, of course, to the internet and how it's affected craft book sales. Simply put: are you buying more craft books than you did ten years ago, or fewer?

The way we crafters consume how-to information has irrevocably changed. We may love the idea of real craft books, but we also rely on them less than we used to. And therein lies the rub, both for publishers and authors.


Jackpot Winner

Image by Christina VanMeter, via Flickr


So, what DO you get from writing craft books?

OK, so with all that said, remember that I'm not telling you that you shouldn't pursue writing a craft book! I'm just hoping to clarify the financial part so you can make a more informed decision as to why you're writing.

Here are the benefits of craft-book authoring I see:

  • • Because a publisher has access to markets beyond what you can reach on your own, a book can be a way to reach new potential customers for another business you already have. (Assuming you get good marketing support from your publisher, which is something you should look into before you sign a contract.)

  • • Book-writing pushes you creatively in a big way. In the process of writing a book, I always end up developing a whole set of other ideas I end up using professionally later on.

  • • Having a new book out gives you an excellent reason to participate in craft industry events and trade shows, where you can make beneficial new connections.

  • • A book is a good member of a connected universe of products and services that you offer. If someone likes your online shop, they might buy your book – and vice versa. A book is also a good "calling card" for introducing yourself to editors and gatekeepers who might hire you for freelance work.


Magic Wand

Image by Carol Alejandra Hernández Sánchez, via Flickr


…But none of these benefits of book-writing is magically conferred on you as a result of being a published author! They all require a lot of careful planning and elbow grease on your part to materialize – not to mention, some viable way of keeping a roof over your head while you're materializing.

I think that, for craft-book writing to be "worth it," you need to have some kind of long-range plan for how that book will help you do something else. Craft book-writing in itself is not a path to a sustainable income. But it can help you get there.

My books have all felt "worth it" in this sense.

Categories: 

Grandmother's Cutting Garden Quilt


So, if you get into English paper piecing, sooner or later you'll discover the Grandmother's Flower Garden quilt. It's an old design, dating back to the 1930's, that involves a quilt top pieced entirely from little hexagons, all arranged in a pretty flower pattern.

I loves me some Grandmother's Flower Garden. I've started four of these quilts over the years. But the problem is, making a Grandmother's Flower Garden involves sewing about a thousand hexies together, and I always peter out long before that number.


Grandmother's Cutting Garden Quilt


…And that's why I designed this pattern. It's my way of getting a beautiful hexie flower quilt, but with way less work.

I decided that I wanted the fun of making the flowers, but stitching a whole mess of plain background hexies to connect them… not so much. And so I figured out this straight-row design. it's reminiscent of how a typical cutting garden of flowers is planted, in wide rows for easy access to the blooms. And it sneakily fills the quilt top with flowers, but without so much hand-stitching.


Grandmother's Cutting Garden Quilt


For this quilt you need just 18 English paper-pieced hexie flowers, plus some hexie stems to connect them. When you finish the EPP, you machine applique it to a simply-pieced quilt top. Add some quilting and a scrappy pieced binding, and you have it!

I had a wonderful time making this quilt. And best of all, there was never time to get bored. :-)


Grandmother's Cutting Garden Quilt


Grandmother's Cutting Garden QuiltThe pattern is now available in my shop, and you can get the deeper details of materials and such over there.

It's a bit of a whopper at 48 pages, but I wanted to cover every facet of the EPP and quilt-making processes in a beginner-friendly way. If you've never tried EPP or quilt-making, you can totally make this quilt. If you're an old hand, then you'll just enjoy how quickly it all comes together. Happy Stitching!

Hexie Diamond Pillow


Back in August, Sew, Mama, Sew kicked off a new series of posts on Slow Sewing. And I got all excited because these days I am all about the slow sewing. I've come to treasure the quiet pace and close focus of English paper piecing as a form of meditation and healing.

…And so I emailed Beth and said "please, please, please let me do a post for this series please, please, please." (Paraphrasing there.) And she welcomed me into the slow-sewing fold, and so I made this pillow!


Hexie Diamond Pillow


I used 1" hexies, which are perhaps the least demanding, most relaxing-to-use shape for EPP. And I got to employ some wonderful scraps I've been hoarding. I had a lovely time making this baby!

You can get my full how-to over at Sew, Mama, Sew. And be sure to peruse the rest of the Slow Sewing series. It's awesome reading.


Pages