You are here
How to Make a Hexie Butterfly Pillow (with a little EPP)
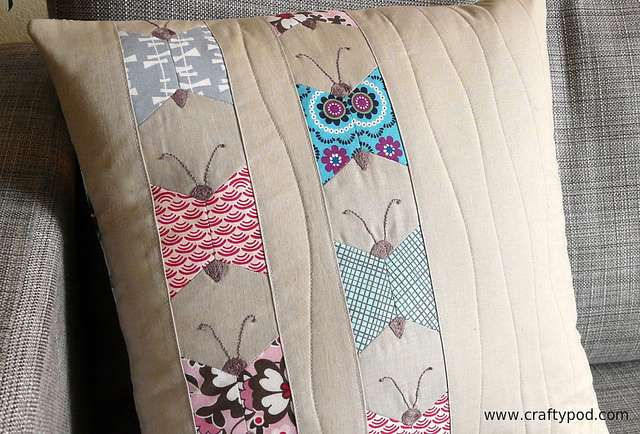
It's probably no secret by now that I loves me some EPP. It's a technique I use every time I want to make a patchwork design that would be a bit of a pain in the patootie for me to execute by machine. (As in: anything with Y-seams.)
So for this project, I used good old hexies to make the patchwork strips, and then machine-sewed those to larger pieces of fabric. It's a very forgiving project, and gives you both EPP enjoyment and quick gratification.
You'll Need:
- • 5 fabric scraps (for butterflies)
- •About 1/3 yard of background fabric (linen, solid or small-print cotton - you decide)
- •1/2 yard of backing fabric (again, linen or cotton)
- •20" square piece of low-loft cotton batting
- •Thread that coordinates with your fabrics
- •Hand-sewing needle (a sharp or between in a length you like)
- •Hexie EPP templates (see below)
- •Paper scissors and fabric scissors
- •Seam ripper
- •Six-strand embroidery floss
- •An 18" square pillow form
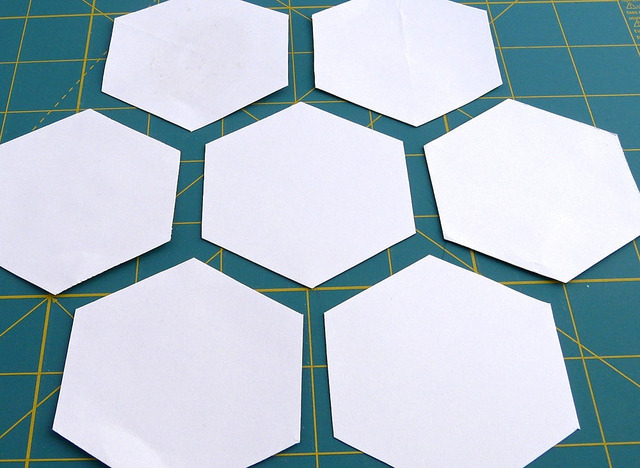
This project uses hexies with 1 3/4" sides. You can download and print this pattern and cut out 27 hexie templates for this project. Or, if you'd rather not do all that cutting, you can order up a pack of lovely pre-cut templates from Paper Pieces.
This video shows you how to cut the fabric and baste your hexies. You'll need to baste:
- •9 hexies in your background fabric
- •18 hexies in butterfly fabrics (two hexies per butterfly, nine butterflies total)
I recommend basting only through the fabric, not the paper templates, for this project. (It's the first method shown in the video.)
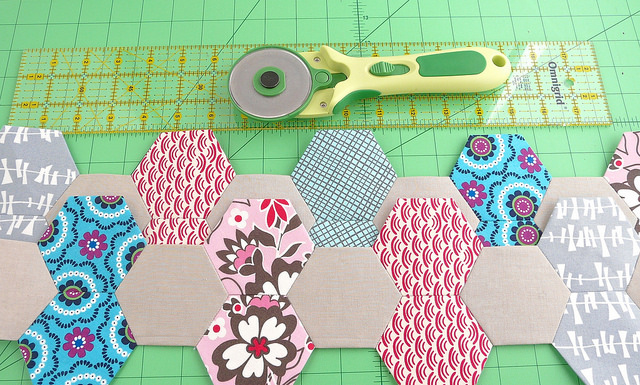
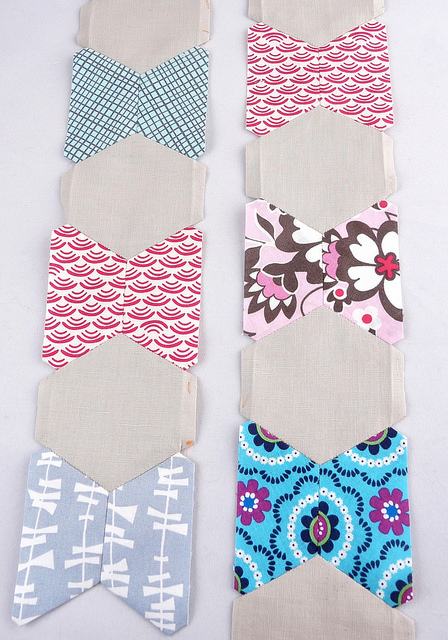
I made two butterflies each of four of my fabrics, and one butterfly of the fifth one. But you can really do anything you like here - make them all in just two fabrics, or make each one a different fabric.
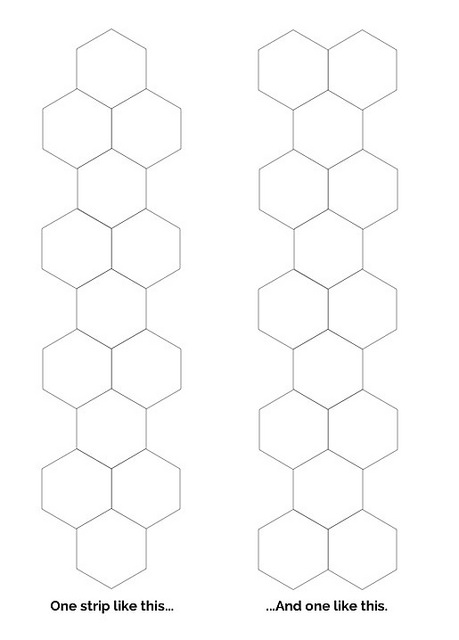
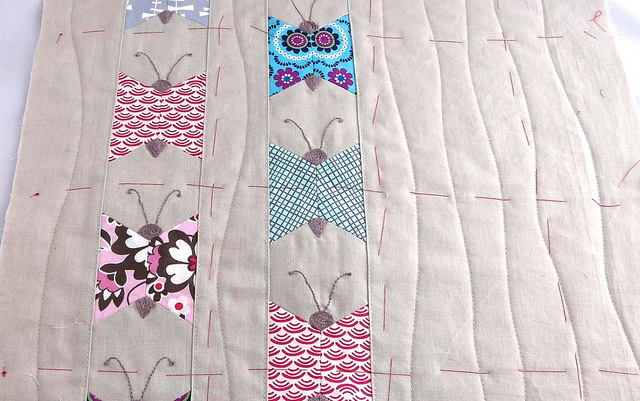
Now, whipstitch those hexies into two strips, arranging them as you see here. Use your butterfly fabrics for the sections where the strip is two hexies wide. Make sure you're scattering your various fabrics along the two strips as you like. I always find it helpful to lay my hexies out before I sew, so I know what goes next to what.
(If you need help with the whipstitching part, try this video.)
Press your completed strips with a hot iron. I recommend no steam for this pressing. Here's why: a lot of times, when you work with hexies, you end up lining the grain of the fabric every which way. This isn't a big deal for EPP generally, but when you're working with thin strips like these, steam can accidentally help stretch the fabric this way and that as you press, and that will mean your strips don't end up being straight. So: no steam, and always press your iron straight down; don't slide it around. Then you'll be just fine.
When you've pressed the strips, you can take out the paper templates. Just reach in at the edge of each patch until you can grab the edge of the paper. Then peel it out. Save those templates for a future project!
…Aaaaaand then press your strips again once those templates are all out.
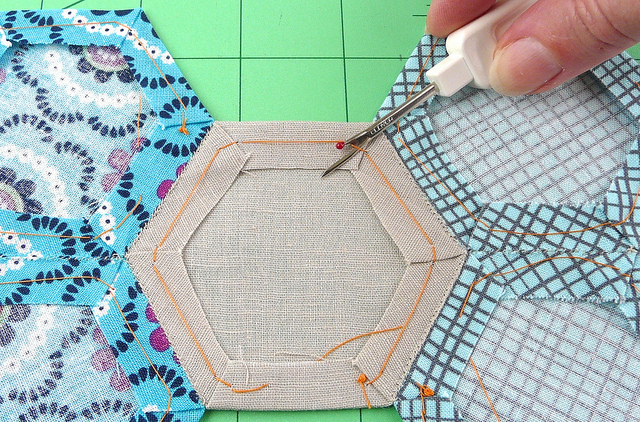
We need to trim the long edges of these strips straight now. The first step to that is to press the sides of those single-hexie sections out flat. So take a seam ripper and gently cut the two tack basting stitches at the corners closest to the edge. Pull out that bit of the basting thread. (You can leave the rest of the basting there - it's not hurting anything.)
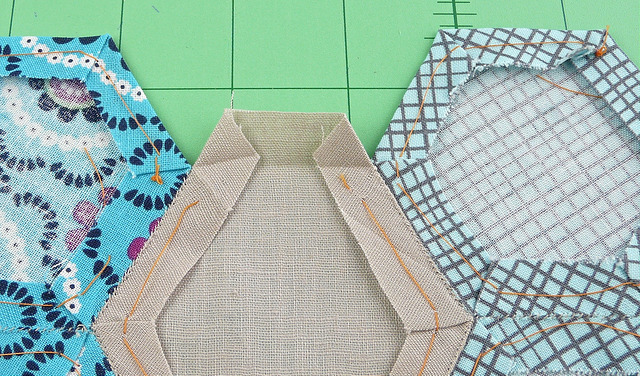
Then, open out the side edges of each background hexie and lightly press them flat. (Leave a bit of the original crease in there – it'll come in handy in a moment.)
Don't do anything at all, by the way, to the two-hexie sections of the strips.
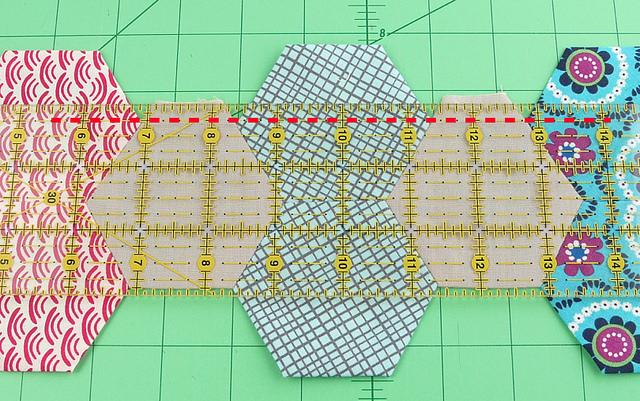
OK. Place one of your strips on your cutting mat now, and line your ruler up on top. Your alignment point here is a little tricky, so let's be very careful…
Do you see how the points of the hexies along the edge of the strip form an invisible line? Take that line, and line your ruler's 1/4" line up along it. (I put a big red dotted line on the image above to show you exactly where that is.)
>
…Now here's the thing about EPP. It's hand-sewn. Hand-sewn things sometimes have little variations. There's nothing in the world wrong with this.
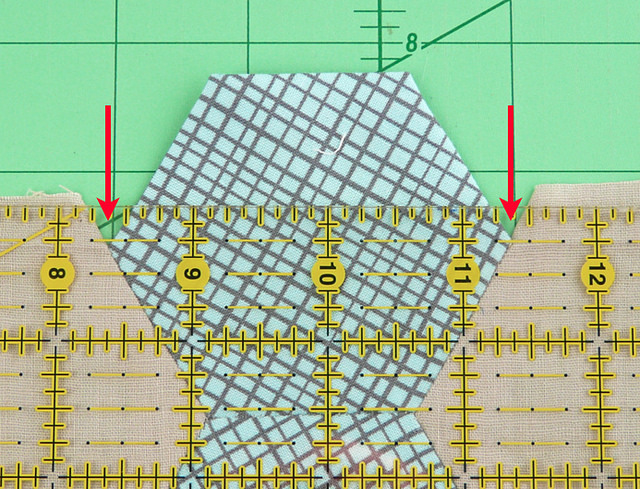
As you're lining your ruler up, you'll likely notice that there are some little variations in how well these notch points line up on that 1/4" line. Some will be right on, some will be slightly off. It's okay. Get the best happy-medium alignment you can, and it'll all work out.
Trim both EPP strips in this manner, and then you're ready for the sewing machine.
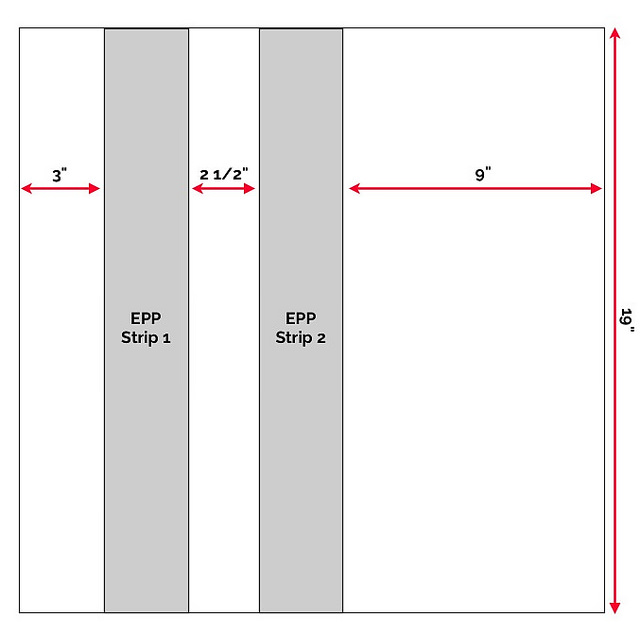
Here are the pieces to cut from your background fabric - seam allowances are already added to these measurements (and a little squaring room).
Sew your EPP strips to these background strips in the order outlined above. Use 1/4" seam allowances. Press the seam allowances away from the EPP strips.
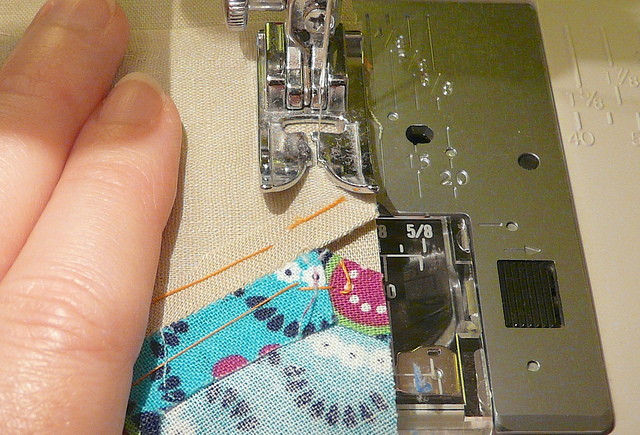
I recommend always sewing your seams on the EPP side - that allows you to make sure those little notch points in the patchwork are getting caught in your 1/4" seam. It also helps keep the EPP seam allowances from moving around.
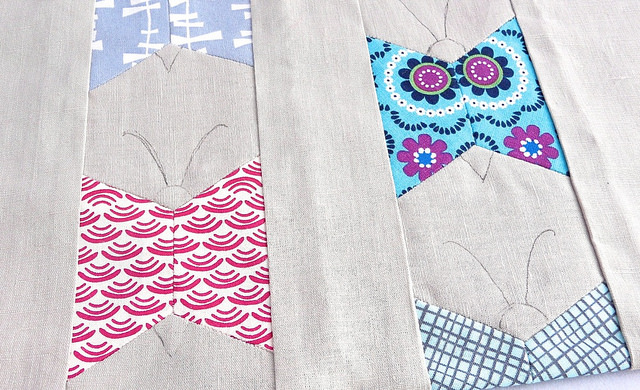

If you want to add bodies and antennae to your butterflies, you can use my template to trace from, or you can hand-draw your own. I like a FriXion pen for this step - its marks remove with the heat of an iron. I drew the outlines right on the pillow top, stitched over them, and then pressed to erase any bits of line still showing.
I used split stitch to fill in the bodies and back stitch with a french knot for the antennae. You can put the pillow top in an embroidery hoop, but be careful about stretching your seams out too much.
(Many thanks to Sublime Stitching for the excellent stitch how-to's I linked there. I'm also using their awesome floss here!)
When your pillow top is all sewn and stitched, square it to 18". Then cut a piece of batting to the same size and a piece of muslin the same size.
Stack these three squares together: muslin, then batting, then pillow top. Take a needle and thread and make big basting stitches through all layers. I like to do three rows of basting horizontally and three more vertically. That holds everything together while you quilt.
I recommend using a walking presser foot for quilting. Inspired by Kevin's awesome book, I just did some loose vertical lines. But if you like to get fancy with the free-motion quilting, that would look awesome, too.
When the top is quilted, pull out the basting.
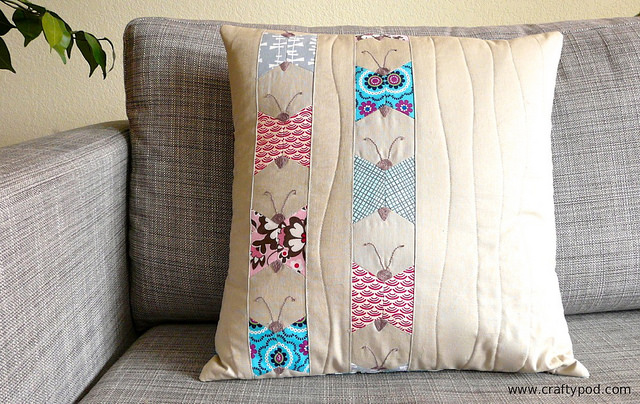
I made an envelope back for my pillow. Here's a simple style tutorial over at The Happy Housie, and a slightly more complicated style at Lia Griffith.
…And that's it! Piece and enjoy, my friends.


![[Valid RSS]](../../../sites/files_cp7/valid-rss.png "Validate my RSS feed")
Comments
Very cool! Love how you lined up the design in the blue one!
I love this project! It's so adorable!
What a super cool way to use hexies! It's neat to see them used in such a neat (and cute) way. Awesome project!
So good! My granddaughter loves butterflies so am going to incorporate this design in the quilt I am making her. Thank you for the inspiration and great instructions.