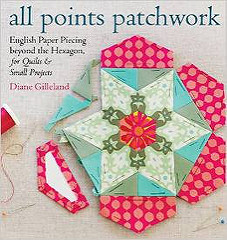
You are here
How to Make Happy Hexie Pins
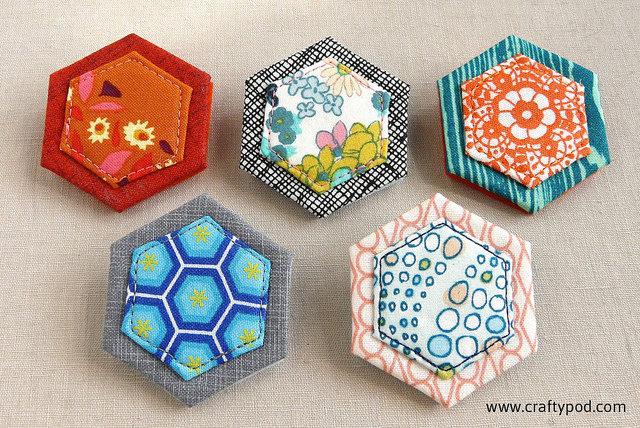
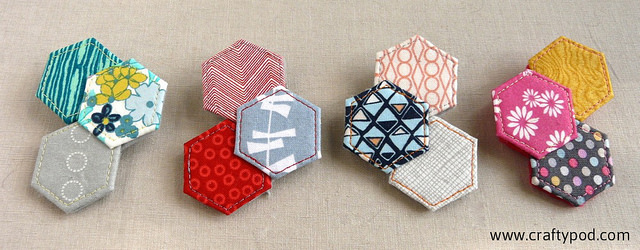
I made a whole bunch of these pins to take to Craftcation, and they were a surprisingly big hit, so I thought I'd share a how-to. They're super fun to make, and an excellent use for little scraps.
You'll need:
- Stiffened felt in white or a light color (available at many big box craft stores, or online)
- • Cardstock
- • Fabric scraps
- • Craft glue
- • Sewing machine and coordinating thread
- • Hand-sewing needle
- • Felt
- • 1" pin back
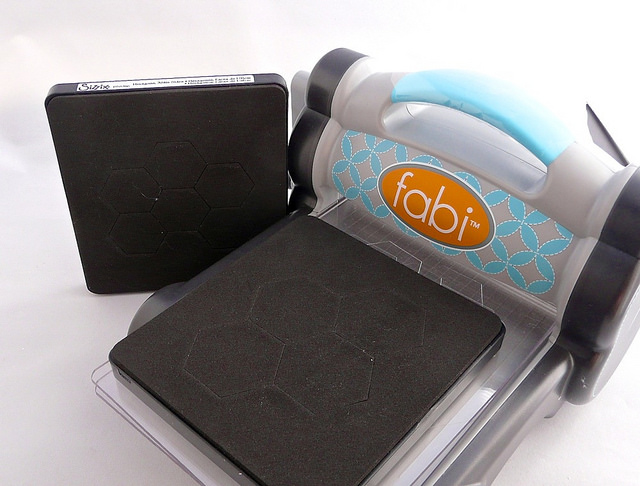
So, Sizzix was kind enough to sponsor not only Craftcation, but the EPP class I taught there. They sent me one of their Fabi cutters ahead of time to play around with. This machine was the inspiration for these pins – I realized that I could quickly cut multiples of perfect hexagons, so making pins by the dozen would be easy.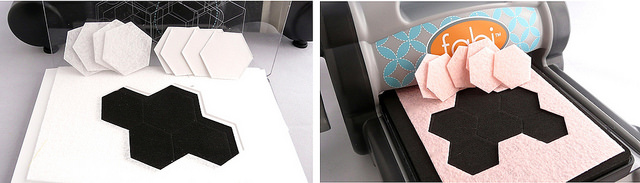
I used the 1" and 3/4" hexagon dies for this project, but really you could use any size you like. For the two styles of pin I made, I did these diecuts:
- • With the 1" die, I cut some stiffened felt, some regular felt (not pictured, sorry) and some card stock.
- • With the 3/4" die, I just cut the stiffened felt.
(If you're unfamiliar with the Sizzix and want to see this in action, watch this video.)
With everything cut out, you can set the cardstock and regular felt hexies aside until later. The stiffened felt hexies, we need to cover with fabric.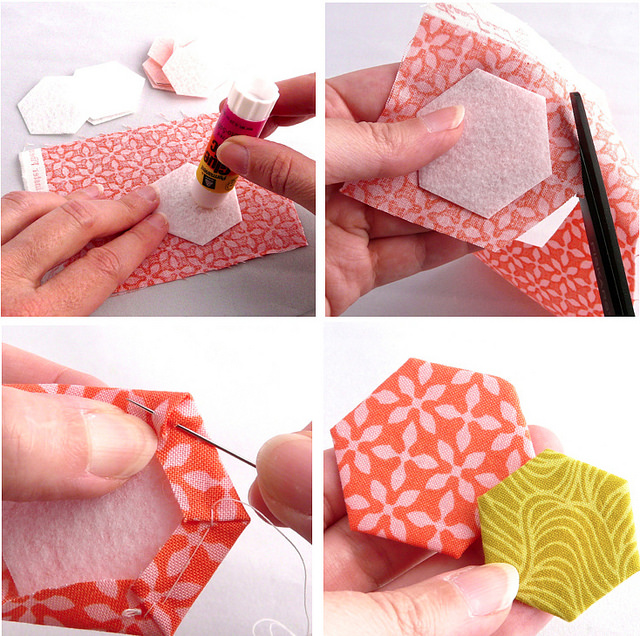
I used my go-to method of EPP fabric cutting and basting for this project. (It's the first method I share in this video.) You just need to end up with fabric smoothly covering the stiffened felt, and no basting stitches visible on the front.
- • For the two-hexie style pin, you'll need to baste one 1" hexie and one 3/4" hexie.
- • For the three-hexie style pin, you'll need to baste three 3/4" hexies.
In case you're wondering, of course you can cut your fabric hexies for this project with the Sizzix! I chose to cut mine by hand here because I'm a total fussbudget about using directional fabrics and lining the designs up on my hexies. But you could use these Sizzix dies for fabrics:
- • A 1 1/2" hexie die would cut fabrics for your 3/4" stiffened felt.
- • A 1 3/4" hexie die would cut fabrics for your 1" stiffened felt.
(I recommend having about 3/8" or more of fabric sticking out from all sides of your stiff felt hexies before you baste - that makes it much easier to baste without stitching through the stiffened felt. If that last sentence made no sense, just watch the video.)
So, for each two-hexie pin, you should have one large and one small fabric-covered hexie. For the three-hexie pin, you should have three small fabric-covered hexies.
These pins get their sturdiness partly from glue and partly from machine-stitching. The first step is to glue the hexies together. For the two-hexie pin, just glue the smaller hexie on top of the larger one, centering them to each other. You can see above that I'm not using a ton of glue here. You want to anchor the pieces together, but not create a thick layer of hardened glue that your sewing machine will have to struggle through later.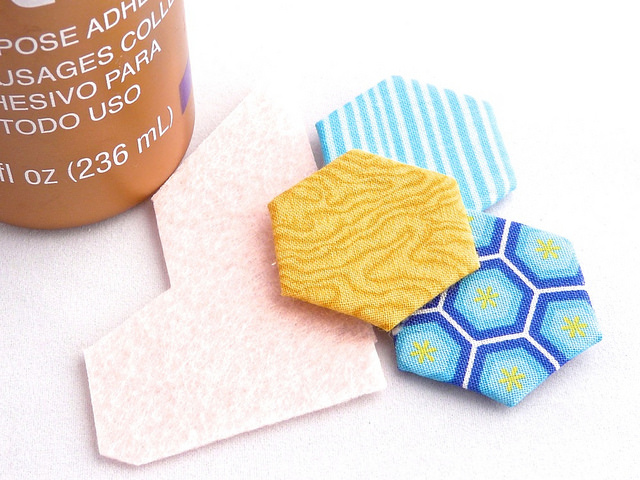
For the three-hexie pin, arrange your hexies in a configuration you like and use a similarly small amount of glue to anchor them together. I like to keep some scraps of my stiffened felt on hand to help keep the hexies level as they dry. Just slide it under any section of the pin that's showing a tendency to sag while the glue's wet.
Let the glued hexies dry for several hours, or even overnight – you want them to be firmly in place before you sew on them.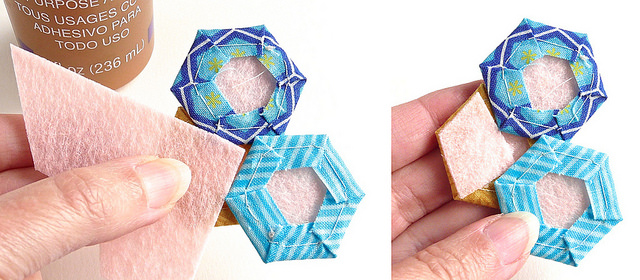
It's also important to glue an extra bit of stiff felt to the back of the three-hexie pin, so it has a consistent thickness throughout.
Here's what I usually do: I take a scrap of the stiffened felt, and trim a corner so it will nest reasonably well into the space at the back of the pin. Then I glue it down, letting the glue dry for 20 minutes or so. And then, I trim the rest of the felt flush with the edges of the pin. (As you can see, it doesn't need to be any particular shape as long as it fills in the gap on the back.) Leave this to dry another several hours.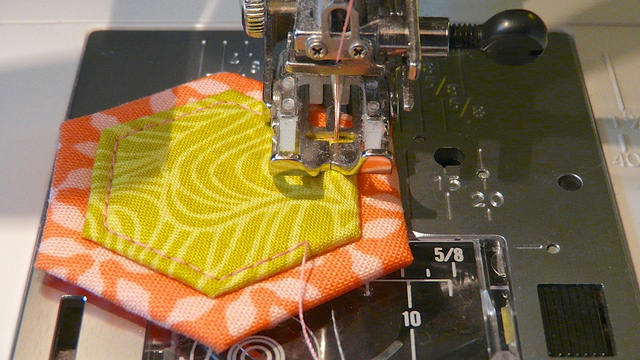
Now that the glue is dry, it's time to pop your pin on your sewing machine. Stitching through all the layers will really firm up your pins and make them very sturdy.
For a two-hexie pin, stitch about 1/8" from the edges of the topmost hexie. Choose a thread color that complements your fabrics, and put any old color on the bobbin - it won't show. I prefer to use a walking presser foot here for best results. Start stitching at the center of one side, and don't reverse stitch at the start or end of your seam. Instead, sew your way around until you reach your starting point, and then stitch a couple stitches over. Then cut the thread with some tails.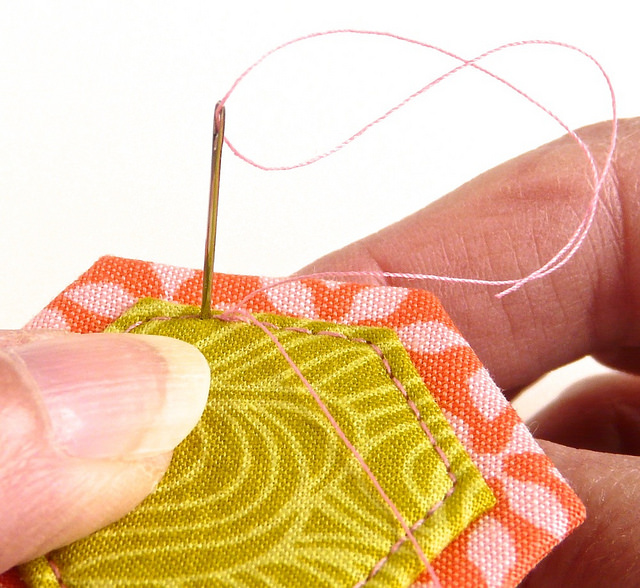
Thread the tails on a hand-sewing needle one at a time, and pull them to the back. Tie the thread ends in a double knot and cut them close to the pin. This method creates a nice finish to the topstitching.
For a three-hexie pin, stitch about 1/8" from all three hexies, starting with the center one. Since you're stitching on three separate hexies here, you'll of course end up with more thread tails to pull to the back.
(And incidentally, you could totally stitch around these edges by hand with a tiny running stitch, if that's your sort of thing.)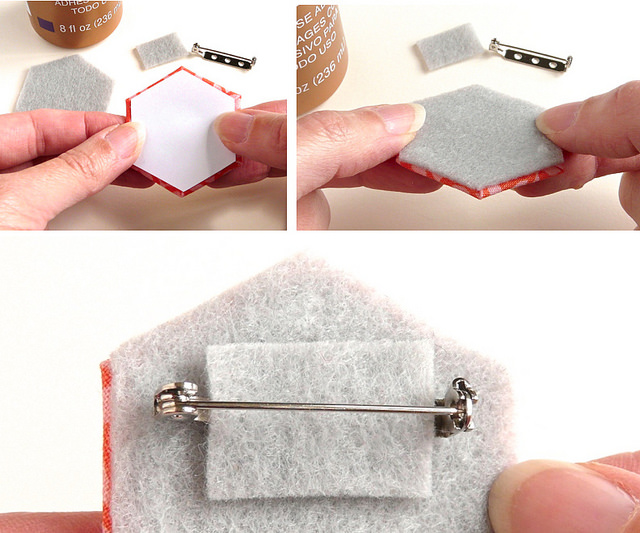
Finally, it's time to add a pin back and backing, and it's time for the hexies you diecut from cardstock and regular felt to see some action.
For a two-hexie pin, trim a little from the edges of the cardstock hexie - you want it to be a tiny bit smaller than the pin, so it won't show at the edges. Glue the cardstock to the back of the pin, centering it. Then, glue the regular felt hexie on top of that. Try to get the glue near the edges of the pin here, so the felt is well sealed.
Lastly, glue on a pin back, and if you like, a little scrap of felt to cover it.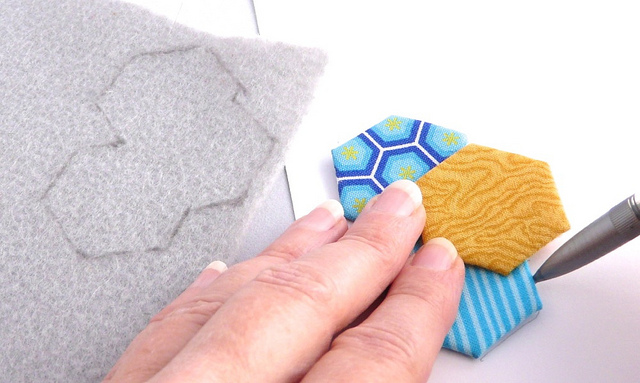
If you're making a three-hexie pin, then you'll need to trace your finished pin onto cardstock and regular felt. Cut the cardstock a little inside your traced lines so it comes out a bit smaller than the pin. Cut the felt out to match the pin. Then glue it all together as above.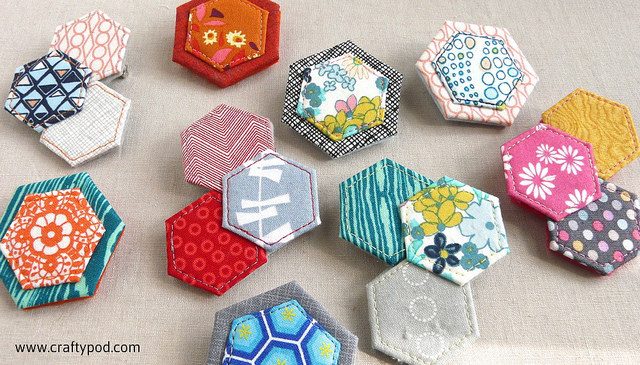
And that's it! Happy pin-making!


![[Valid RSS]](../../../sites/files_cp7/valid-rss.png "Validate my RSS feed")
Comments
These are fabulous! I'm fussy about cutting directional fabrics on EPP as well. The extra effort is definitely worth it.
I. Love. Them. Madly! Simple, sweet - and your color sense is off the charts, my dear.
Thank you so much, Michelle! I sweat bullets and kittens over every fabric choice, so your comment totally makes my week!
Hi. I made a king size hexagon quilt and wonder if I can use this method for the borders.They are all paper pieced. Thanks
.
Hi, Wendy - Tell me more about the method you're interested in? Is it the stiffened felt I'm using here, or the basting method I use, or something else?
You might also want to take a look at this tutorial on Badskirt - Amy has a wonderful method for finishing the edges of a hexie quilt: http://badskirt.blogspot.com/2010/05/tutorial-finishing-you-hexie-quilts...
...And congratulations on finishing such a huge hexie project!
I'm in love!! I've got a Craft Gossip post scheduled for this evening that links to your tutorial: http://sewing.craftgossip.com/tutorial-happy-hexie-pins/2014/05/01/
--Anne
Oh, how exciting - thank you so much for that, Anne!
This is my favorite thing. But then, you already knew that.
Thank you for this tutorial. Love the idea.
These are brilliant! Thank you for the tutorial. I love small scaled projects and your pins are so pretty!
Woaw !! great !
A great idea for a small pin cushion..just add some stuffing and put a back on it and it will work out perfectly...
I love hexies. Thank you for sharing this great idea. Regards, Marja
These are so, so amazing. I want to make a ton of them! I love them so much!
such a lovely idea to make brooches of them, i never had thought of this idea.
Ones i have made a afghane of this methode of old pieces of cloths of mine.
Only my exhusbant didn't wanted to give it back when he got the bed. but i have still good memories of working on it.
Thank you for this fun idea. Like it!!!