You are here
How to Make a Needlepoint Pendant (Yes! With Plastic Canvas!)
I get thousands of emails each week, begging me to offer more plastic canvas coverage on this blog.
(…Okay, well - perhaps that actually happens only in my mind. But still.)
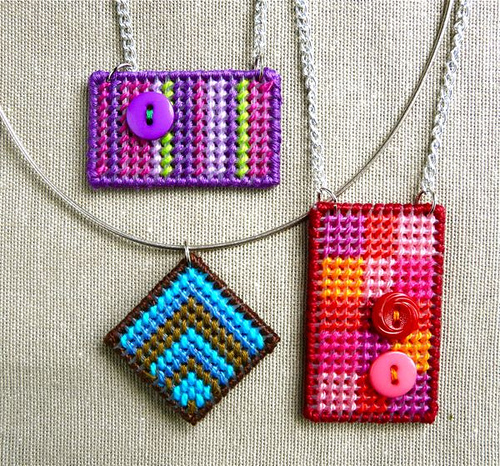
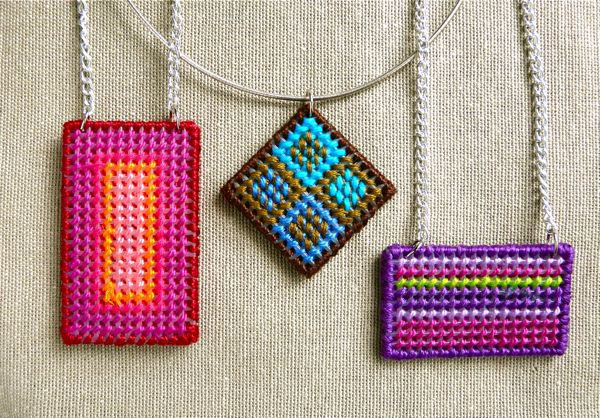
I've been noodling with these needlepoint pendants lately, and liking both the process and finished product. They make up quickly, and use up odds and ends of embroidery floss. Plastic canvas makes a great base for these, because it adds a "heft" that helps the pieces drape well.
Also, it's plastic canvas.
But not just any old plastic canvas!
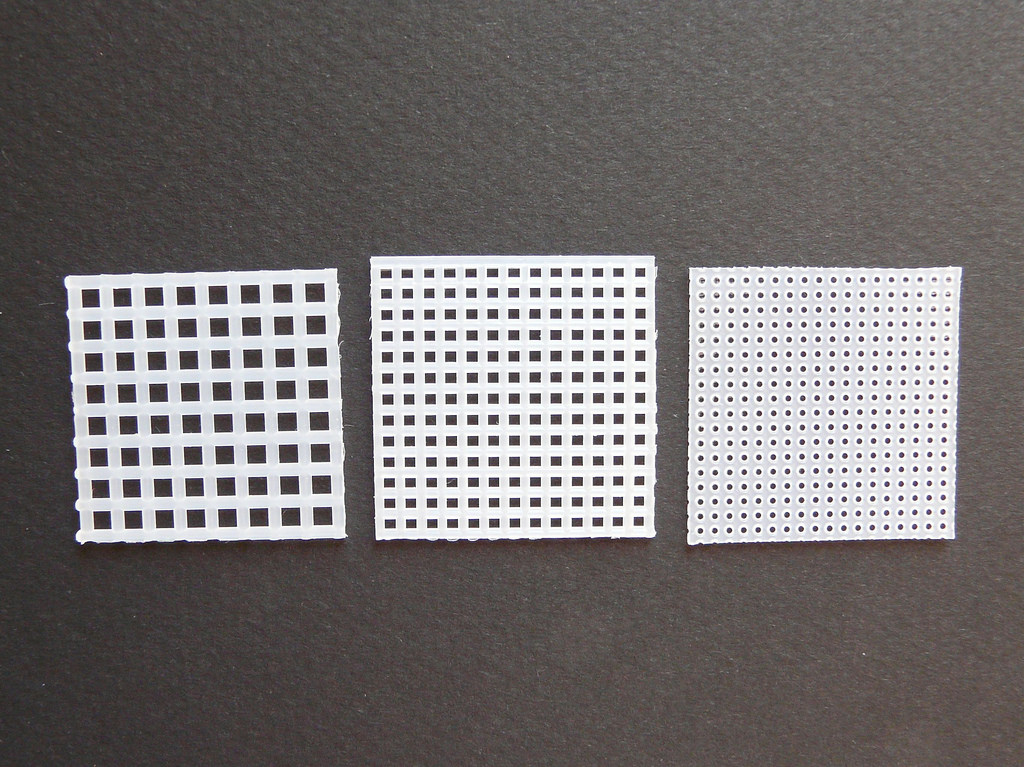
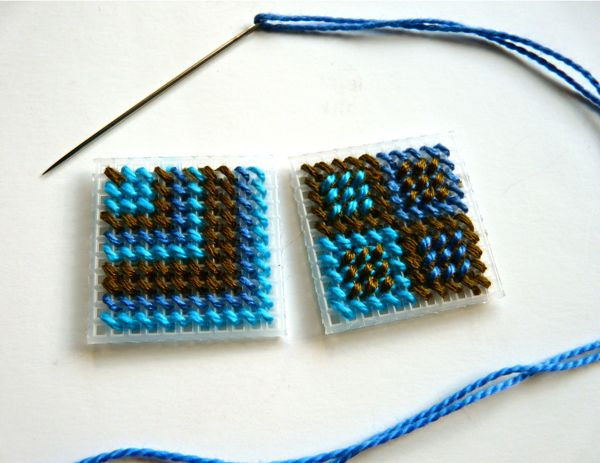
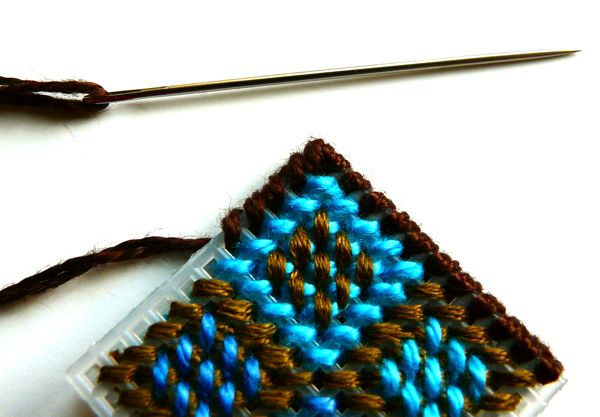
I used 10-count PC for this project, which is a different animal from the bigger 7-count stuff you usually see at your local craft store. (In the photo above, it's the stuff in the center. The "count" refers to the number of squares per inch, by the way.) 10-count has a finer finish, which takes very nicely to six-strand or pearl cotton embroidery floss.
If you can't find 10-count canvas locally, you can get it online. It's great stuff! (If you're curious, the canvas on the right is 14-count. I've made little gift boxes with it.)
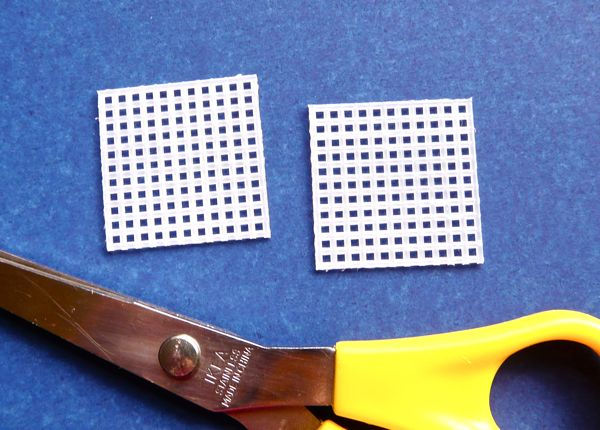
…So, to begin your pendant, cut two same-size pieces of canvas. You can make them any size and shape you like. You may have a specific needlepoint design in mind - and in that case, you'd want to count the number of squares you'll need as you're cutting the canvas.
Or, you can take my patented lazy approach, and just cut a shape and figure out the needlepoint later.
Then, stitch both pieces. I like to stitch them differently, so my pendants are reversible, but you can also make them identical. I'm using a crewel needle here, because it fits nicely through the canvas holes, and a single strand of pearl cotton. If you're using six-strand floss, just use all six strands.
I'm using good old Continental stitch and just playing with colors, but remember - there are so many interesting needlepoint stitches in the world! These are tiny blank canvases - so have fun!
(Incidentally, if you want to sew buttons or sequins to your pendant, this is the time to do that, too.)
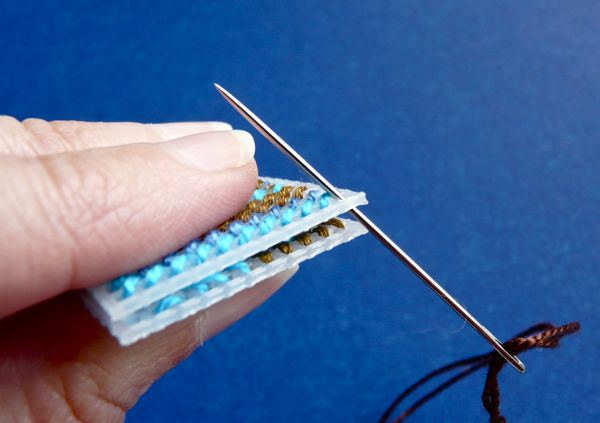
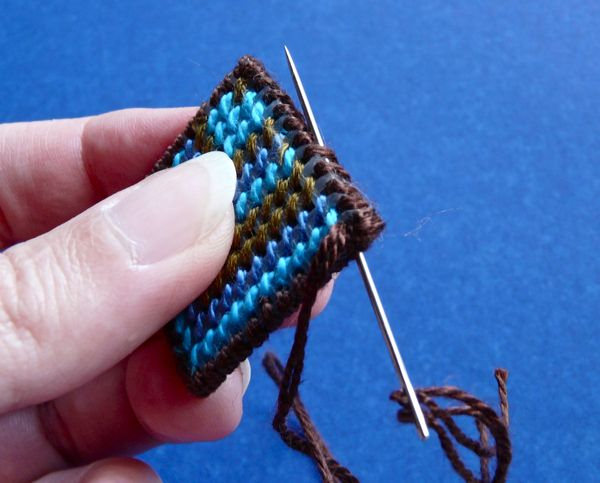
Now, we'll stitch the two pieces together. Place them so the right sides are facing out. Thread your needle with a double strand of floss - it provides better coverage at the edges than a single strand.
Pass the needle up through the top layer of canvas only, as shown.
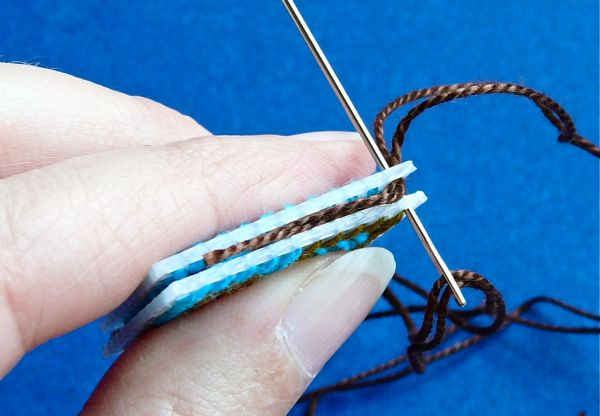
Pull the needle through until you have about 1" of floss. Lay this between the two pieces of canvas, as shown. Then take your next stitch by passing the needle up through both layers of canvas together.
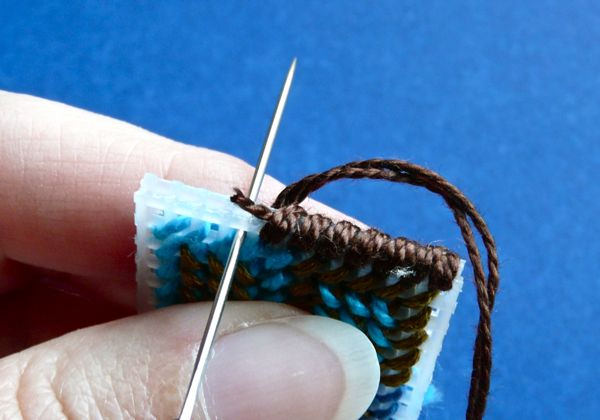
Repeat this stitch to cover the edges of the canvas. (It's called a whip stitch, by the way.) As you stitch, catch that tail of floss in your stitches, as shown here.
Stitch your way around the pendant. To fully cover each corner, take three stitches in the corner hole.
When you've stitched all the way around the pendant, it's time to finish off your floss. To do this, pass your needle carefully between the two layers of canvas, and back out the side, as shown here.
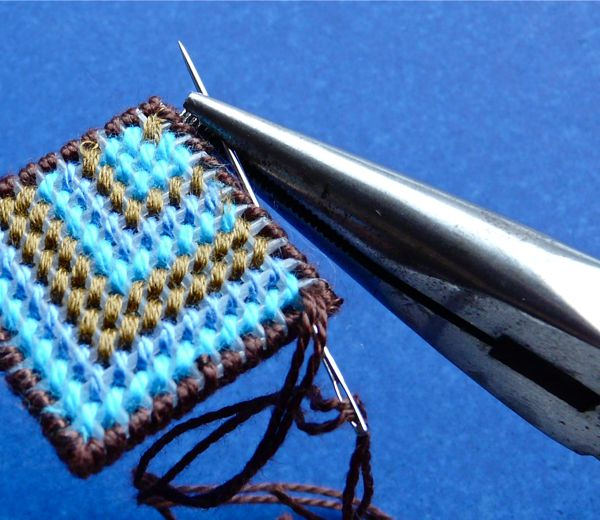
Use a pair of needle-nose pliers to pull the needle and floss through. Seriously, you'll need the pliers. Unless you possess super-human strength.
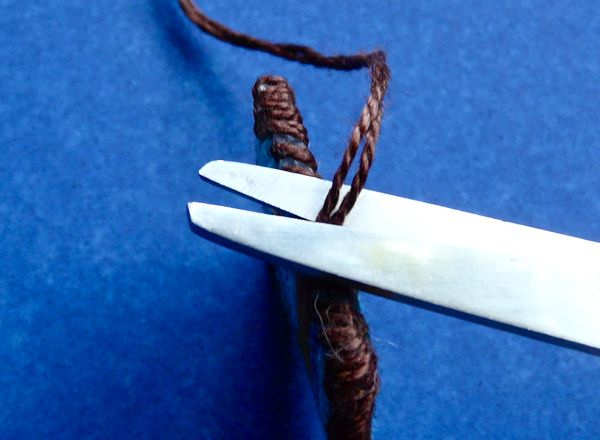
Clip the excess floss close to the edge of the pendant.
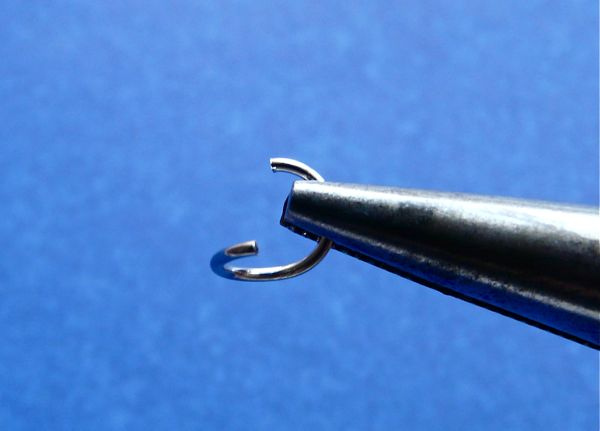
Get a nice, big jump ring, like a 7mm or 8mm. This is the proper way to open a jump ring - you twist it open a bit.
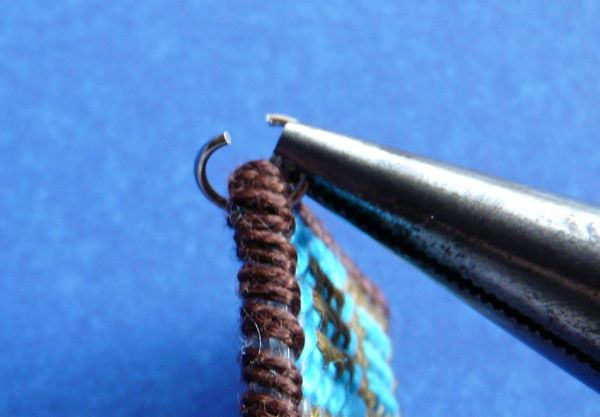
Carefully feed the jump ring through the canvas - pliers are helpful here, too.
If you want your pendant attached to a chain, you can also feed the chain link onto the jump ring now.
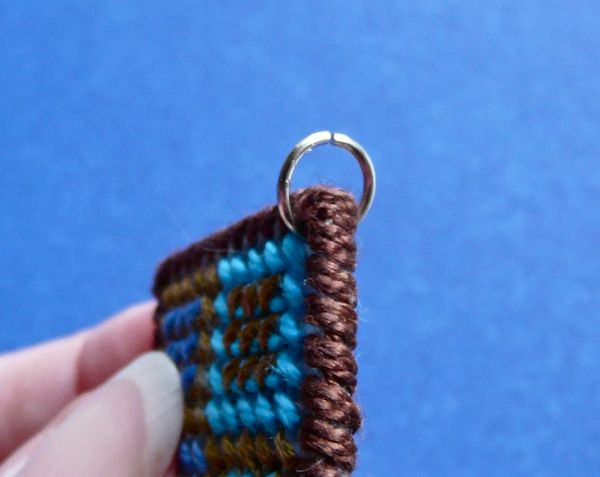
Then, close the jump ring. (Here's how, if you aren't familiar.)
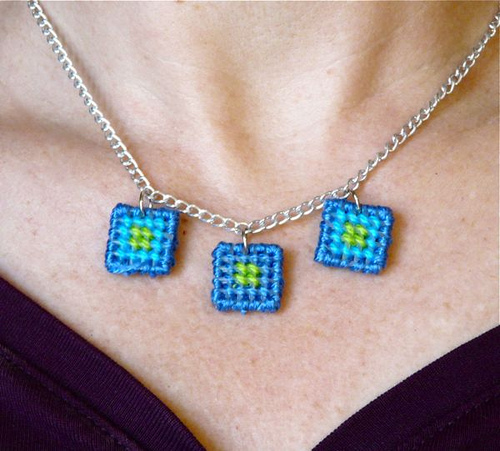
…And you're done!
I'm thinking these have some interesting mixed-media possibilities, because you can add buttons and beads easily, or embroider on top of the needlepoint. You could even applique some fabric over the needlepoint. Heck, you could even try stamping or painting over it.
If you make one of these, I'd love to add a photo of it to the CraftyPod Flickr group! Just email me or comment here, won't you?

![[Valid RSS]](../../../sites/files_cp7/valid-rss.png "Validate my RSS feed")
Comments
ohh, easy and beautiful!!!
;)
Very, very nifty. Not much of a plastic canvas person, but this looks like something I will need to try.
Diane, you are a genius as usual! I love these!
Cute~ You can get the canvas at Joanne's or Micheal's right?
Thanks, Claire! Jo-Ann and Michaels (at least here in PDX) pretty much always have the big 7-count canvas. I can find 10-count more regularly at the Jo-Ann Superstores - but not every trip.
(Yep, sadly, I do look for it every time I visit.) :-)
Thank you, Jennifer! This project is a nice, instant-gratification intro to needlepoint. :-)
I love these! I've never tried needlepoint before, but this is definitely the project to try it out!!
I just finished making one of these pendants. I am wearing it right now and keep stopping what I am doing to go look at it in the mirror ;-) It looks awesome! I used pink and green thread and a stitch called Framed Pavilion. It was the first time I've ever done needle point and I can't believe how engrossed I got in it. I am going to take photos later and email them to you. Thanks again Diane! Best thing though? I have enough supplies to make another 2 pendants :-)
oh how wonderful, they look so easy to make too, i may even try my hand at something like that because i do alot of craft work myself, kids will love this type of stuff....
wow - i really like that- i got a ton for plastic canvas yarn at the thrift store and really didnt now what to do with it - thank you for the great idea.
My daughter (who's 10) and I are super excited to try this out today. Thanks for posting it!
That's awesome! I'd love to see how yours turn out! (And does this imply that you have plastic canvas lying around your house?) :-)
I love this idea! You just set off a bunch of ideas running through my head, I hope to get started on this in the next couple of weeks.
Yaaaaay! I'd love to see how yours come out!
Those are wonderful!! Going to have to try them!
simple and cute! your tutorials always have the best photos.
i didn't know PC came in different sizes. i'll have to get some of the smaller stuff.
Thank you! Yes, definitely get some of the small stuff - so many good uses for it, and - dare I even say this out loud - it doesn't really have that "plastic canvas look." :-)
Thanks, Sarah! Warning - addictive. Is all I'm saying. :-)
OOh, true - the time requirement is just right for a craft night. So glad you like them - and thank you for linking!
Super cute! I love the colors you chose. They look great together, too - I think you should make a PC charm bracelet. ;) They'd be sweet little brooches, too. :) Have a great night!
Ooh! Ooh! Charm bracelet! That's an awesome idea. And definitely, brooches! You could probably glue these to ring blanks, for that matter. *rubs hands and cackles with glee*
Thank you! The smaller canvases are hard to find in the US sometimes, too. My local big-box craft store only has it sporadically. Thank goodness (again) for the internet! :-)
You know, you could also crochet around the edges!
Hoo-Hoooooooo, why yes you could! Dang, that's terribly exciting. *busts out cotton threads*
Why yes--the bigger kind--but we were at fabulous LYS today and they're going to order some of the #10 for us.
Oh, and then you could take little needlepoint squares and crochet them
together, or crochet the necklace chord, or, or,......!!!!!
Oh, Lordy! I'm totally making another hundred of these!
Hee Hee... it is one of my missions in life to rehabilitate the craft community's perception of plastic canvas. (The Rodney Dangerfield of craft supplies!)
Ooh, definitely - shapes would be really fun to play with. Manufacturers make lots of shapes in 7-count canvas (stars, circles, diamonds. I wonder if anyone makes them in 10-count? 'Cuz then you could even cut them down to pendant size. I'll do some searching...
MUST.MAKE.THESE! These are so gorgeous. I think they would make THE best gifts for my blogger friends. I cannot wait to find shop for supplies. I especially love the idea of making these from quilt blocks.
Oh, my goodness - that's a beautiful idea, Terri!
So cool! Love this idea...
These are gorgeous! Would you believe I have large rolls of plastic canvas left over from the '80s? (Silly question, of course you would!)... OH! OH! Another idea... I have lots of spools of rattail that I use for Kumihimo braiding. I bet that would look spectacular. Gotta go play!
Wowee, that rattail would stitch up so pretty! I love how many cool ideas everyone's coming up with here!
I love these projects. I'm going to try a few using Bargello needlepoint stitches. Thanks for sharing the step-by-step instructions. Can't wait to get started!
Althea DeBrule
http://bargelloneedlepoint.com
Wow, Althea - I think Bargello would be beautiful! I'd love to see pictures of how yours turn out!
ooh love the bright warm colours :D if people would make more things out of plastic canvas like this, it would get used more
Well, I didn't do so well with the rattail. With the 2mm size, there's no way to put it through the holes twice, even with 7-mesh. I'm trying out some nice metallic variegated ribbon yarn and that's working up nicely. I too am a big fan of bargello, so I'll be trying that as well. Photos coming soon.
By the way, are you familiar with Orna Willis? Her needlepoint is spectacular. Here is her website: http://www.ornadesign.com/
Ooh, very cool - thank you for that link! Her work is absolutely beautiful.
This looks as though it would be a great way to interest young ladies. The more adventurous could add beads for additional sparkle.
Yaaaay, Erin! I'm so glad you had fun with this project, and I can't wait to see photos! I'd love to add them to the CraftyPod Flickr group!
three done! I just posted pics of mine on Flickr, what fun! I tried using a variagated embroidery floss & it came out soooo pretty! Woohoo! Had no trouble at all finding the 10 count canvas (at Hobby Lobby)
Yours came out absolutely beautiful, Ellyn - thank you so much for sharing them! (Anyone wanting to see, go here: http://www.flickr.com/groups/1300628@N20/pool/) I love how that variegated floss looks!
Thanks for this lovely tutorial...it reminds me of my grandma. I still have many of her plastic canva creations, she was an amazing crafty lady. I'm going to make one that I bet she would have loved and it'll make me smile every time I wear it. Today is my grandparents wedding anniversary, and I hope they're celebrating together in heaven :) How perfect I read this post today...thank you.
Oh, my goodness - this comment made me smile so hard, and tear up at the same time. I would LOVE to see a picture of how your pendant comes out. And I would totally love to see your grandma's PC creations!
I will post a pic of my pendant...I can't wait to make it :) Most of her creations come out around the holidays and are carefully packed away until then...my favorite is the full plastic canvas nativity scene (so much love and time must have gone into it), a fbulous Easter Wreath and an equally amazing Santa train that I played with as a girl and now my little boys play with too! And she was ALWAYS making everyone glasses cases...such a fun memory.
Totally wonderful!
Thanks, Michelle! I hope you will! I'd love to see.
I am so interested in making new things that are both evidence of my creativity and do not involve a large investment. I have already begun wire wrapping stones and making tree of life pendants. Now, I love this idea of using these materials because I've been toying with the idea of threading some beads anyway. After I make a couple of sales, I will take some money and make this rather small investment into this idea. Thanks for the demo - I know I can do this! I'd love to come back and share something with you when I get some made! :)
Hi!
Wanted you to know that I posted a link to this tutorial today on my blog.
Nancy Ward
http://www.nancywardcrafts.com
Thank you so much, Nancy!
Pages