You are here
Free Pattern: Half Hexie Star Table Runner (12 Hexes or Less Blog Hop)
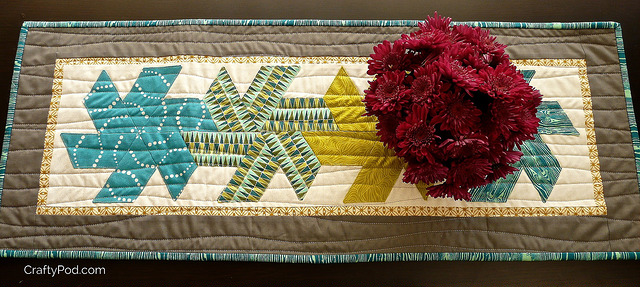
A Little Note: This tutorial is my entry in the now-concluded 12 Hexies or Less Blog Hop. I was finishing it up on the morning everything changed. Now that things are beginning their slow march toward almost-normal, I wanted to share this how-to. It's a project I'm really happy with, and I wanted to be part of this hop, even extremely late! Do take a look at the linky at the bottom of this post to see the awesome 12-hexie projects the other blog-hoppers made. For my entry in the 12 Hexies or Less Blog Hop, I initially decided I wanted to do something with quite-large hexies. But after a lot of sketching and finagling, I decided to cut my hexies in half. That way, I could re-arrange them into star shapes.
(I loves me some half hexies. You can do so many cool things with them.)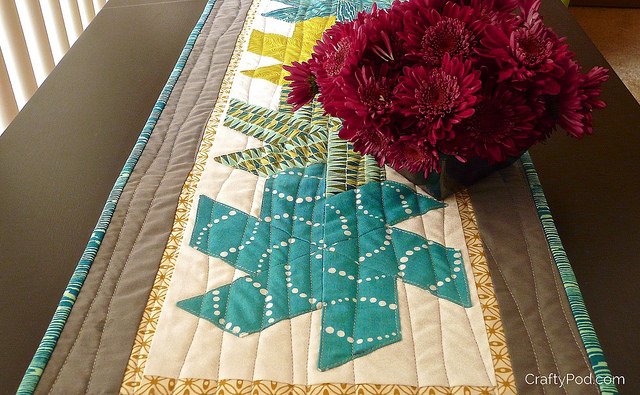
You'll Need:
- Downloadable template (or die-cutter, see below)
- 4 fat eighths of coordinating prints (stars)
- 1/3 yard of Fabric A (center of top)
- 1/8 yard of Fabric B (inner border)
- 1/8 yard of Fabric C (outer border)
- 1/2 yard of Fabric D (backing)
- 1/4 yard of binding fabric
- 15" x 35" piece of batting
- Coordinating thread
Finished size: 12" x 31 1/2"
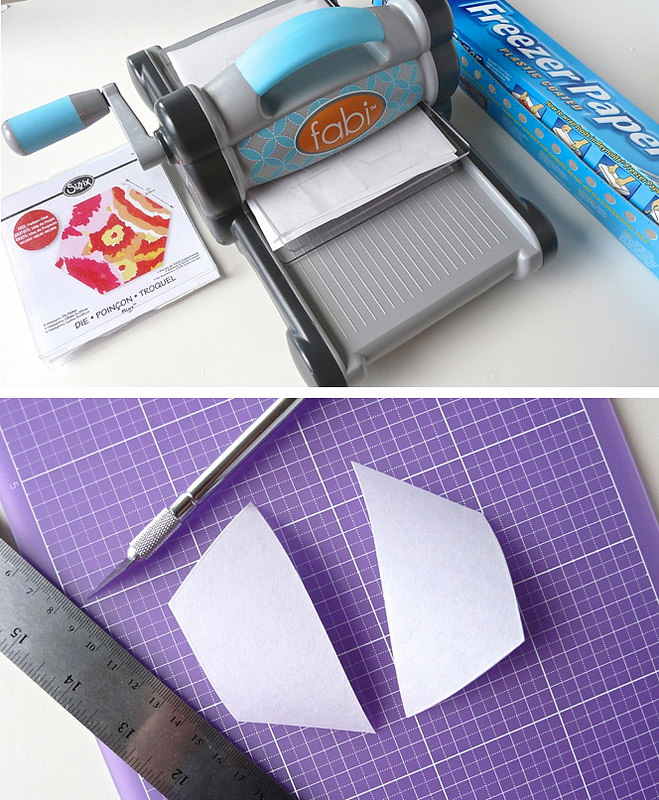
I used my Sizzix Fabi and their 2" hexie die to cut some templates from freezer paper. This was great, because usually I have to trace a shape over and over on the freezer paper and cut them out one by one. Here, I just hacked my freezer paper into twelve pieces and ran them through the Sizzix. Then I used a ruler and craft knife to cut each hexie in half from point to point. That kind of accuracy makes a huge difference when you're working with this EPP star shape.
(I also made you a downloadable template in case you don't have a die cutter.)
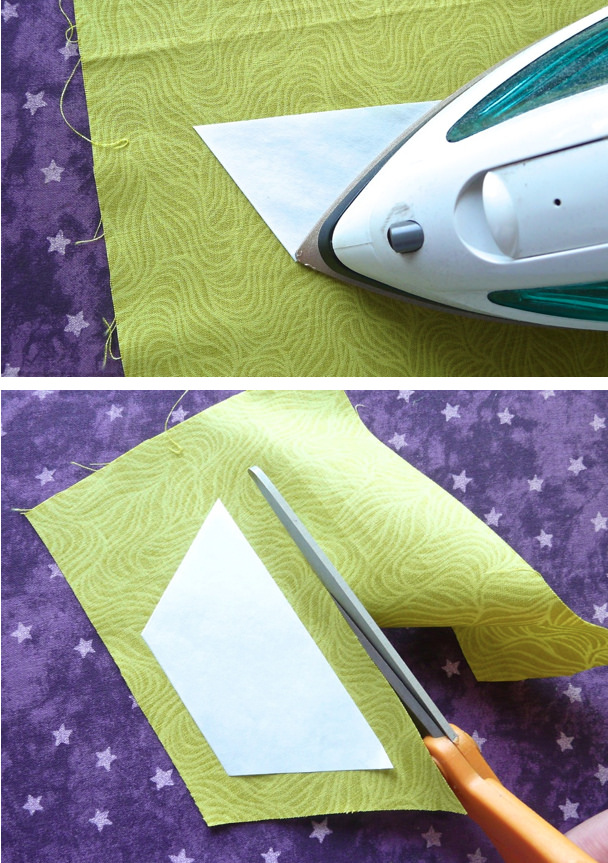
Freezer paper templates are wonderful when you're working with larger shapes in EPP. You just place the shiny side of the paper against the wrong side of the fabric and press it with an iron. That lightly fuses the paper and fabric together, and then you just trim the fabric so there's about a 3/8" margin all the way around.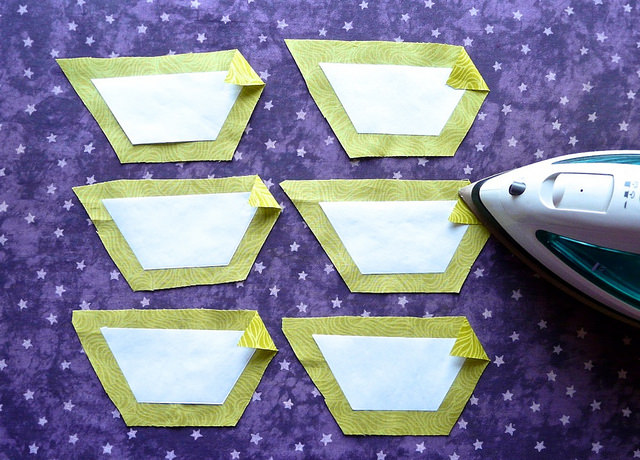
For basting, I just have one little tricky-trick for you, and then things are pretty straightforward. Before you baste, take a moment and press one corner of each fabric shape down, like you see here. Orient your patches with the long edge at the top, and then press the right-hand corner. Make sure all your templates are oriented like this, and make sure you're always pressing that same corner. That'll make sense in a moment, I promise.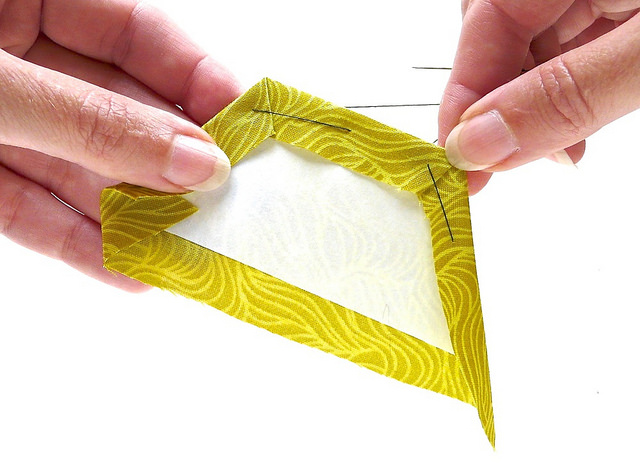
For templates this size, I always baste through both the paper and fabric, using fairly long stitches. You don't need any precise arrangement of stitches here; just make sure you get a stitch at each corner to hold the fabric edges down, and add an extra stitch or two along the long edges.
You can see this kind of basting in action in this video if you skip ahead to the 3:57 mark.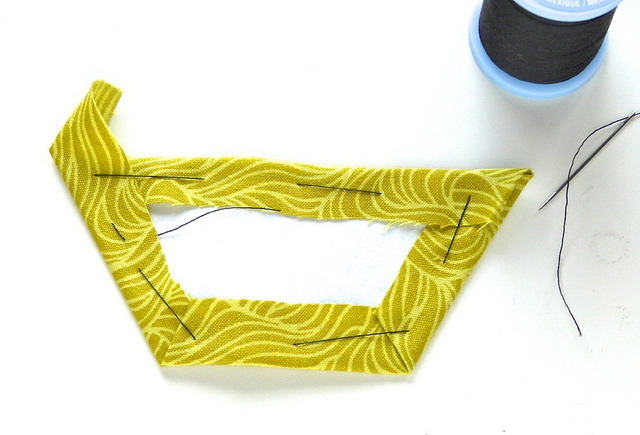
Now, remember that one corner we pressed down? When you baste that corner, fold the two edges of the fabric over the pressed part, as shown here. Secure the two edges with a basting stitch. This creates a nice, finished corner, which we'll place at the outer edges of each star.
Here's a fully-basted patch. See how one corner is finished, and the other has a "flag" of fabric sticking out of it? Good! This is what you want.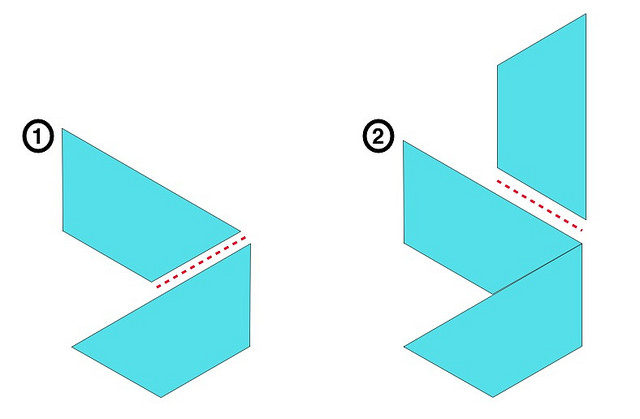
Sew the patches together with a whip stitch. (I have a sewing basics video over here.) There's one really important trick to making these half-hexie stars, and here it is:
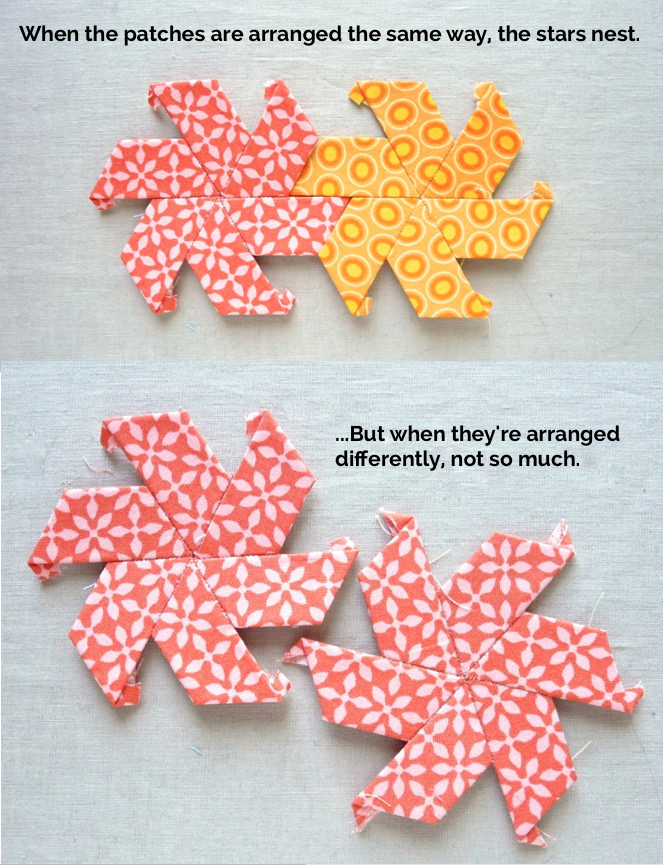
Each star has to be assembled in exactly the same way, or your stars won't nest together. I strongly recommend that you make your first star, and then keep it in front of you as you make the others. so you can make 100% sure that all those half-hexies are facing in exactly the same direction.
Just to illustrate what can go wrong - see how I made these two stars with the patches facing in different directions? They won't fit together now.
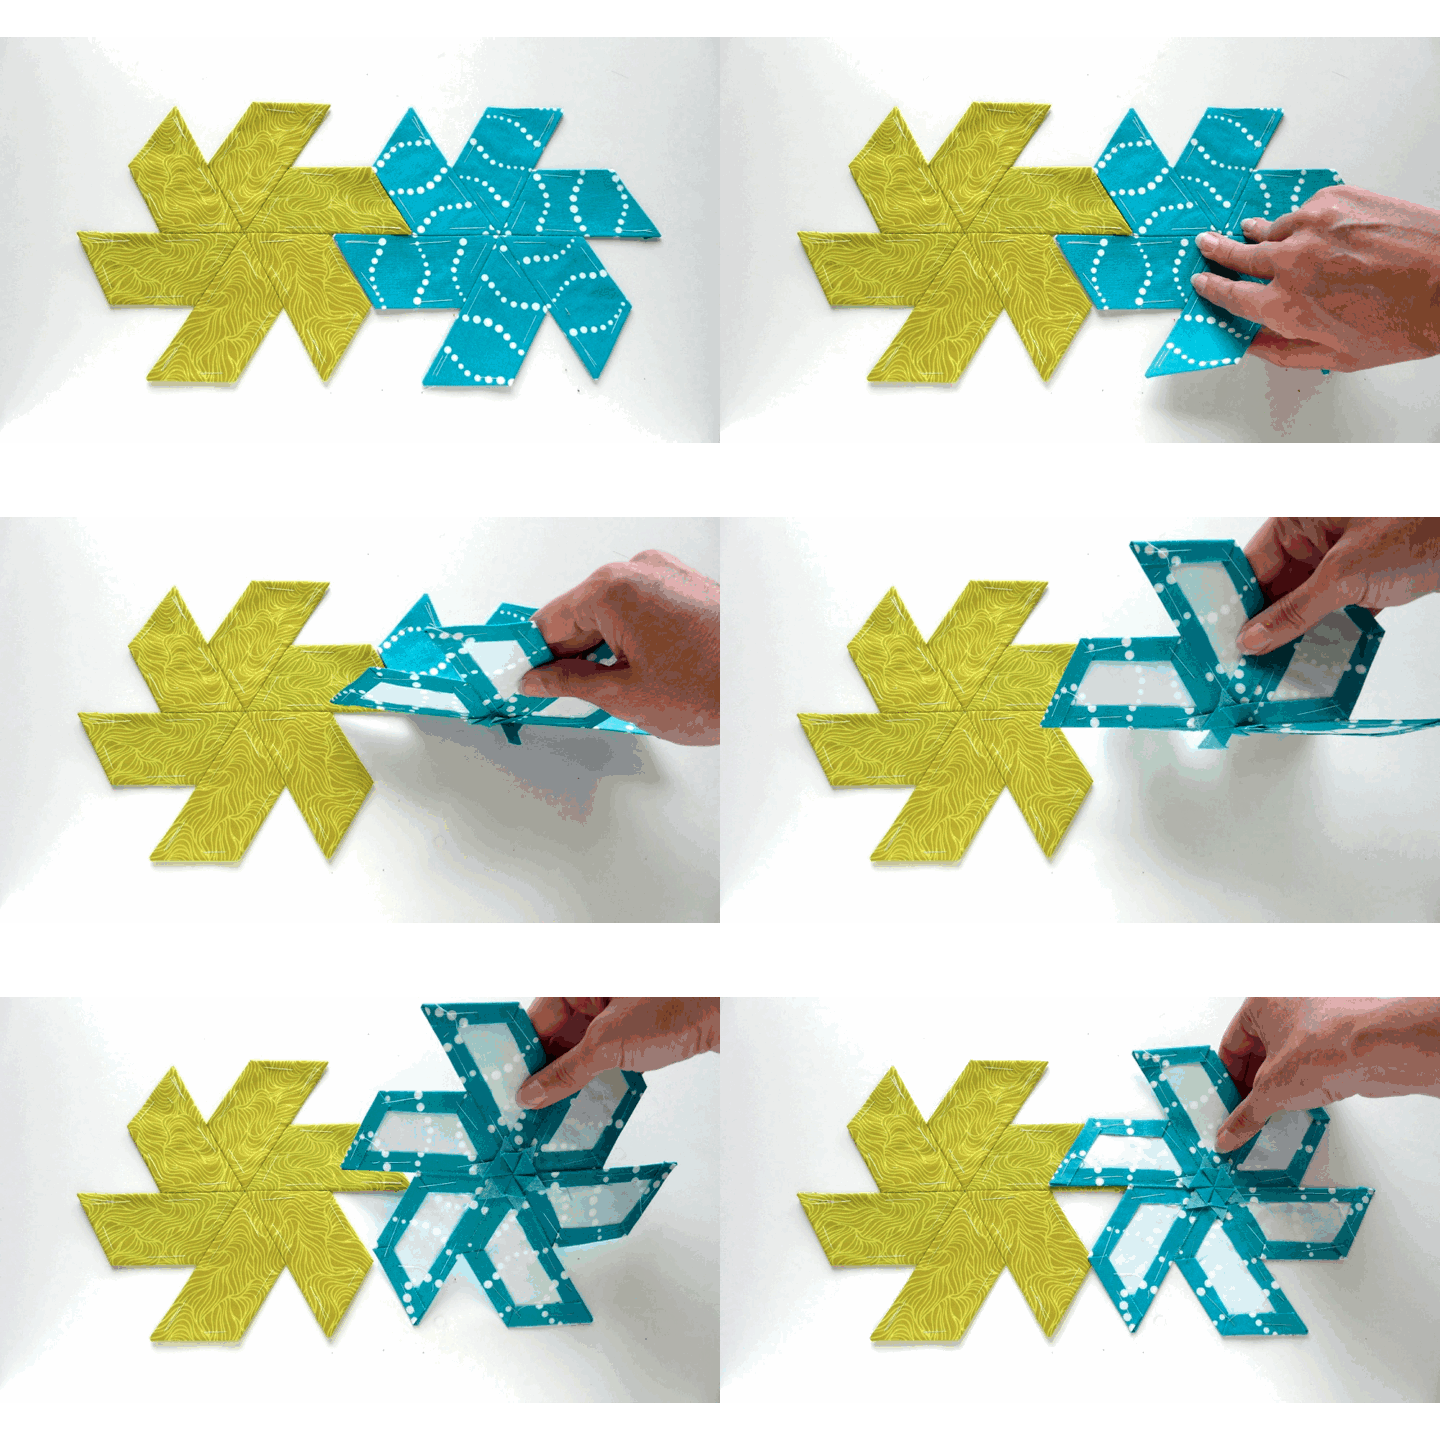
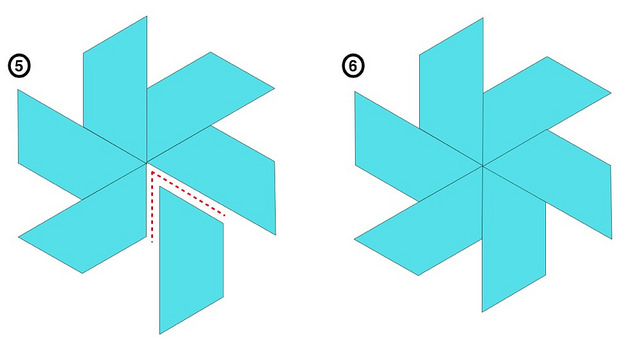
As you sew the finished stars together, it's easiest to start by nesting them together on your work surface, and then flip one over the other so their right sides are together and the edge you need to sew is lined up. It's easiest to show you this in motion, so I made an animated GIF (above). If you're reading this via email subscription or RSS reader, it's possible that you might need to click through to the post to see the animation. (And you really should, because I'm pretty dang proud of it!)
You can also see here how, as I assembled my stars, I made sure that those finished corners faced to the outer edges of the star, and the corners with "flags" aimed toward the center. See how those little flags all nest together at the center?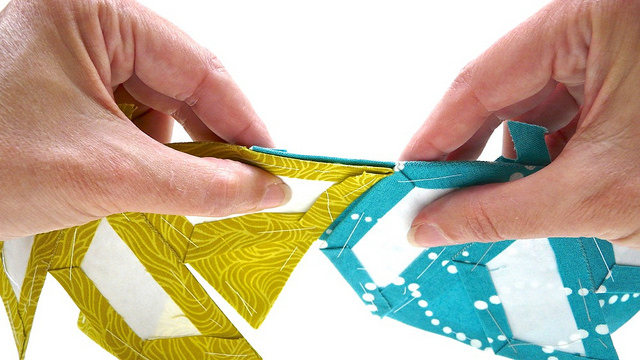
Feel free to fold the stars any way you need to so you can reach these tricky little internal seams. You can't hurt the pieces, and the freezer paper handles folding and unfolding like a champ.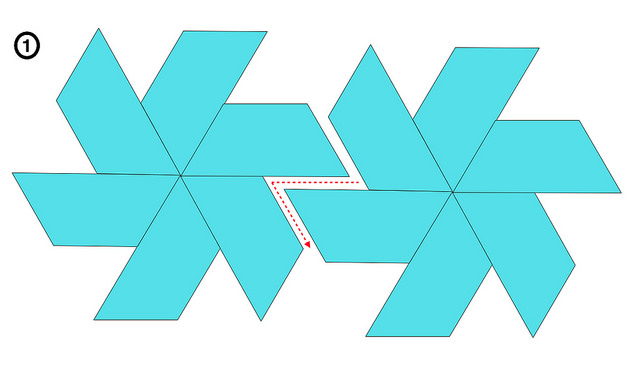
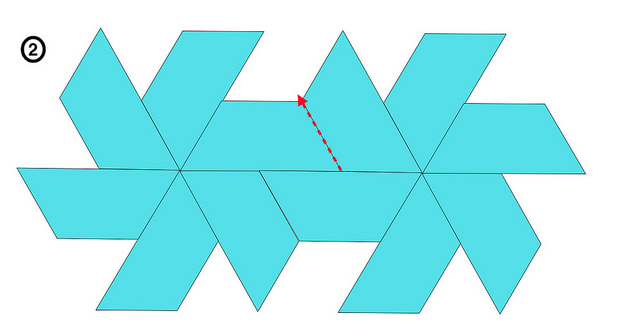
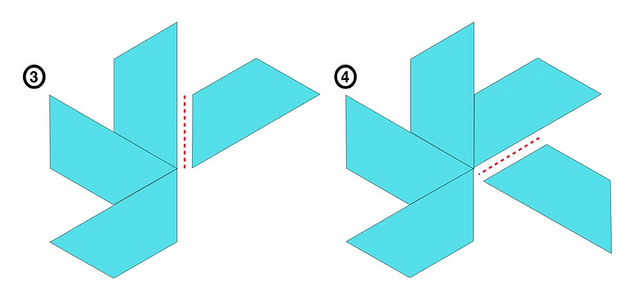
I find it easiest to approach the star-joining in two steps, like this.
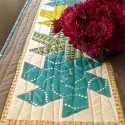
My table runner has four stars in it, in keeping with the 12 hexie limit of this blog hop. If you wanted a longer runner, you could always add more stars. Each star requires three hexagons, each cut in half.
With all the stars sewn together, you have a nice, big applique unit. Go ahead and press the whole thing, take out all the basting stitches, and peel out the paper templates. Then press the whole thing again, making sure all the seam allowances are flat and none are visible from the front side.
(There's a video on removing the basting and templates over here.)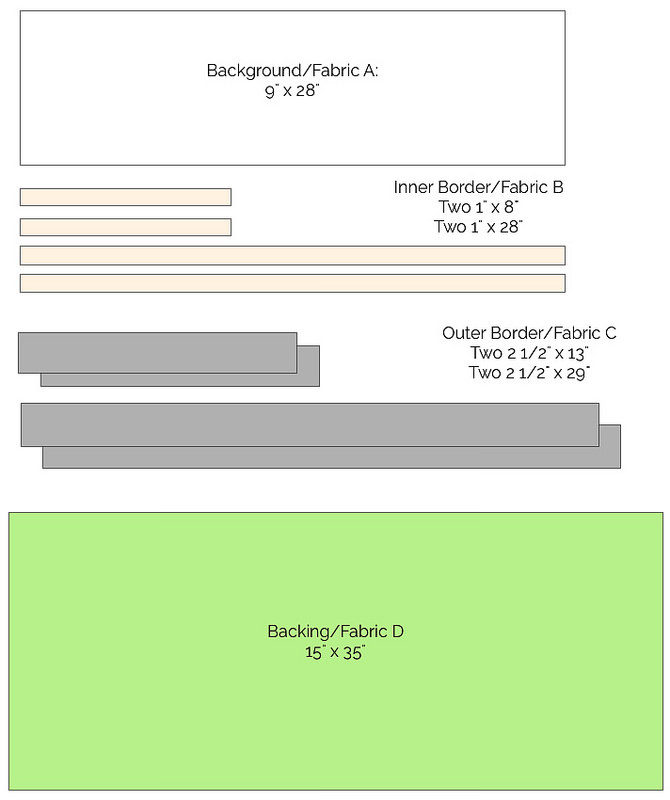
Here are the rest of the pieces to cut for the runner. You'll also need 1/4 yard of binding fabric.
Center your star applique on the Fabric A piece and pin it all over. (I like to use short applique pins so I don't have to move them around as I sew.) Sew 1/8" from all edges.
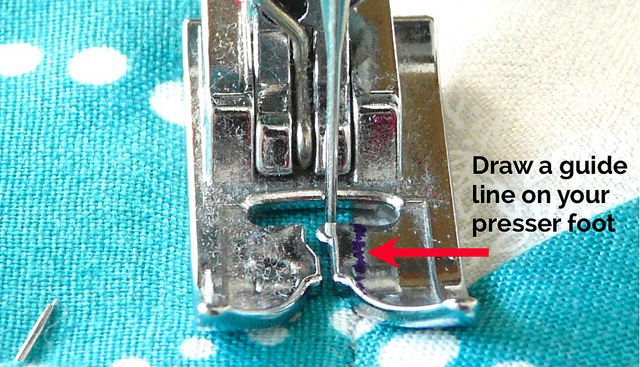
Some presser feet have handy guide lines on them so you can easily line up that 1/8" seam. If yours doesn't, I highly recommend drawing one on with a fine-point Sharpie, as I've done here. Just put your needle in the edge of the fabric where you need it, make sure it's straight, and then carefully draw a line on your presser foot that matches the edge of the fabric, as shown above. (Later, when you're done sewing, that line will come right off with some rubbing alcohol.)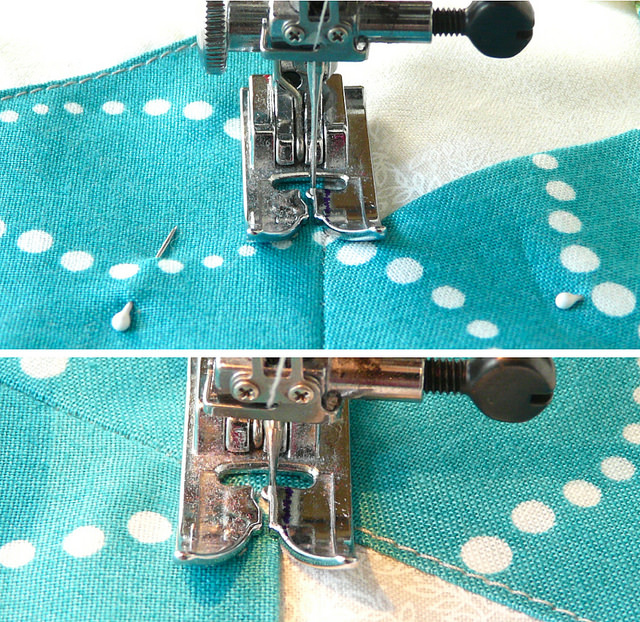
Because of the starry shape of this applique, you'll be sewing a twisty, turny seam. At each corner, stop sewing 1/8" from the corner or point, making sure your needle is in the fabric. Then lift the presser foot and pivot the project so you can line that guide line on your presser foot with the next edge of the fabric. Then drop the presser foot again and continue sewing. Take your time, and if your machine has a sewing speed control, you might want to crank it down to a slow setting.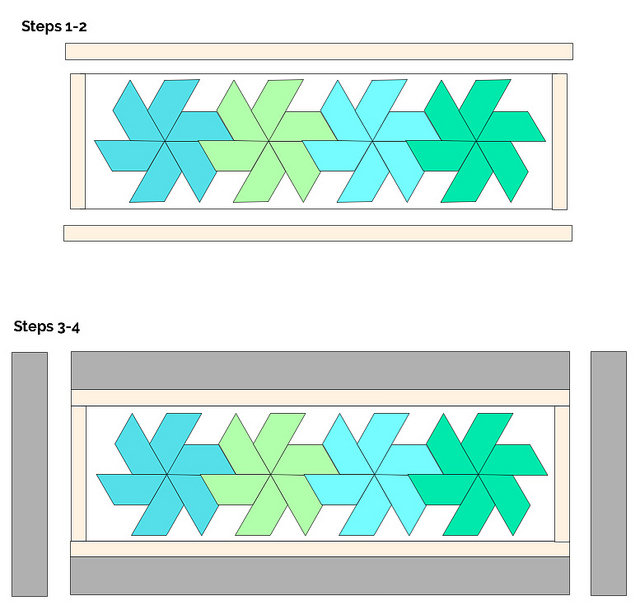
The rest of the runner top goes together like this. 1/4" seam allowances, of course.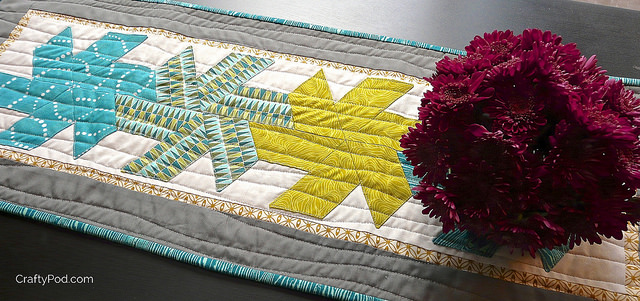
From there, sandwich the top, batting, and backing together and baste them with either safety pins or long hand stitches. Quilt the whole thing as you like. I used some simple, slightly wavy lines following the length of the runner. Then square the whole thing and add a binding.
...And you're done! Have fun with your hexies – below are a bunch of other quick projects to try out:



![Validate my RSS feed [Valid RSS]](../../../sites/files_cp7/valid-rss.png)
Comments
Thank you for another great tutorial, Diane! What a cute table runner! And I bet it would look cute in Christmas-y colors, with the stars as snowflakes, too! I've definitely got Christmas on the brain lately. :) Thanks for the easy-to-understand tutorial!
Half hexies are starbursts??? How cool and gorgeous! I so looove the color scheme of the table runner. Thanks for the beautiful inspiration. Glad you are coming back after going through the most immediate time of grief and shock. I hope you and your mom will feel more at peace, bit by bit, as life and time give distance. p.s. thanks for the sweet kind comments on my blog, esp the one about the bra poking you. Why are bras so mean?
good tutorial and last sunday I bought the die for the 2" hexagon so no excuse for me. Did not know this hexie hop was happening o much check back and see what i have missed.
Beautiful tutorial!!
I am so happy to see you have added your beautiful contribution to the "hop". And may I say having had a first hand opportunity to view your table runner (and despite your excellent photography) - the images still do not depict this project in all it's awesomeness!
great tutorial Diane, thanks for sharing. I live in Brazil and we do not have freezer paper available here. Can I substitute it with fusible interfacing?
Hi, Tania -
Thanks for your kind words! You could use a heavyweight fusible interfacing - the only difference would be that, once it was fused, you wouldn't be able to remove it. So your finished stars would be quite a bit stiffer, but in the context of a table runner. that extra stiffness wouldn't really be a problem.
Alternatively, you could also print the templates onto regular paper and baste the fabrics to them with no fusing. Just use a washable glue stick to lightly stick the paper template to the wrong side of the fabric, and then cut the fabrics a little larger, and baste. When you're ready to remove the template later, it will peel away from the fabric easily.
I hope that helps! Do let me know if you run into any other questions.