You are here
How to Make an English Paper Pieced Instavase (What's That?)
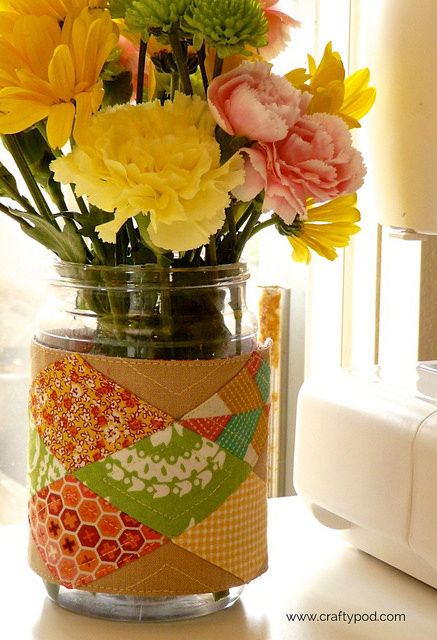
This is one of those projects that had many points of genesis. First, I've been decluttering lately and got rid of all my assorted vases. Then someone gave me flowers, and I was all, "Oh crap, I have nothing nice to put these in." And then, given that I'm making quilts like crazy these days, I've been wishing for a really quick EPP project to relax with. And then, I was washing out an empty peanut butter jar for the recycle bin one day, and all these little data points came together in my head with a bang. Result: The Instavase!
You'll Need:
- • A clean, fairly large jar from your recycle bin – glass or plastic
- • Several pretty quilting cotton scraps
- • Two large scraps of linen, or quilting cotton, or both
- • One scrap of batting
- • Diamond English paper piecing templates (see below)
- • Hand-sewing needle
- • Thread that coordinates with your fabrics
- • About 5" of elastic cord
- • Removable fabric marking pen
- • Two 1" sew-through buttons
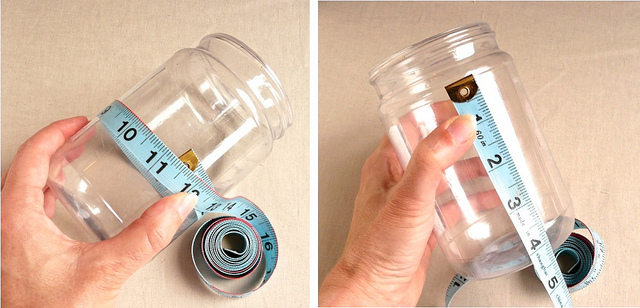
First, we need to get the dimensions of your Instavase wrap. Measure the circumference of your empty jar. Then add another 2" to cover seam allowances and overlap. (So I'm using a fairly standard peanut butter jar here, which is 11" around. Adding another 2", I get 13" in length.)
How tall does your wrap need to be? Again, measure your jar. You're looking for a height that covers most of it. Then add another 1/2" to cover seam allowances. (My jar needs 3 3/4" in height to cover. Adding the extra 1/2", I get 4 1/4".)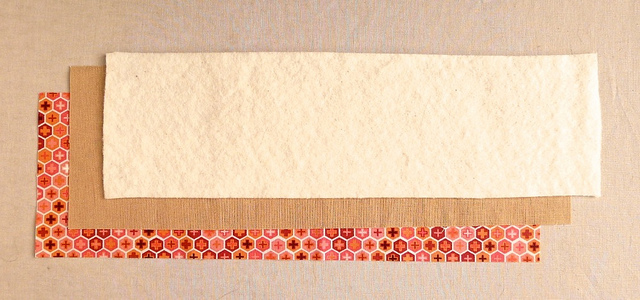
Cut two pieces of fabric to these dimensions. I'm using one piece of linen and one of quilting cotton, but you can make them both the same. Also, cut a piece of batting that's 1/4" smaller on all sides. (Instead of doing math, I just cut the batting to the same size as the fabric and then lop off the extra 1/4" from each edge. Because I'm lazy like that.)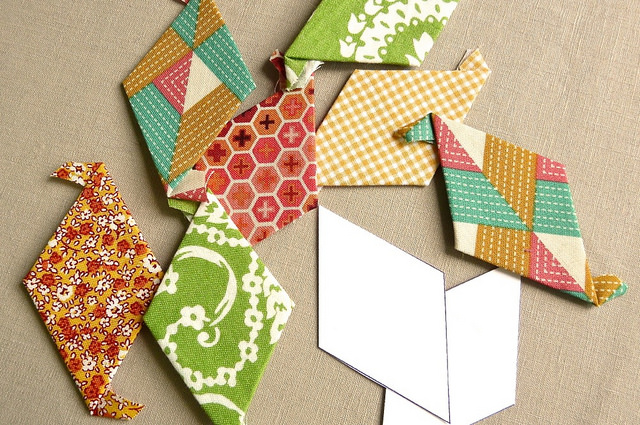
Now, make some EPP! I'm using a 1 3/4", 60-degree diamond template here. You can print my free PDF template and cut them out, or buy readymade templates online.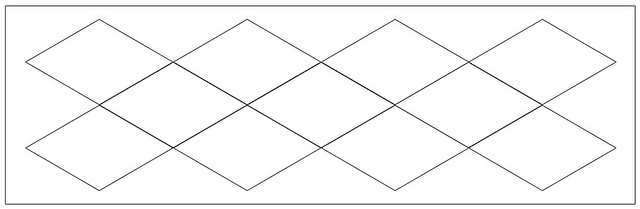
The number of diamonds you'll need depends on your jar. For my peanut butter jar, I needed 11. Just lay your paper diamond templates out on top of your cut fabric and see how many of them fit. Remember to leave space at the edges for a 1/4" seam allowance. My diamonds come right to the edges of that size. If you want less of a tight tolerance in your seams, you can reduce the size of the diamond templates a little.
This video explains how to baste the templates. I'm basting through the fabric only here – the first method shown in that video. This video explains how to sew the patches together.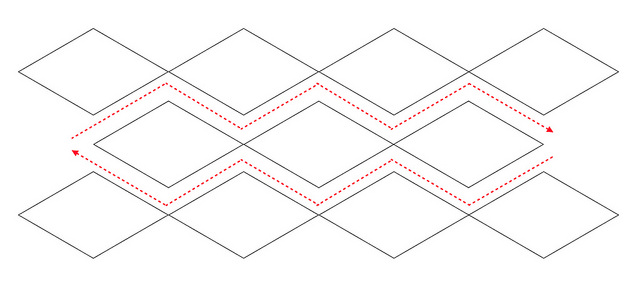
For diamonds arranged horizontally like this, I like to sew two long zig-zag seams: one that attaches the top row to the middle one, and one that attaches the bottom row.
I opted to arrange my fabrics fairly scrappily here, but feel free to come up with a more formal arrangement of colors if you like.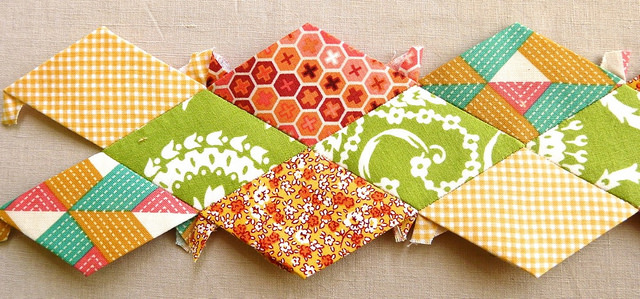
Now you have a pretty applique unit, full of nicely-matching points. While the paper templates are still in there, give the whole thing a good pressing with a hot steam iron. Aim to flatten out all the patches.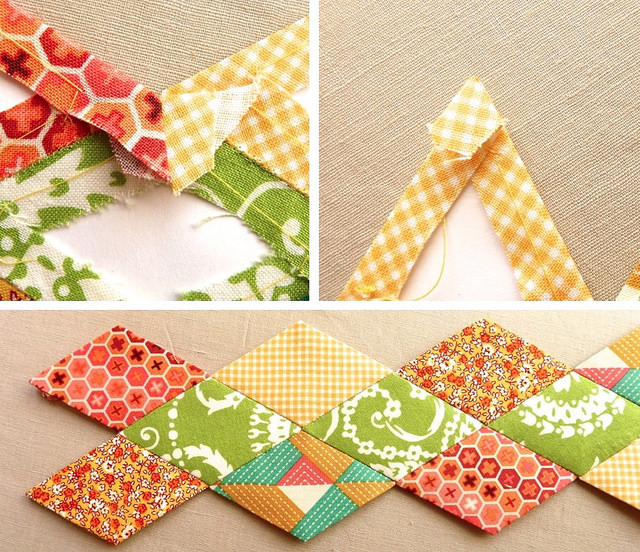
Then, take a look at those points of seam allowance that stick out from the edges. We need to hide those puppies, so fold them to the back of the work and press them well.
Do the same thing at the ends of the strip – fold the flags at the tips over so they're hidden. (If you see any fabric sticking out at the edges of these points after pressing, you carefully can trim it away.)
Now that everything's neat and pretty, you can take out the paper templates. This video explains how. Then press the strip one more time once all the templates are out.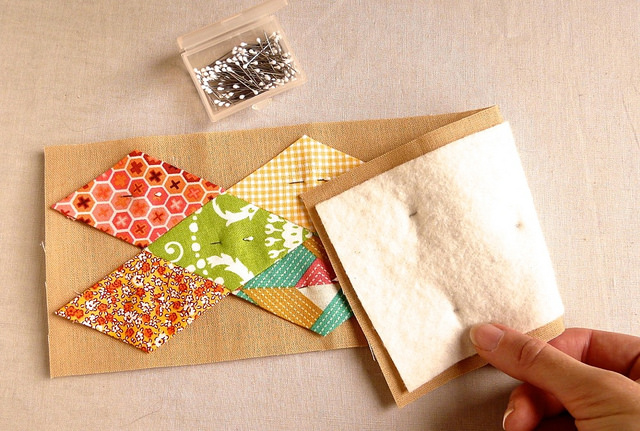
Now we'll applique and do a little quilting. So pin the batting to the wrong side of the fabric you're using for the front of the wrap, centering it there. Then pin the applique unit you've made to the right side, centering that as well. Use plenty of pins so it won't move around as you're sewing.
Incidentally, these little shorty applique pins are dandy - they let you pin all over without needing to move the pins around during sewing.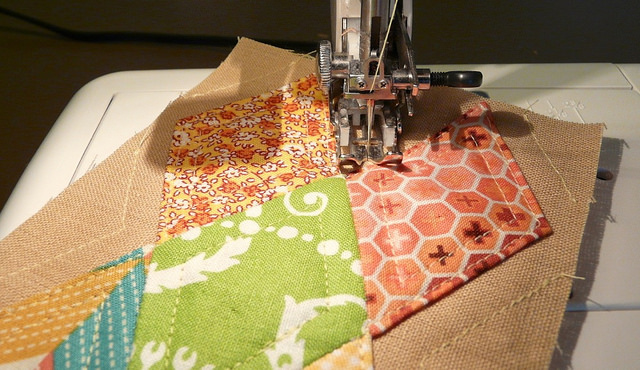
Machine stitch 1/8" away from all edges of the applique strip. Then, make some additional quilting stitches as you like. I decided to follow the shapes of the diamonds, but you can really do anything you like – including not quilting it at all!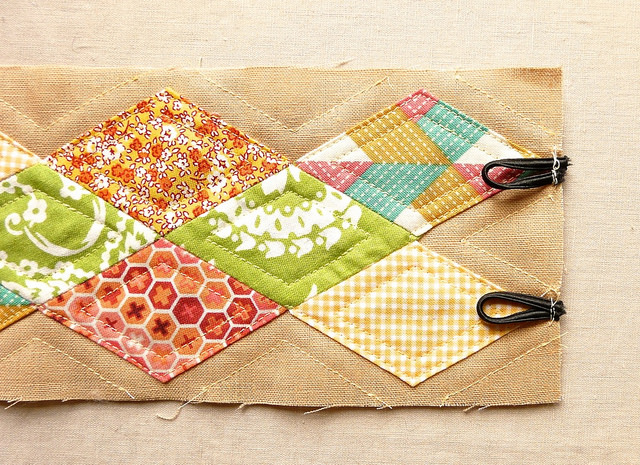
Now let's make an elastic loop closure. Cut two 2 1/4" lengths of elastic cord. At the right side of your finished top, measure 1" in from the top and bottom edges and make a mark with a removable marking pen.
Bend one piece of elastic cord at its center, pressing the fold with your fingers to help the cord hold it better. Place the folded cord on top of the first mark you made, lining up the raw edges of cord and fabric. Baste over the cord with about a 1/8" seam allowance, reversing your stitching once to make it more secure. Repeat this process with the other piece of cord, basting it over the second mark you made.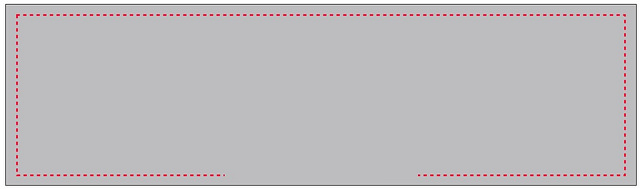
Pin the finished top to the backing fabric now, right sides facing. Sew around all four edges with a 1/4" seam allowance, leaving about a 3" gap near the center of the bottom edge. Your seam will catch those elastic cord loops.
Clip the four corners and turn the whole thing right side out. Poke a bodkin or chopstick into the corners to make them nice and sharp. Then press the whole thing flat. The elastic loops should now be sticking out from one side.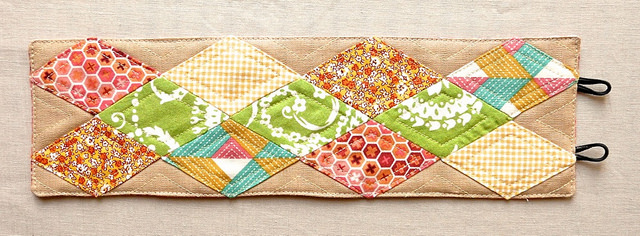
If you like, stitch 1/8" from all four sides – that will finish the edge nicely and close the opening. Or if you'd rather not, then just close the opening with a ladder stitch. (Wendi Gratz has a great tutorial for that.)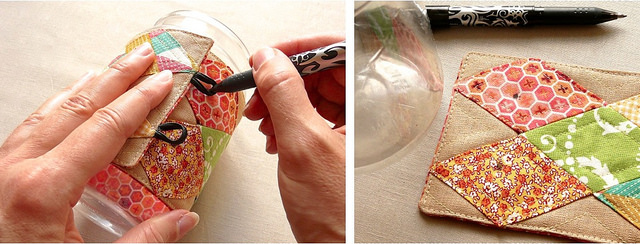
Wrap the Instavase around your jar now, overlapping the looped edge on top. Use a removable fabric marker to make a dot inside each of the loops. These marks are where you'll sew on the buttons.
Sew two buttons to the non-looped edge of the Instavase, right over each of your marks.

Aaaaand you're done! Go get some flowers!

![[Valid RSS]](../../../sites/files_cp7/valid-rss.png "Validate my RSS feed")
Comments
Cute project! I can't wait to get home from work to make one. I just scored some vintage fabric scraps and buttons at a yard sale over the weekend and I was trying to figure out what to do with them. As I was sorting through my treasures, I remembered that I had a bag of 1.5" EPP diamond templates that I haven't used. I figured I'd just make a bunch of diamonds and then decide what to do with them later. I just had my own "bang" moment when I opened your blog! Plus I've added 2 new words to my crafty vocabulary...instavase and scrappily...heheh!! Thanks for another wonderful project, Diane!
Aw, thank you, Lynne! I'd love to see a picture of your Instavase - vintage fabrics and buttons would be awesome in this context.
These could be used on any number of things - journals, pen/pencil cups, as bracelets, on lamps, pillows, presents... the mind boggles at the opportunities. Great project!
Ooh, right you are, Catherine - I'm eyeing my pencil cup right now!
I love this project! Recycling and EPP--the perfect combination.
what a great idea, thinking I use these for all sorts of things not just flowers, pens etc spring to mind
so smart and brilliant to make a cozy for a jarvaze. So it looks just not the ordenairy jar but something specially.
I love it. Thank you for the sharing. I'm sure i will try this out;-D
I'm seeing vases...and french press covers in my future! Thank you for the tutorial!
Love how a beautiful and simple idea can transform an ordinary bouquet in a vase and offer so many possibilities!