You are here
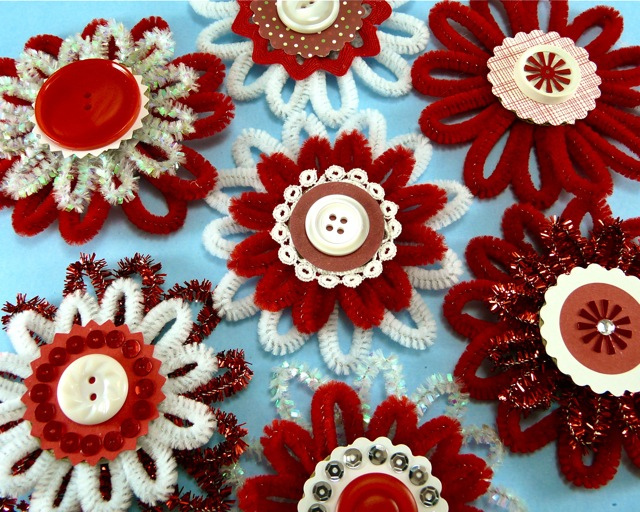
How to Make Festive Chenille Flower Ornaments
It's not like I had the time, really, for another ornament tutorial. But somehow I got all fixated on the idea of chenille stems, and this happened.
Actually, it's a really quick and easy little ornament (not counting glue-dry time). You could use these on your tree, or as garland, or gift tie-ons. You could make a whole mess of them at once, and it's a nice craft for older children, family groups, or holiday craft nights.
Anyway. First you need three 12" chenille stems. Bend them all up according to this handy little video. (Sometimes it's a lot easier to show something in motion than in still photos, you know?)
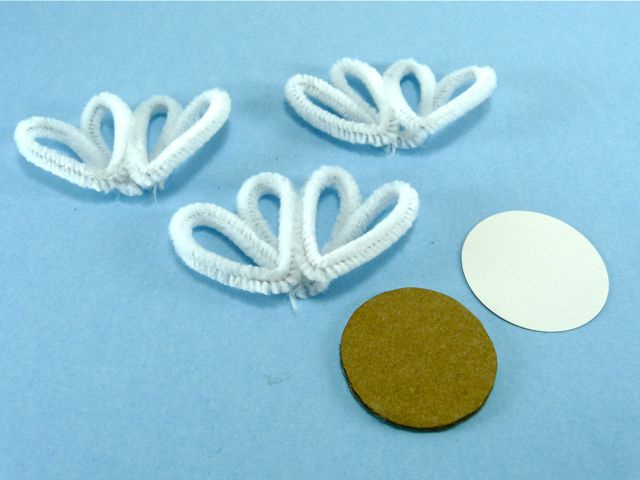
Once you have three petal units bent, then cut yourself three circles. (I know there are only two pictured here, but bear with me.)
You'll need two circles of fairly stiff cardboard. If you plan to make a two-layer flower, then you'll also need one of regular card stock. My circles here are 1 1/4" in diameter, but that's not like a law or anything.
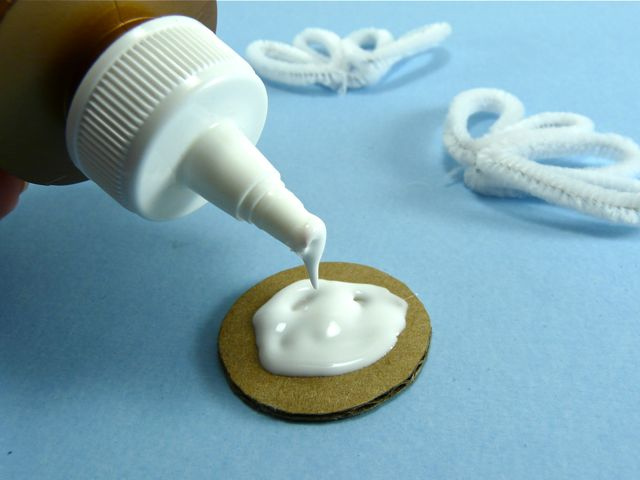
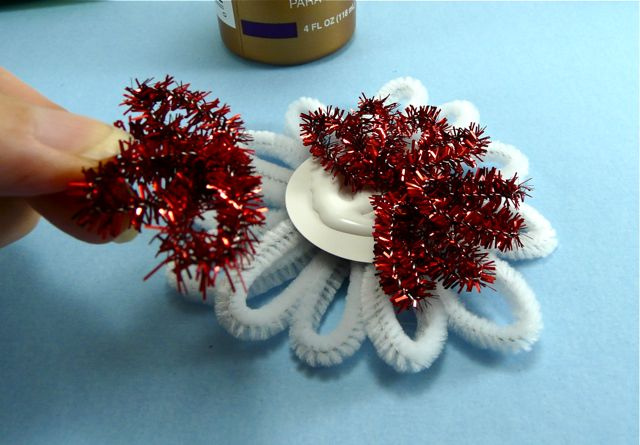
Get yourself some tacky glue, and put a nice, thick puddle in the center of one of your cardboard circles. Keep it away from the edges, but be pretty generous with it.
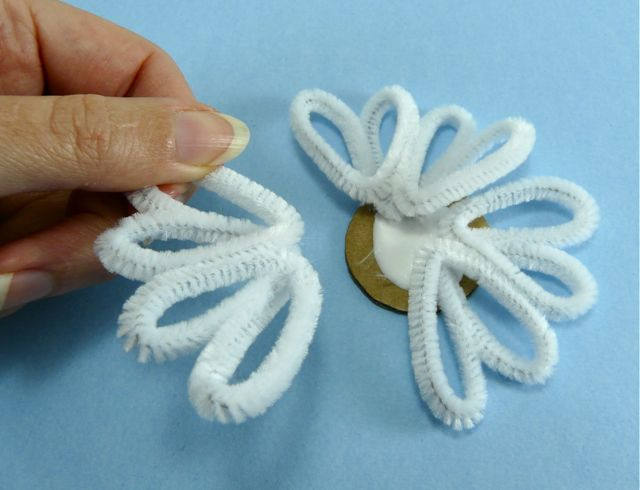
Next, place your three petal units into the glue. You'll have plenty of time to arrange them just so while the glue stays wet.
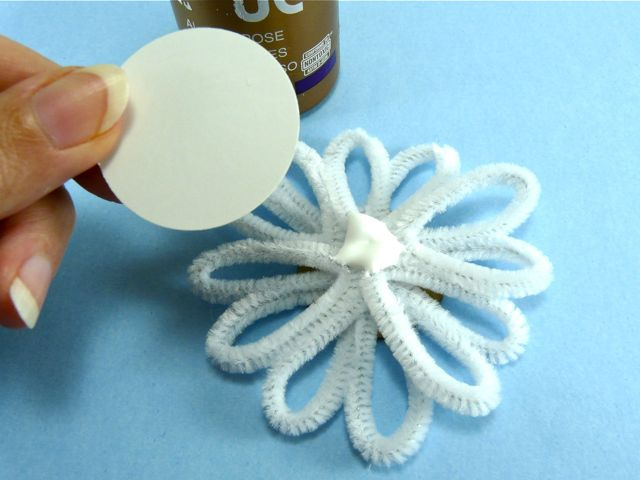
Then, put a little more glue over the center and add the card stock circle. Make sure everything's centered in relation to everything else.
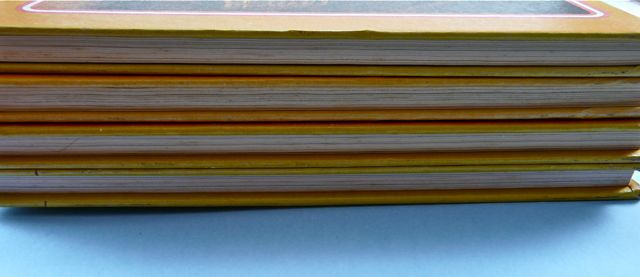
Now, this whole thing needs to go under a heavy stack of books for a while, to press the shape nice and flat. But there's one important key…
…Make sure the weight you place on your flower is balanced. If you're making lots of these ornaments at one time, this won't even be a problem - just spread all the ornaments out under the books.
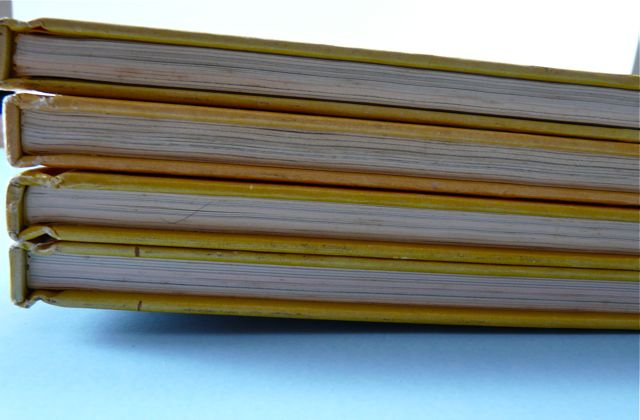
If you're only making a few at a time, however, you may find that the books can't lay flat over the ornaments - the thickness of the ornaments throws the books off-kilter, like you see above. This will result in off-kilter ornaments!
(Not that this has happened to me or anything.)
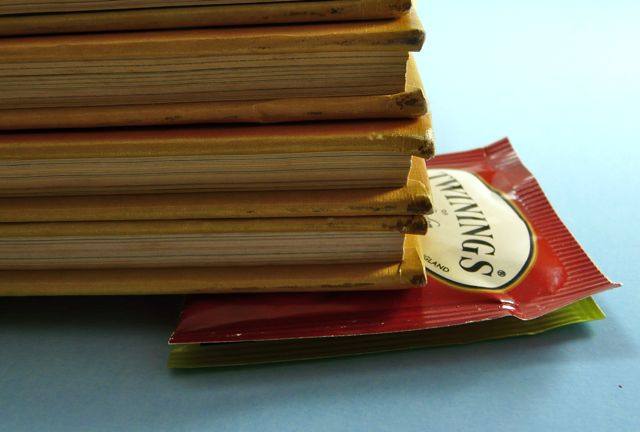
…So, just place a little something under all four corners of your books to help them stay nice and parallel to the table top. If you live in a house with thousands of tea bags, like I do, then that's a natural choice. You could also use magazines, or junk mail, or whatever you have on hand.
Leave the books in place for an hour or so while the glue sets.
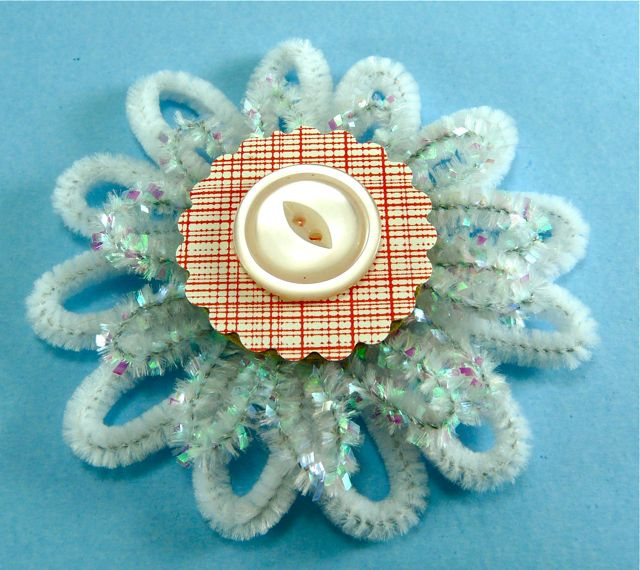
Then, remove the books and add a second layer of chenille to the top. (How do you get a smaller flower? You just lop off 1/3 to 1/4 of each chenille stem before you bend it into the petal unit.)
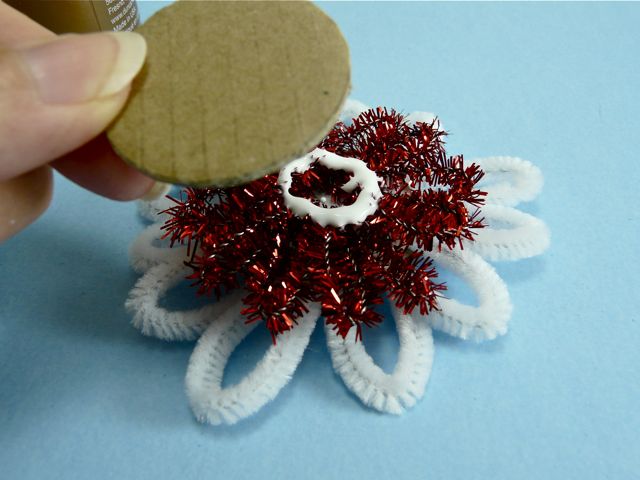
Add a little more glue to the center, and then press the other stiff cardboard circle over the top. (Again, make sure things are centered.)
…Then it's back under those books for several hours or overnight.

After that, you can get out all your crafty bits and bobs to decorate the center. I used some scrapbook papers, cut with punches and scissors. I also used some buttons (yay!), ric rac, and sequins. You could also use yarns, felt, pom poms - lots of possibilities!
Lordy, these are fun and addictive to make!
And if you make some, I'd love it if you shared a photo in the CraftyPod Reader Projects Flickr Group!

![[Valid RSS]](../../../sites/files_cp7/valid-rss.png "Validate my RSS feed")
Comments
oh, they are so cute, looks like a great Xmas procrastination project!
Those are really, really pretty. Thanks for sharing.
adorable
I have this big open space on my Christmas tree. Hint, Hint.
Heh! I'll split them with you, okay? I made about a hundred or so. :-)
Criminy!! This is TOO GOOD! I can't WAIT to get home, now. I was staying away from home, but now--I'm going right for the chenille stems, baby! I have glittery white ones that are PERFECT for this! I'm going to have flower ornaments all over the place. I may rim my soup bowls with flower ornaments! I'm not even kidding. Picture frames? You betcha! A pencil holder filled with flowers glued to pencils? YES!!
I love you.
In other news, I called my physician.
She said only 7 Craftypod posts at a time.
I guess my levels were really high.
Love them! We were just playing with chenille stems, too! Thanks.
Rebecca@RootsAndWingsCo
Yay! Aren't chenille stems the best? I really had to forcibly stop myself making these after a while. :-)
How cool! Easy to make with commonly found materials and pretty, too!
Perhaps hot glue would make this project faster?
Great question - and theoretically speaking, yes. The only things I worry about would be pressing those cardboard circles into the hot glue and maybe getting burned. (Not really an issue for someone who's familiar with hot glue, but maybe an issue for kids.)
The other issue might be with the sparkly chenille, which is made from some sort of plastic. Would the hot glue melt it? I'm interested to test this now!
Thanks for the suggestion - definitely might be the ticket for some crafters.
I want a garland. Can I put in an order? ;) I don't know if I can fit another idea in...aahhh!!! They're great. And the first photo is beautiful. :)
Heh! Would you like 6 feet long or 12? :-) (And thank you so much! And I TOTALLY HEAR YOU about the whole idea overload thing.)
Love Love Love these!
xo
Pam
Thanks, Pam - they do have that kind of vintage-y look, don't they?
Love the colours! Very eye-catching!! Gotta get myself some chenille stems!!
Thank you! I'm also thinking this would work well with those bumpy chenille stems - hope to try that out as soon as I can find some...
Great idea. I love the result.
Greetings from Germany.
Those are super cute. The video explained it perfectly. Thanks for sharing-
Who knew pipe cleaners could look that amazing?
Wanted you to know I posted a link to this tutorial today on my blog.
Nancy Ward
PaperFriendly
http://www.nancywardcrafts.com
I never liked chenille stems...until I saw these!!! I never had any desire to use them for anything, either, but I've GOT to make these!!! Thanks so very much for this tutorial; it's awesome!
Welcome, Sandie! Thank you so much for stopping by, and for your kind words!
These are wonderful cute little ornaments!! Thanks for sharing! Hope you have a great weekend! xo Holly
I love these chenille ornaments! Lovely idea. I also LOVE your KANZASHI book! Yep, it's on my wish list!! I am subscribing to your blog, also. Thank you for sharing your creativity!!!
Thank you for the easy-to-follow tutorial! These ornaments are adorable. I can't wait to make some. Thanks again!
Oh, my! You just had me madly Googling "Wired Tinsel," Susan, and now I'm all excited. That material has serious possibilities. Thanks for sharing - what a great way to keep the costs down on this craft!
Love the ornaments. Found a roll of something new at hobby lobby called wired tinsel. The roll was 72 feet! Super cheap and I just cut it into 12 inch lengths! Worked out to be $.27 per flower!
These are so beautiful; I've been looking for something different to do for our church bazaar next month and these will be just great. Thank You!