You are here
Tutorial: A super-simple way to cover a composition book
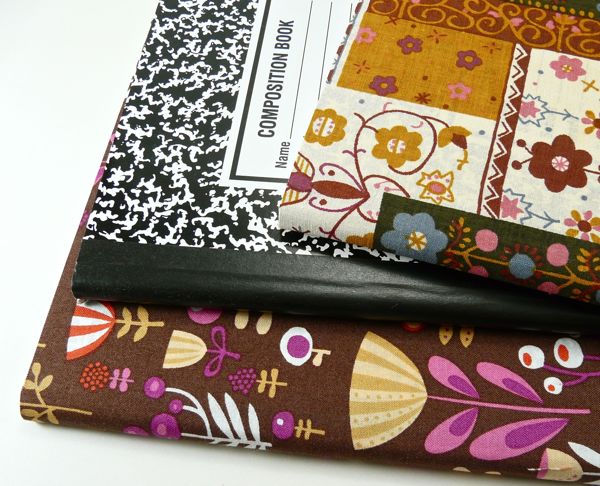
I loves me some of those old-school composition books. Last August, our local Fred Meyer had them on sale for 25 cents apiece for back-to-school, and K and I laid in a stock to get us well into our old age.
I've been noodling with ways to make them look prettier. There are tons of tutorials on the web for mixed-media treatments, or removable patchwork covers. But I wanted something a little more simple and durable - after all, my notebooks take abuse.
I don't know why it took me so long to arrive at this dead-simple idea, but here you go.
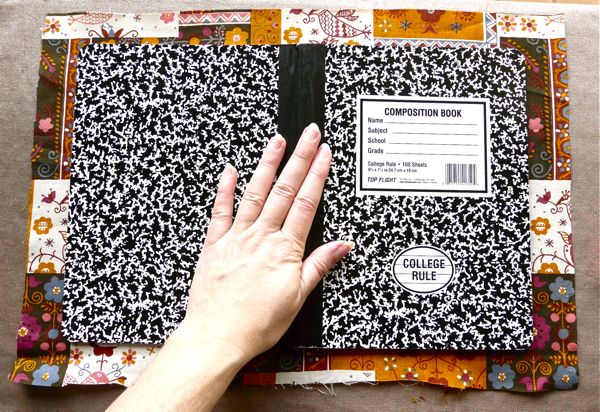
So first, you'll need a piece of fabric that's roughly 1" larger on all sides than your opened-flat composition book.
This project works best with a woven cotton that's a little on the thicker side and tightly woven. Quilting cottons are ideal. Do take a moment and see whether the black-and-white composition book cover will show through the fabric - this can happen with light colors especially.
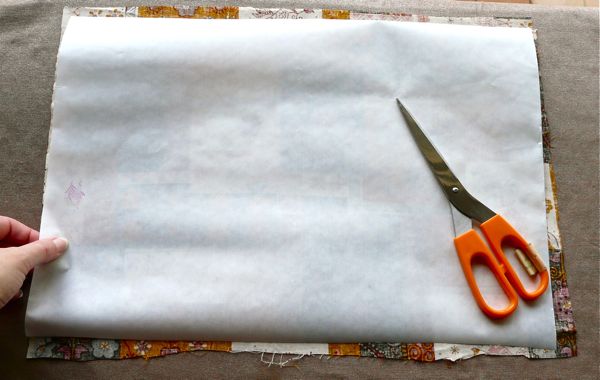
Next, get a sheet of fusible web that's slightly smaller on all sides than the fabric. You'll notice that I haven't gone to too much trouble to cut anything perfectly straight. This tutorial was shot on a Sunday morning. There's no need to get too exacting about anything on a Sunday morning.
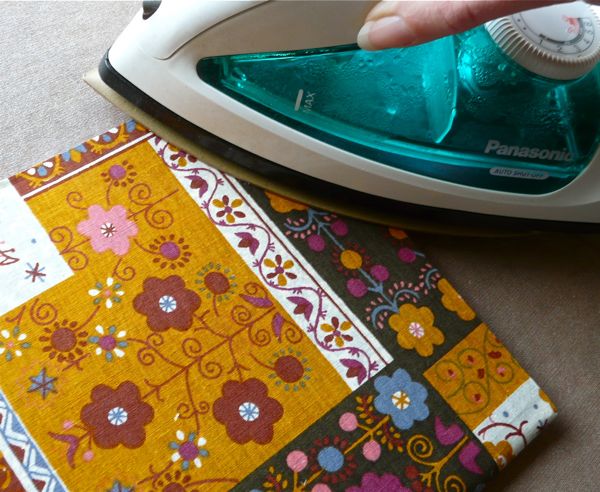
Place the fabric on an ironing board wrong side up. Place the fusible web over the fabric, with the web side facing down.
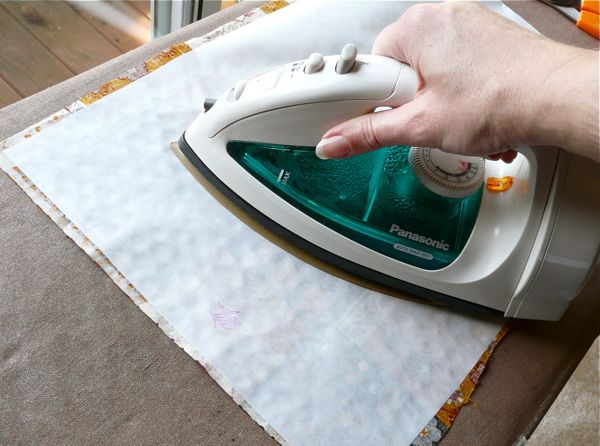
Your iron should be on high heat with no steam (No steam is really important here.) Pass the hot iron over the paper backing of the fusible web. Keep the iron moving, and make sure you iron over all of the paper - especially out to the edges.
When you're done ironing, let the fabric and paper cool for a moment.
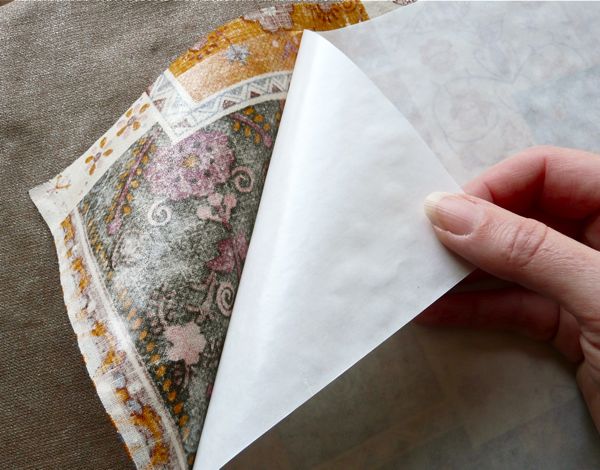
Gently peel away the paper. See the shiny glue fused to the back of the fabric?
You should end up with a nice, even coat of glue fused to the back of your fabric. If you end up with bare spots, try placing the backing over the fabric again in the same position, and iron over the bare spots again to transfer the glue from the paper to the fabric.
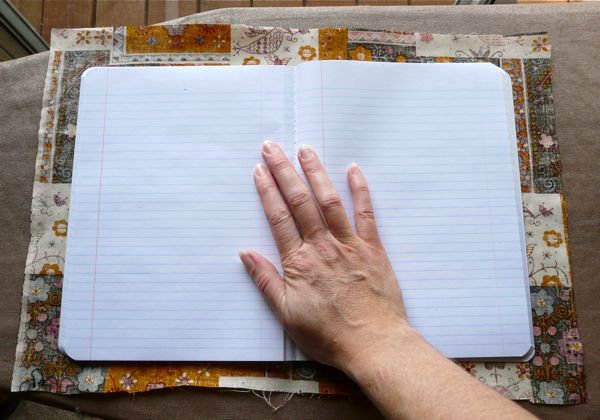
Now, place the fabric on your ironing board with the glue side facing up. Place your composition book over the fabric, like this. Then, close the book, folding the fabric over it.
Take a moment to adjust the placement of the fabric as needed. This is why we made the fabric bigger than the book - so we'd have some leeway for adjustments.
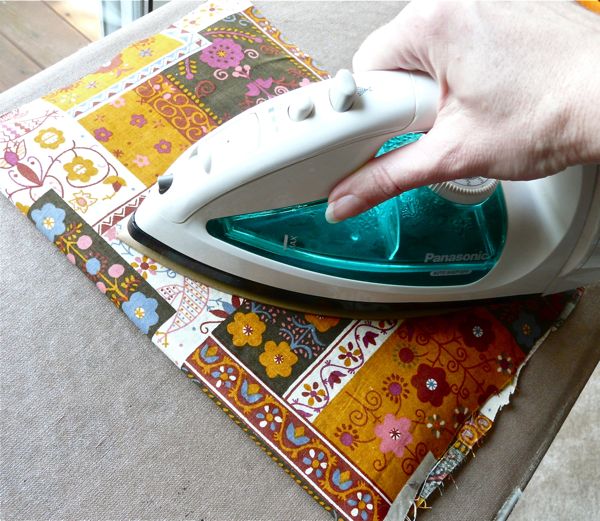
Make sure the fabric is smoothly spread over the cover of the book. Then, iron the fabric to bond it to the cover. Again, keep the iron moving and make sure you iron along all the edges of the cover.
Flip the book over and re-smooth the fabric. Iron the fabric to the back cover.
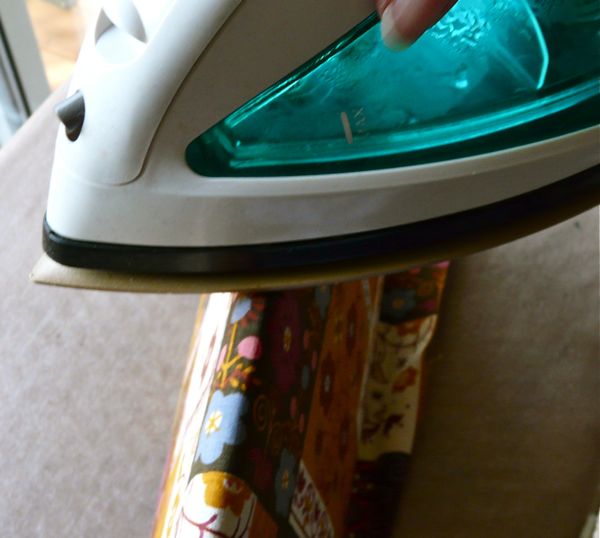
Lastly, run the iron along the spine a few times. Then let everything cool for a moment.
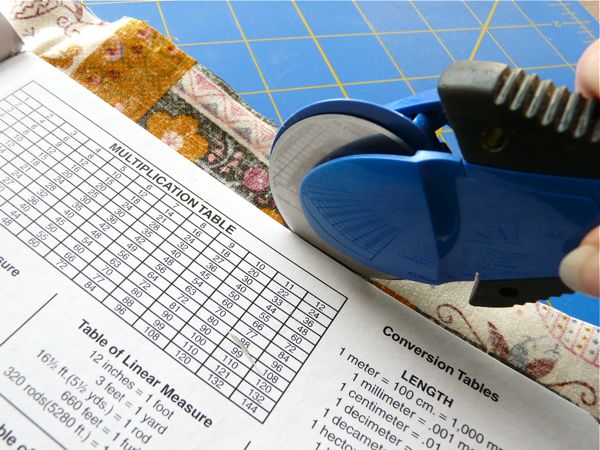
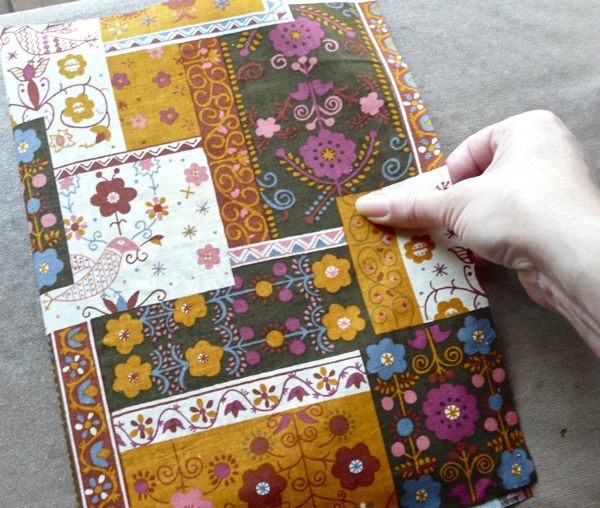
Next, trim the fabric along the edges of the book cover. I like to use my rotary cutter for this, but you can also cut along the edges with some scissors.
(Don't you love all these conversion tables and things on the inside covers of composition books?)
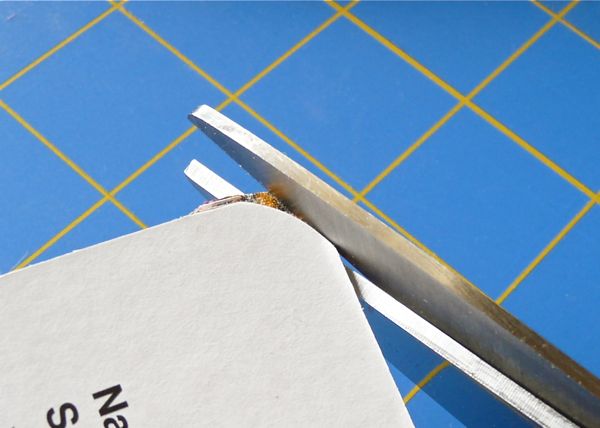
I prefer to use scissors to trim the fabric along the rounded corners.
As a last step, iron along all the edges and corners of the cover one more time, to make sure that fabric is good and fused there.

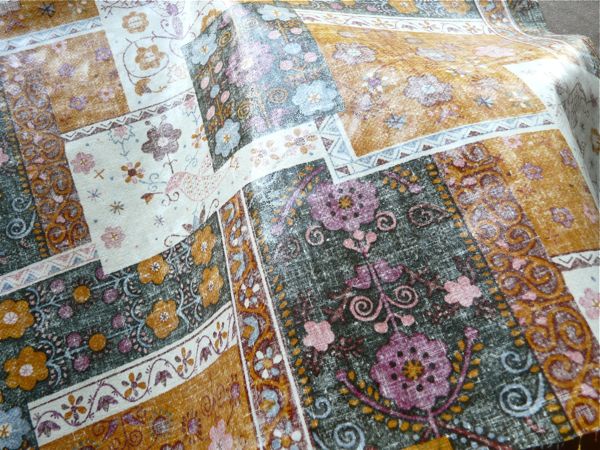
...And it's done! Don't you love this 70's fabric? I'm only going to use this notebook to write about my dates with Keith Partridge.
Of course, since you're playing with fusible web, you could also fuse a solid fabric to the cover and then fuse some cut-outs from other fabrics over that. There are a million and one possibilities.

OOh -and since we're here, I'll show you another idea that didn't pan out so well. I thought it would be cool to cover a notebook with duct tape. Since I spend a lot of time at marshy bus stops, it seemed like a nice waterproof option. But, I overlapped the strips of tape, and I don't love the look of that after all.
(I cut those flower shapes out of more duct tape with an Xacto knife. As you might imagine, it ended up being decidedly not fun.)
Anyway. Happy New Week, everyone!


![[Valid RSS]](../../../sites/files_cp7/valid-rss.png "Validate my RSS feed")
Comments
I just Stumbled on this post, and I love it! I've been thinking of ways to update some bland office supplies (notebooks, clipboards, magazine containers) and I think you just won the world for this idea! Mod Podge always seemed too messy for me to bother with it, now I can make all my stuff match!
I make these all of the time for my 5 yr old daughter Cora (aka Tree Killer). The only thing I do different, is rough up the cover with sandpaper first so the fusible web or heat-n-bond does not peel off over time. I also have made the fabric cover water resistant for her outdoor journeys by adhering iron on vinyl to it. It changes the appearance of the fabric a little, but you might like it better than the duct tape =)
I like the overlapping look and the cutouts! I'm going to make one like that today!
Thanks for the ideas!
Wow, how cool is that?! Thank you so much for sharing that with me. I
can't wait for school tomorrow now, either! :-)
It looks awesome! I am going to link & use a photo from this tute in an article on CROQzine.com about using other people's photos in your blog (with credit), if you don't mind.
Sounds awesome! Thanks, Heather!
My 7 year old son and I just did this to his school composition books...using some cool rock star guitar fabric. He can't wait for school tomorrow! Thanks so much :)
I love this idea! Can't wait to try it! Thank you for sharing.
Thanks, Donna! I love your fabric collage idea.
Genius! Love it. I'm a quilter and always end up with those little bits and pieces (aka scraps) of fabric. I can definitely see myself putting together a fabric collage of sorts, adding fusible web to the back, and then using it to cover not only these notebooks, but other types as well. A great way to use stuff up, recycle, and make useful gifts too. Kudos!
So brilliant. And I *love* that fabric. So cool!
this would work perfectly to add some colour to my boring black sketchbooks :)
You can't write about Keith Partridge because he's mine!
This is such a beautifully presented tutorial. I love it all, especially since one of my all time favourite crafting supplies is fusible webbing :)
HAHAHAHAHA!! We could always share Keith. :-)
This is very clever. Have you ever tried putting the fabric with the fusible web through your Cricut? I haven't tried it myself, but I have heard of people having good success. It wouldn't be waterproof, but you might be able to get some good flowers that way.
ohyeah! I'll try this *o*
Realy the love~
I've been covering composition notebooks with fabric and Mod Podge for a few years now, but I love this idea so much I linked back to it in my blog post from yesterday. Thanks for sharing!
Thank YOU so much for linking, Amanda!
Well this is super fun and easy!
OH MY GOODNESS. This is one of those dream ideas that has the time/impact ratio spot on. Ie, not too much time/big impact! I can't wait to cover every bland notebook in sight. Thanks so much for the tutorial.
I love notebooks too and this is such an easy way to dress them up. It made me think of covering books in school with brown paper bags! This could be much more elegant though than be early feeble attempts. It would be great to make matching accessories for the office too. Thanks for sharing your idea! :)
I've never used fusible web before but this makes me want to try it out. Especially since I have pieces of great 60s-70s fabric! Great tutorial.
Sophie
Thanks, Sophie - fusible web is awesome stuff! Here's a tutorial I did
a long time back, where I used it for greeting cards: http://www.diyalert.com/node/3982
Heh heh - Wooooo! :-)
This is brilliant! I'm very sewing challenged, and now I see that fusible web is my friend. Thanks Diane!
Yes! It's totally a good friend to those who don't like to sew. In
fact, it comes in a narrow tape form, too - so you can do "seams."
Great tutorial, especially the combo of pictures & text. I too am sewing impaired but inspired by this set of instructions. Am contemplating trying it with smaller notebooks, though, like the cheaper brown moleskins that are pocket sized.
That's a great idea! - you could use this idea on lots of different
notebooks.
Tell me you had the Partridge Family 45 from the back of the Alphabits cereal boxx, too?!!!
Me - I loved Bobby Sherman and Tom Jones, too. (Yes, I was weird)
I think that if someone put a gun to my head I would admit to having children JUST so I can buy school supplies every Fall. And I, too, have a mad stash of Composition Notebooks!
HAHAHAHA! I most certainly DID have that 45. And K and I have been
buying the show on iTunes lately. Oh, those clothes and interior
decorating!
I can totally understand parenting for the school supplies. :-)
I think the duct tape layering looks pretty cool. You could do a cool plaid or stripes!
I agree - stripes would have been much more successful. At one point,
I thought I'd try weaving with the duct tape, but then I slapped
myself upside the head good and hard. :-)
I have tried, with mixed results: http://www.craftypod.com/2009/05/28/makin-for-m...
And definitely, this would be a cool way to dress up a fabric-covered
book, if you liked the pre-made Cricut shapes.
What a great idea. I've never worked with fusible webbing. Can you believe it? I keep wanting to, but I haven't. It's interesting that you should mention covering the cover with duct tape-- I just made a journal for myself with cardboard covers and duct tape! I used different colors of tape, though, so the overlaps don't look bad. But they are definitely there! I'll have to work on this issue, because duct tape is definitely neato.
25 cents! good grief!
You're a wizard with colored duct tape! Can't wait to see your journal!
Oh yeah, I read that post. Hee. Have you tried startching the fabric? Someone mentioned it here http://www.cricut.com/messageboard/tm.aspx?m=48... and it sounds like it works well. Also, have you played with Sure-cute-a-lot? With that you can cut any SVG.
Definitely, starching heavily was one of the keys to success - as in,
starching until the fabric was almost paper-like.
I haven't tried the Sure-Cuts-a-Lot. When we were demo-ing the Cricut
at Maker Faire last year, that was what everyone wanted to know: "Can
I cut my own designs with this?" :-)
Fusible web is just magical! What a great idea. I'll be linking.
This is one of the best tutorials ever! Brilliant! I have never heard of fusable web before but now I am going to look into it. Thanks so much!
I've never used fusible webbing before, but I may have to pick some up now! Awesome!
I love this. Going to go cover my journal right now!
Oh, yeah - crap, I forgot about Shaun! :-)
Yay! I'm all for finding something more fun to do than laundry! Happy Crafting!
OOh, what a smart idea with the sandpaper, Jenn - thank you!!
Yessss. I can't wait to do this. I've got about 3 composition notebooks lying around. I'm unfortunately the kind of person who always has about a million different lists and notebooks circulating at once. As you can imagine, I never end up being as productive as I intend to be. How the hell can you when your thoughts are physically scattered all about. I'm thinking I shall make one of those nifty list holders from today's tutorial as well. Qoohoo! Thank YOU so much!
HAHAHA! I used to do that multiple-notebooks thing, too, Julie. And, as you described perfectly, it got really scattering. Now I use just one notebook at a time. My notes are a complete hodgepodge of craft ideas, business notes, etc., but at least I know where they are now! :-)
great idea!
The decorator fabric samples are the perfect size for this project! WOO HOO
So simple. Great idea!
Until this post, I (sadly) did not know about fusible web. It's like the discovery of the century. Watch out all plain and ugly surfaces! Haha.
Pages